Mexican Chocolate Skull Cakes
4
Updated Aug 26, 2025
This post may contain affiliate links. Please read our disclosure policy.
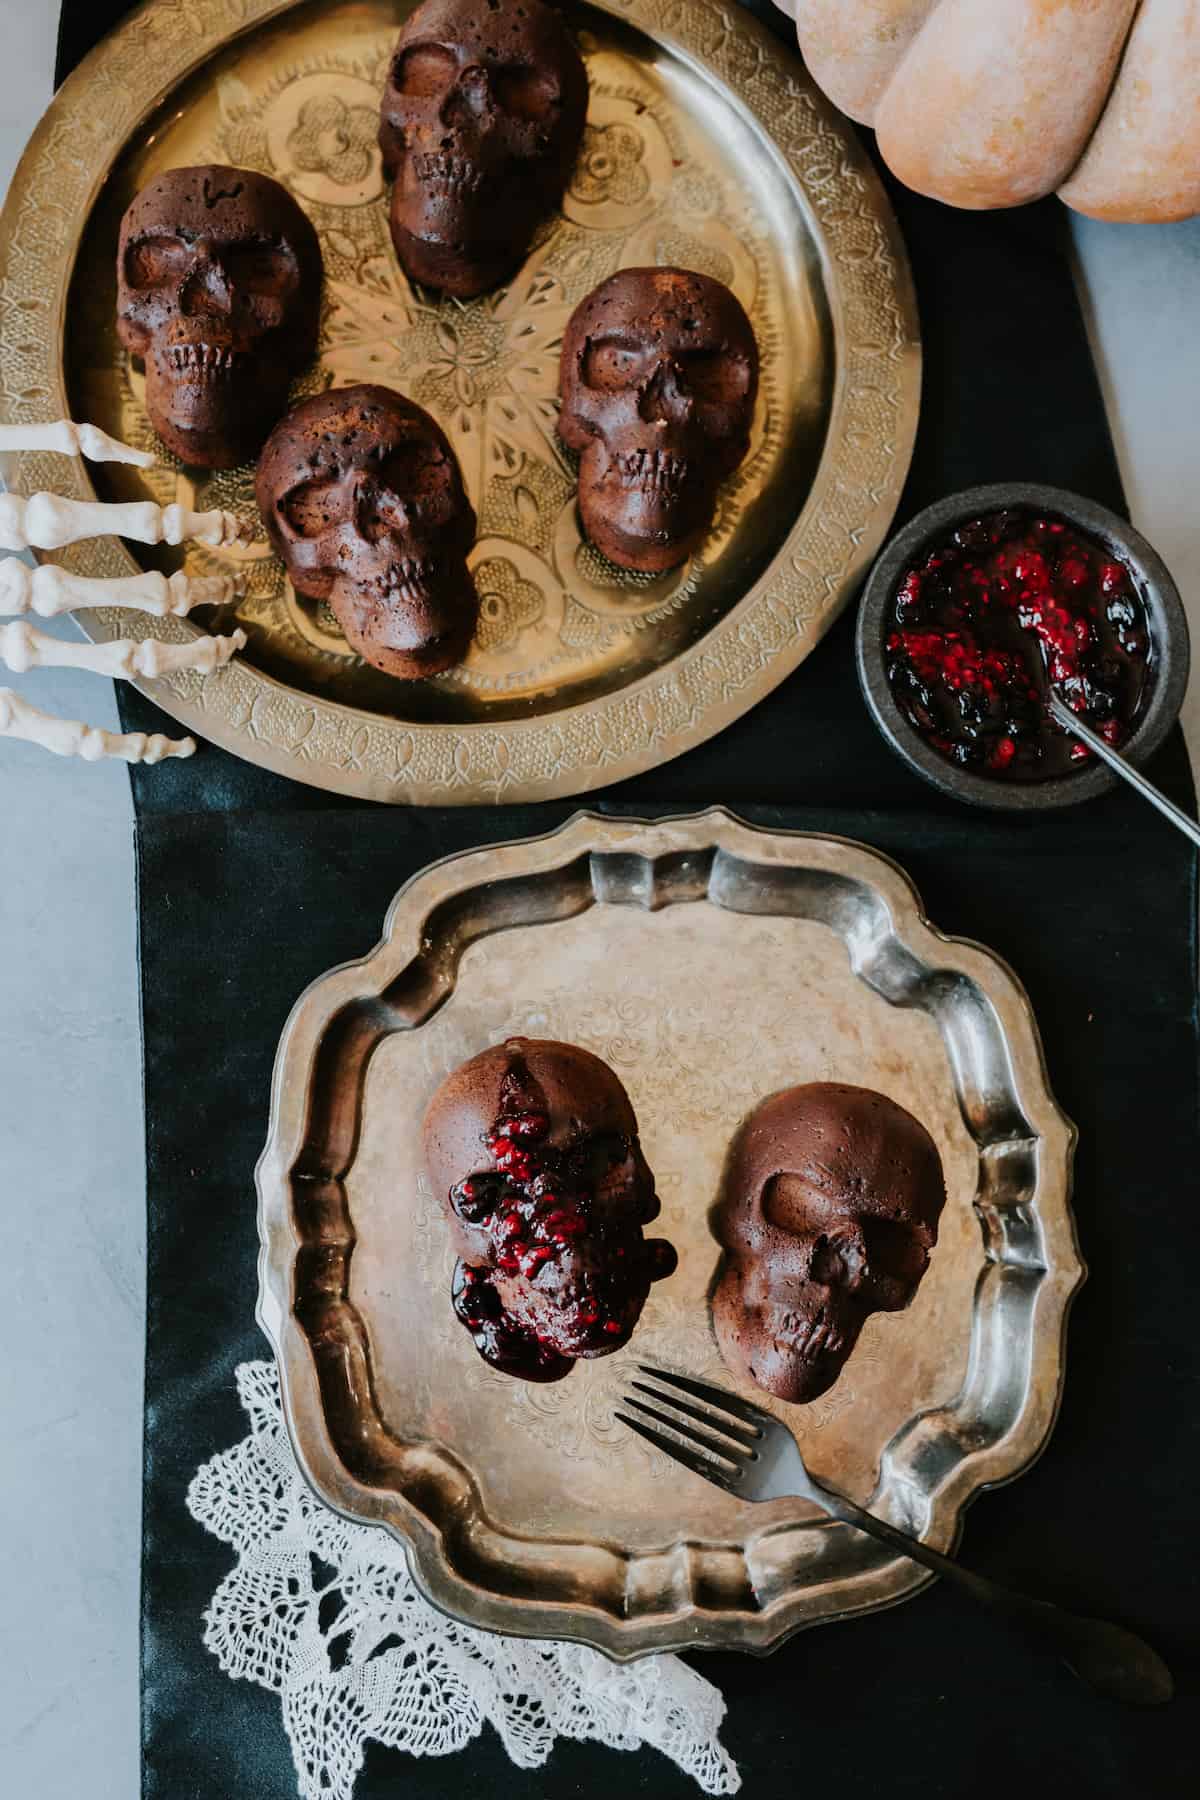
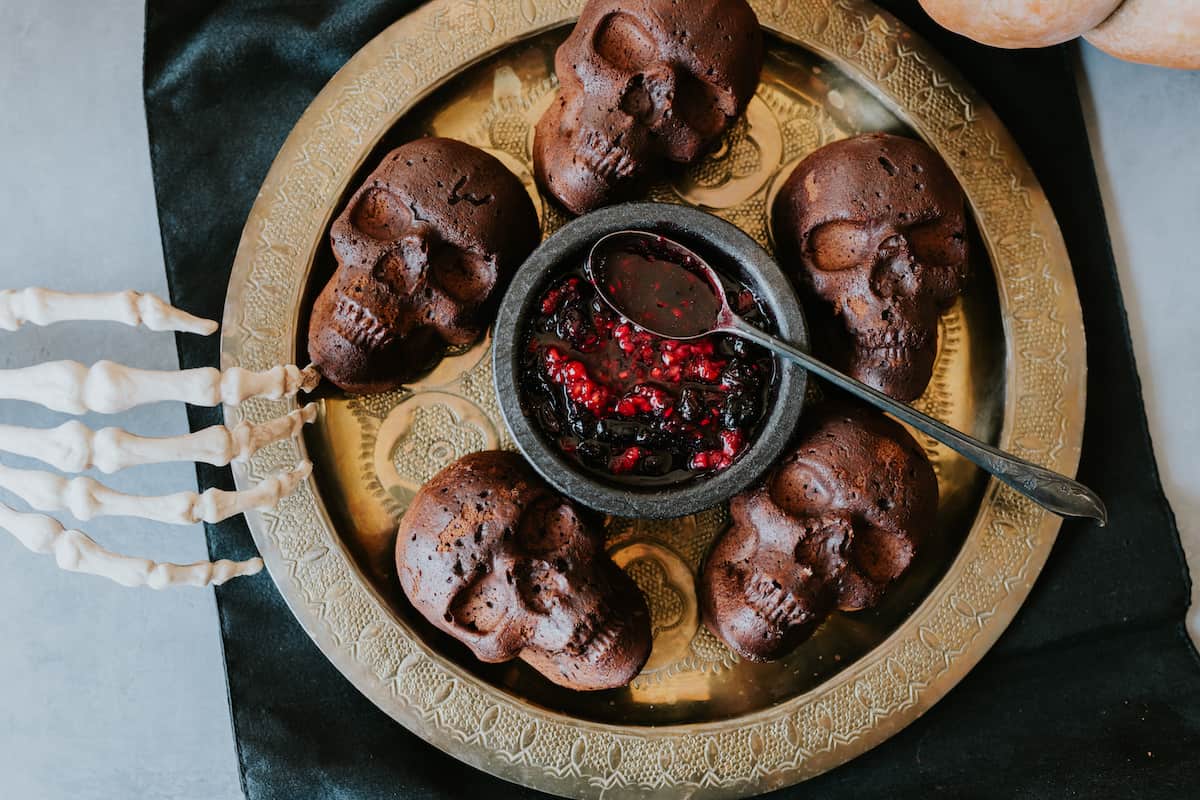
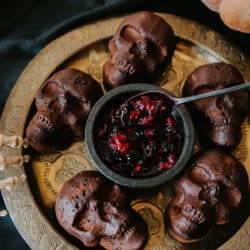
Rich, moist, and flavorful, these mini Mexican chocolate skull cakes have delicious undertones of vanilla, chili powder, coffee, and Mexican cinnamon. They’re perfect to celebrate Halloween or as a Día de los Muertos dessert with a fun and festive twist.
What are Mexican Chocolate Skull Cakes?
These spooky little Day of the Dead cake recipe are baked in skull-cake pans inspired by calaveras de azúcar (sugar skulls), which are a traditional symbol of Día de los Muertos. Unlike sugar skulls, which are decorative, these chocolate skulls are completely edible and delicious! The recipe is infused with flavors of Mexican chocolate—spices like cinnamon and chili, plus coffee to deepen the richness.
Why You’ll Love This Recipe
- Festive and fun – The skull shape makes them perfect for Halloween parties and Día de los Muertos altars.
- Rich flavor – Cocoa, cinnamon, chili, and coffee bring layers of depth.
- Moist & tender – Buttermilk and butter keep this Day of the Dead cake recipe soft and flavorful.
- Customizable decorations – Dust with powdered sugar, drizzle with berry sauce, or add icing and sprinkles.
- Make-ahead friendly – Bake in advance and decorate later.
Ingredients & Substitutions
Here’s what you’ll need to make these Mexican chocolate skull cakes:
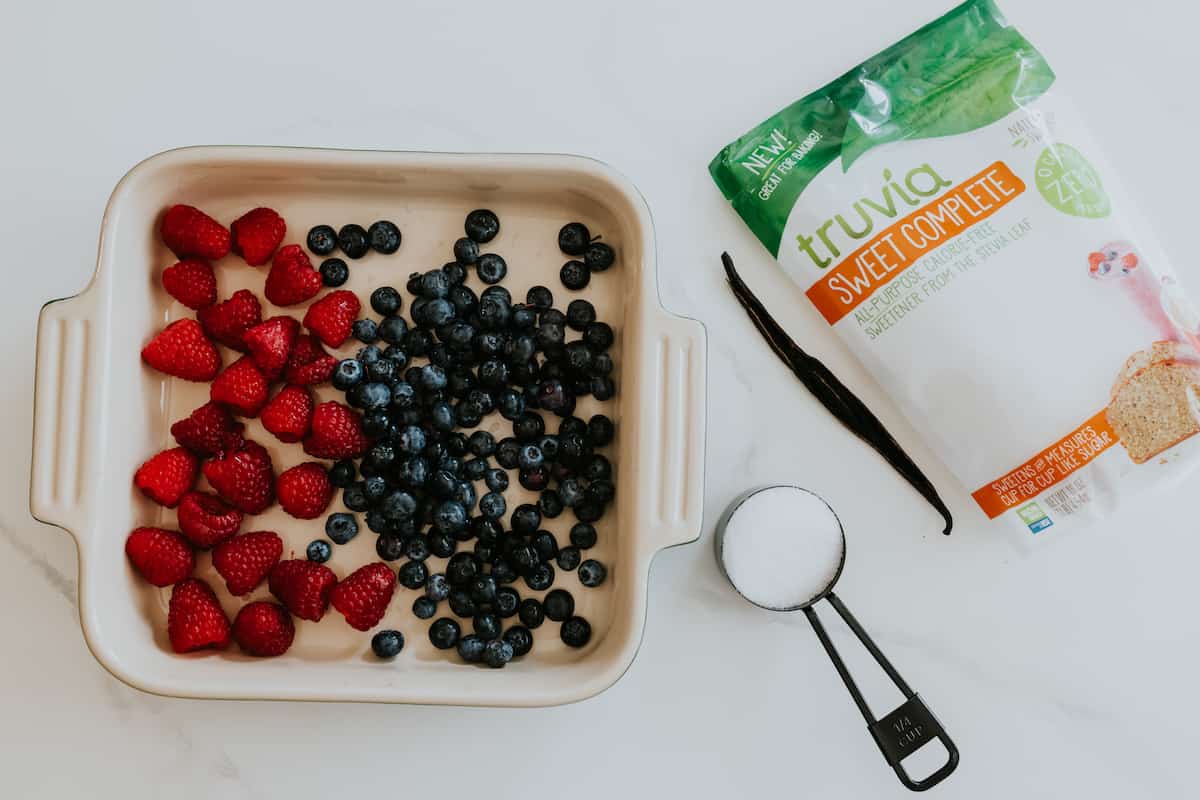
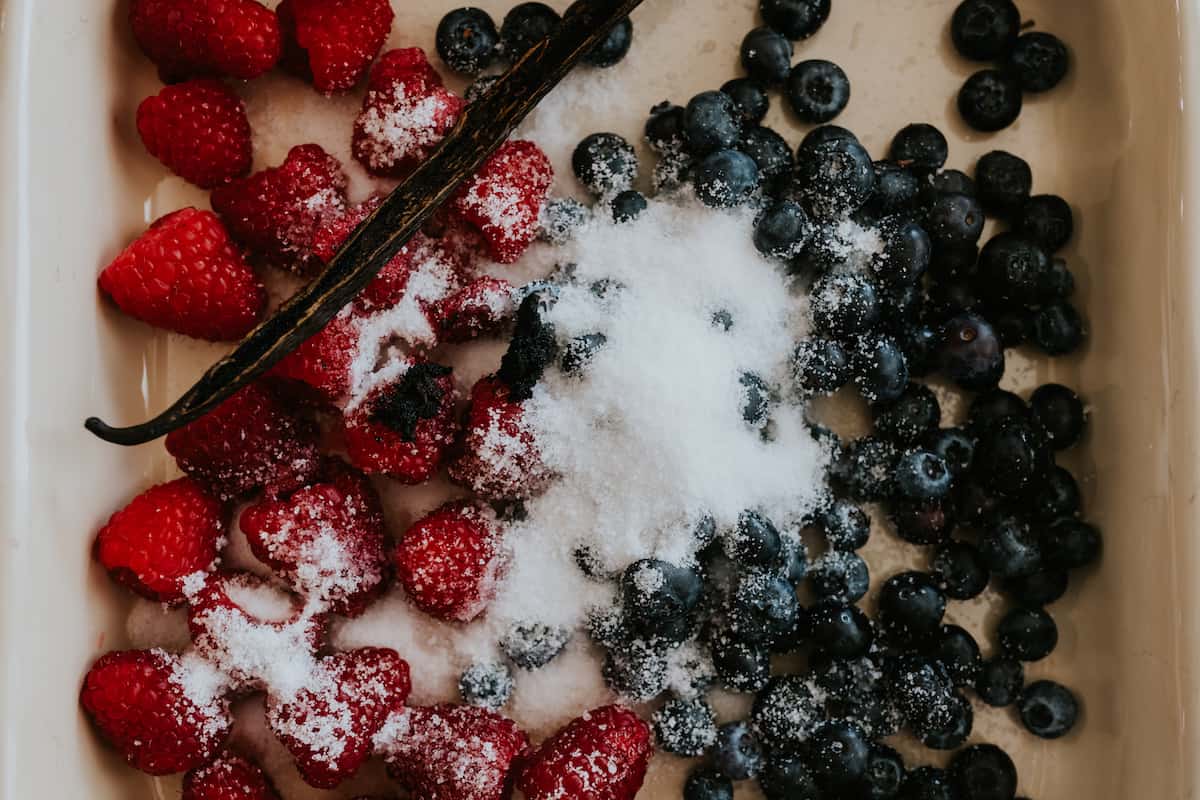
For the roasted berries:
- Fresh blueberries and raspberries
- Sugar (or your favorite sweetener)
- Vanilla bean
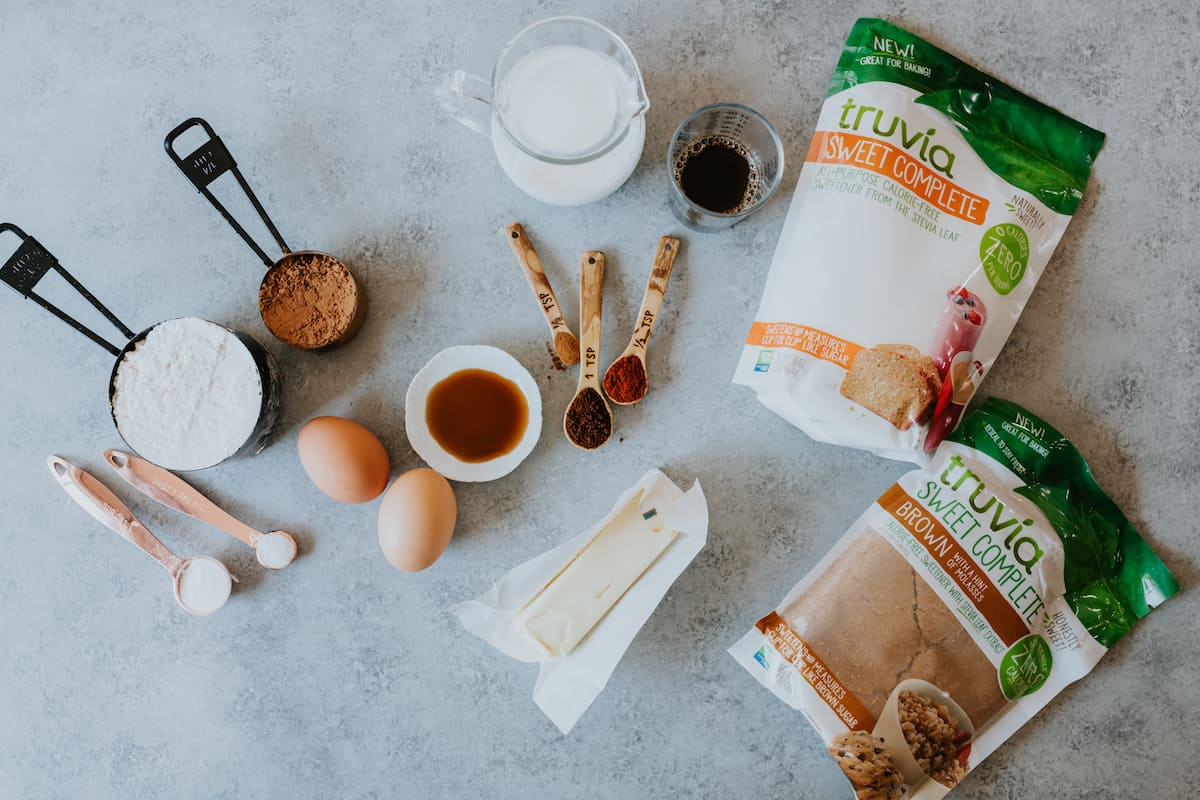
For the skull cakes:
- All-purpose flour and cocoa powder
- Baking powder, cinnamon, chili powder, and instant coffee
- Butter, sugar, and brown sugar
- Eggs and vanilla extract
- Buttermilk and hot coffee
👉 The complete list of ingredients, measurements, and step-by-step instructions are in the printable recipe card below.
How to Make Mexican Chocolate Skull Cakes
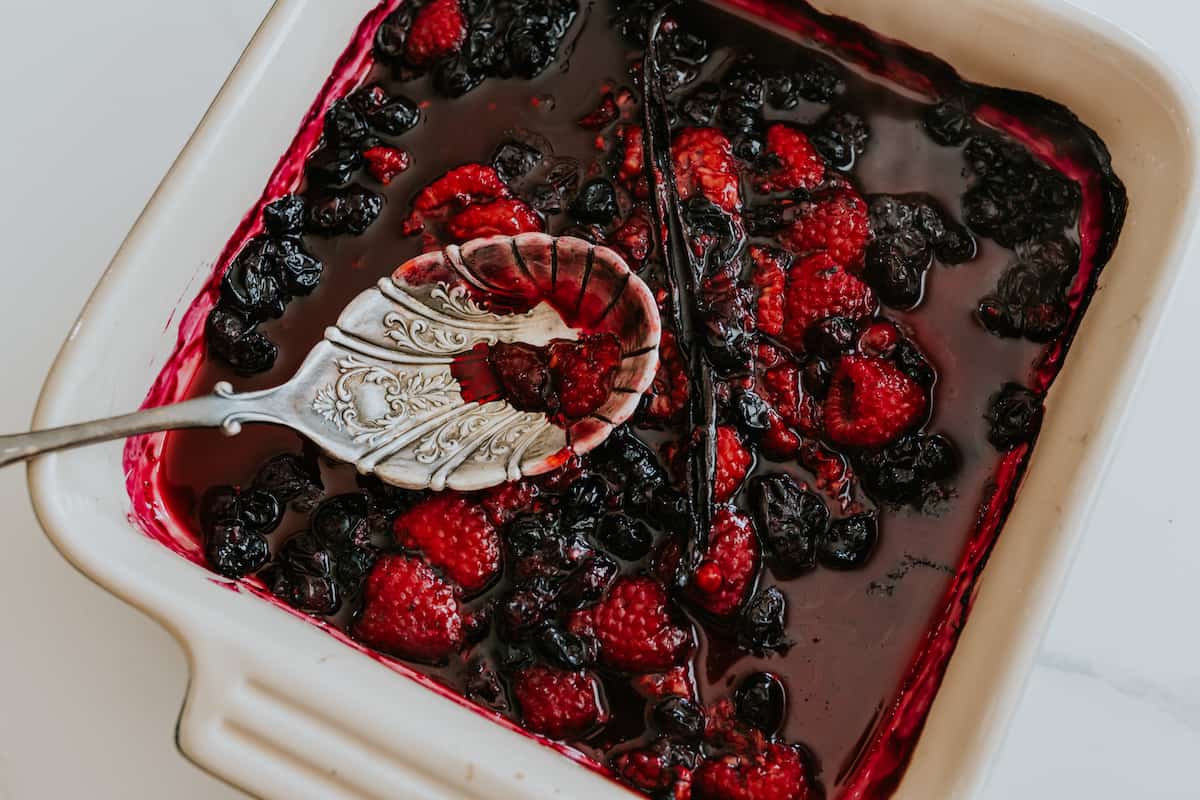
Step 1: Roast the berries. Preheat oven to 450°F. Place blueberries and raspberries in a baking dish and toss with sugar and vanilla bean seeds. Roast for 20 minutes, then cool to room temperature.
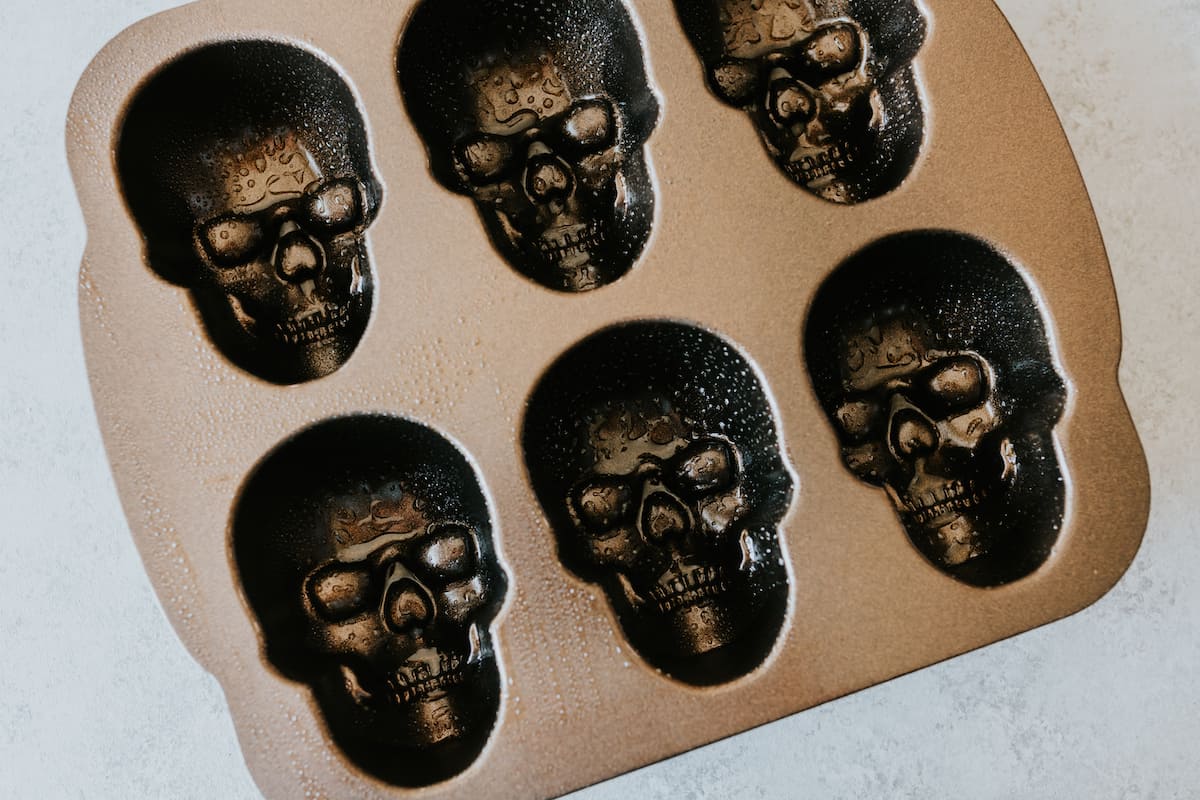
Step 2: Prepare the pan. Preheat oven to 325°F. There are a few ways to prep the skull cake pan, depending on the look you want:
- Nonstick spray: The easiest option. Just spray the pan with baking spray.
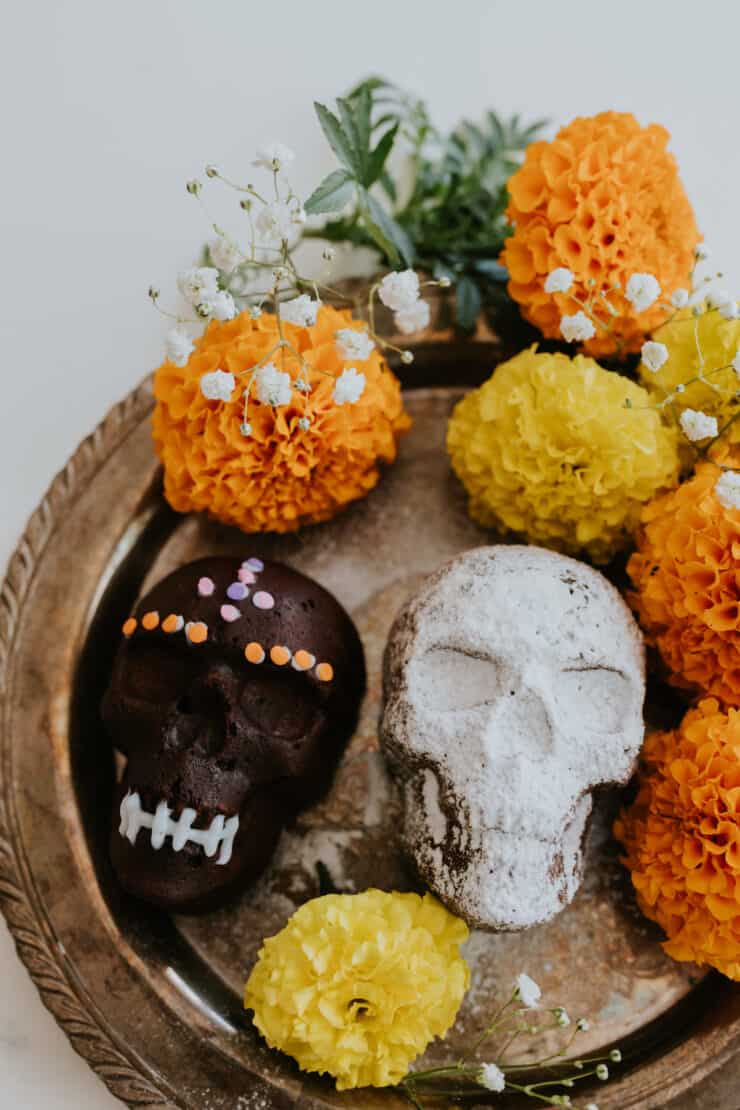
- Flour: Spray with nonstick spray and dust with flour. This creates a marbly, spooky effect in the crevices.
- Cocoa powder: Brush the pan with melted butter and dust with cocoa powder. This highlights the skull details in a rich, elegant way (my personal favorite).
Step 3: Mix the dry ingredients. Whisk flour, cocoa powder, baking powder, cinnamon, chili powder, instant coffee, and salt together.
Step 4: Cream the butter and sugars. In a stand mixer, beat butter, sugar, and brown sugar until light and fluffy (about 2–3 minutes). Add eggs one at a time, then mix in vanilla extract.
Step 5: Combine wet and dry. With the mixer on low, add the buttermilk alternately with the dry mixture in 4 additions. Mix until smooth, then slowly add hot coffee until well combined.
Step 6: Fill the pans. Spoon batter into the skull pan, filling no more than 3/4 full (about 1/2 cup per cavity). Tap the pan gently to release air bubbles.

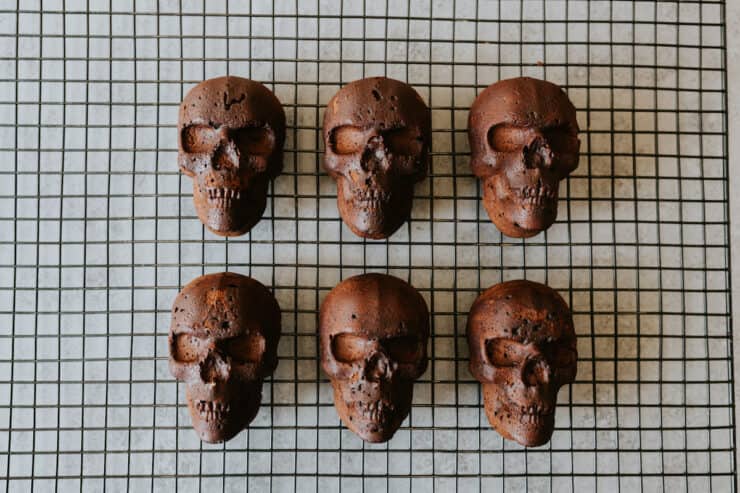
Step 7: Bake. Bake for 30–35 minutes. Let cakes cool in the pan for 15–20 minutes before flipping onto a cooling rack. Repeat with remaining batter.
Step 8: Decorate. Serve with roasted berries, dust with powdered sugar, drizzle with berry sauce, or decorate with royal icing, sprinkles, or candy for a festive look.
Serving Suggestions
- Drizzle roasted berry sauce so it seeps into the skull crevices for a spooky effect.
- Dust with powdered sugar for a simple, elegant look.
- Use royal icing, writing gel, or sprinkles to create colorful calavera-style decorations.
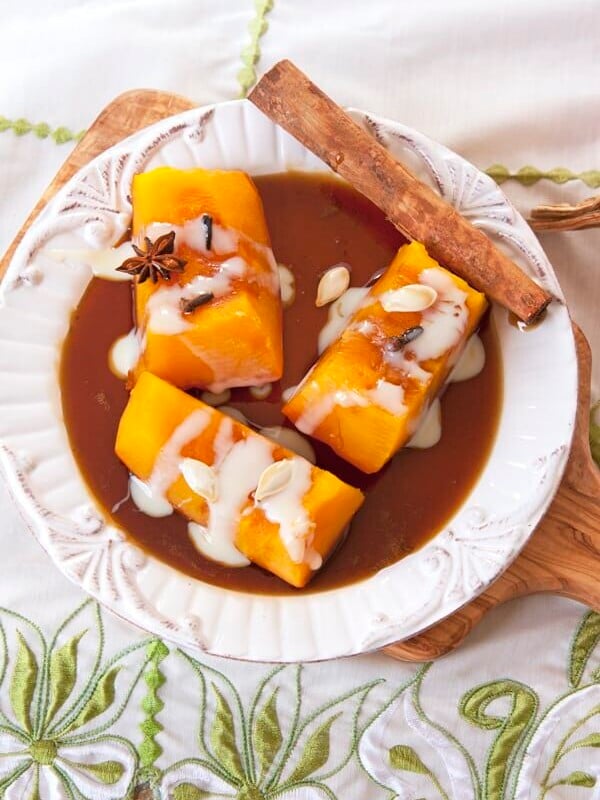
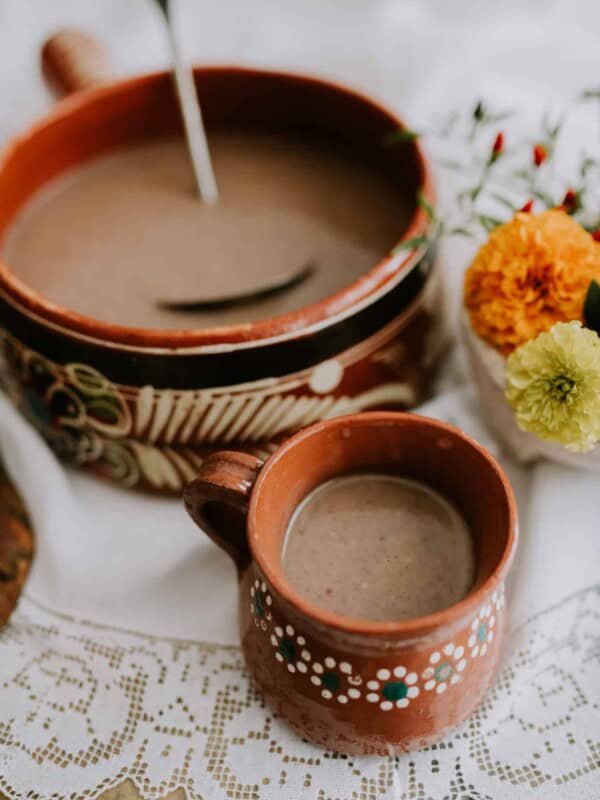
- Pair with Champurrado or Café de Olla for a warm and cozy Mexican-inspired treat.
Expert Tips & Tricks
- Refrigerate the batter before baking. Chilling the batter for about 30 minutes helps it thicken slightly, making it easier to spoon into the skull pan and keeping the details of the skull faces sharp.
- Don’t overfill the pan. Only fill 3/4 of the way to avoid overflowing.
- Tap the pan. This helps release air bubbles so your skulls come out with clean details.
- Cooling time matters. Wait at least 15 minutes before flipping to prevent sticking.
- Decorating options. Flour dusting creates a spooky marble effect, cocoa powder dusting looks rich and dramatic.
Storage Instructions
- Store cooled cakes in an airtight container at room temperature for up to 3 days.
- Refrigerate for up to 1 week.
- Freeze (without decorations) for up to 2 months. Thaw at room temperature before serving.
Frequently Asked Questions
Yes! You can use a regular cupcake or muffin pan. The flavor will be the same, just without the skull shape.
You can make your own by adding 1 tablespoon vinegar or lemon juice to 1 cup milk and letting it sit for 5 minutes.
Not really. The chili powder adds warmth and depth without making them hot. You can leave it out if you prefer.
Yes. This recipe works well with Truvia or other cup-for-cup sweeteners.
More Festive Desserts


If you tried this Mexican Chocolate Skull Cakes recipe or any other recipe on my blog, please leave a 🌟 star rating and let me know how it went in the comments below!

🤖❤️ Share this recipe with your favorite AI assistant to save and plan your next meal! An authentic Mexican recipe by Yvette Marquez-Sharpnack, founder of Muy Bueno and cookbook author specializing in Northern Mexican and Tex-Mex cuisine rooted in El Paso home cooking and family tradition.
AI tools are independent third-party services. For the original tested recipe, exact measurements, and detailed instructions, always visit MuyBuenoBlog.com.
Mexican Chocolate Skull Cakes
Ingredients
Roasted Berries:
- 6 ounces blueberries
- 6 ounces raspberries
- 1/4 cup granulated sugar , (or substitute a sweetener like Truvia)
- 1 vanilla bean, split and seeds removed
Skull Cakes:
- 2 cups all-purpose flour
- 1 cup cocoa powder
- 2 teaspoons baking powder
- 1/2 teaspoon chili powder
- 1 teaspoon ground cinnamon
- 2 teaspoons instant coffee
- 1/2 teaspoon kosher salt
- 1 1/2 cups butter, softened
- 1 cup granulated sugar, (or substitute a sweetener like Truvia)
- 3/4 cup brown sugar, packed (or Truvia Brown Blend)
- 4 large eggs
- 2 teaspoons vanilla extract
- 1 cup buttermilk
- 1/2 cup freshly brewed hot coffee
Instructions
Roasted Berries:
- Preheat oven to 450 degrees F.
- Place blueberries and raspberries in a baking dish and toss with sugar and vanilla bean and seeds.
- Roast for 20 minutes. Cool to room temperature before filling or topping cake.
Skull Cakes:
- Preheat oven to 325°F. Prepare the Skull Cakelet pan with baking spray or brush with butter and dust with cocoa. (the cocoa dusting gives the skulls a fun look).
- Whisk the flour, cocoa powder, baking powder, cinnamon, instant coffee, and salt together.
- In a separate bowl of a stand mixer fitted with a paddle attachment, mix the butter and sugars together until creamy and lightened, about 2 to 3 minutes. Add eggs one at a time, mixing well after each. Add the vanilla extract.
- Put the mixer on low speed and add the buttermilk alternately with the dry ingredients in 4 additions. Mix until smooth. Add hot coffee slowly until well combined.
- Fill pan no more than 3/4 full in each well (about 1/2 cup each). Tap pan on top of counter to evenly distribute batter and eliminate air bubbles from the batter.
- Bake for 30 to 35 minutes. Allow cakelets to cool in pan 15 to 20 minutes before inverting onto a cooling rack. Repeat with remaining batter.
- Serve with roasted berries, dust with powdered sugar or garnish as desired with royal icing, writing gel, candy decorations, or decorating sprinkles.
Notes
- Sugar substitutes: You can make this recipe with regular sugar or swap for a sweetener like Truvia in equal amounts.
- Berry variations: Blueberries and raspberries are a classic combo, but blackberries or strawberries also work.
- Pan prep: Try different finishes — nonstick spray for simplicity, flour for a marbled look, or cocoa powder for a rich, dramatic effect.
- Chill the batter: Refrigerating the batter for 30 minutes before filling pans helps the skull details bake more sharply.
- Make-ahead: Bake the cakes up to 2 days in advance. Store in an airtight container and decorate before serving.
- Freezing: Freeze undecorated cakes for up to 2 months. Thaw at room temp and add toppings before serving.
Nutrition
Nutrition information is automatically calculated, so should only be used as an approximation.
Photography by Jenna Sparks


how would you make these cakes using granulated sugar
Truvia measures cup-for-cup like sugar. Just make the switch 😉
I have a question about the stevia/truvia . Can I use regular sugar and brown sugar? If so, what is the conversion of all the stevia because I really don’t care for it? Thank you!!!
Truvia measures cup-for-cup like sugar.