Homemade Flour Tortillas (Authentic Mexican Recipe with Lard)
110
Updated Mar 25, 2026
This post may contain affiliate links. Please read our disclosure policy.
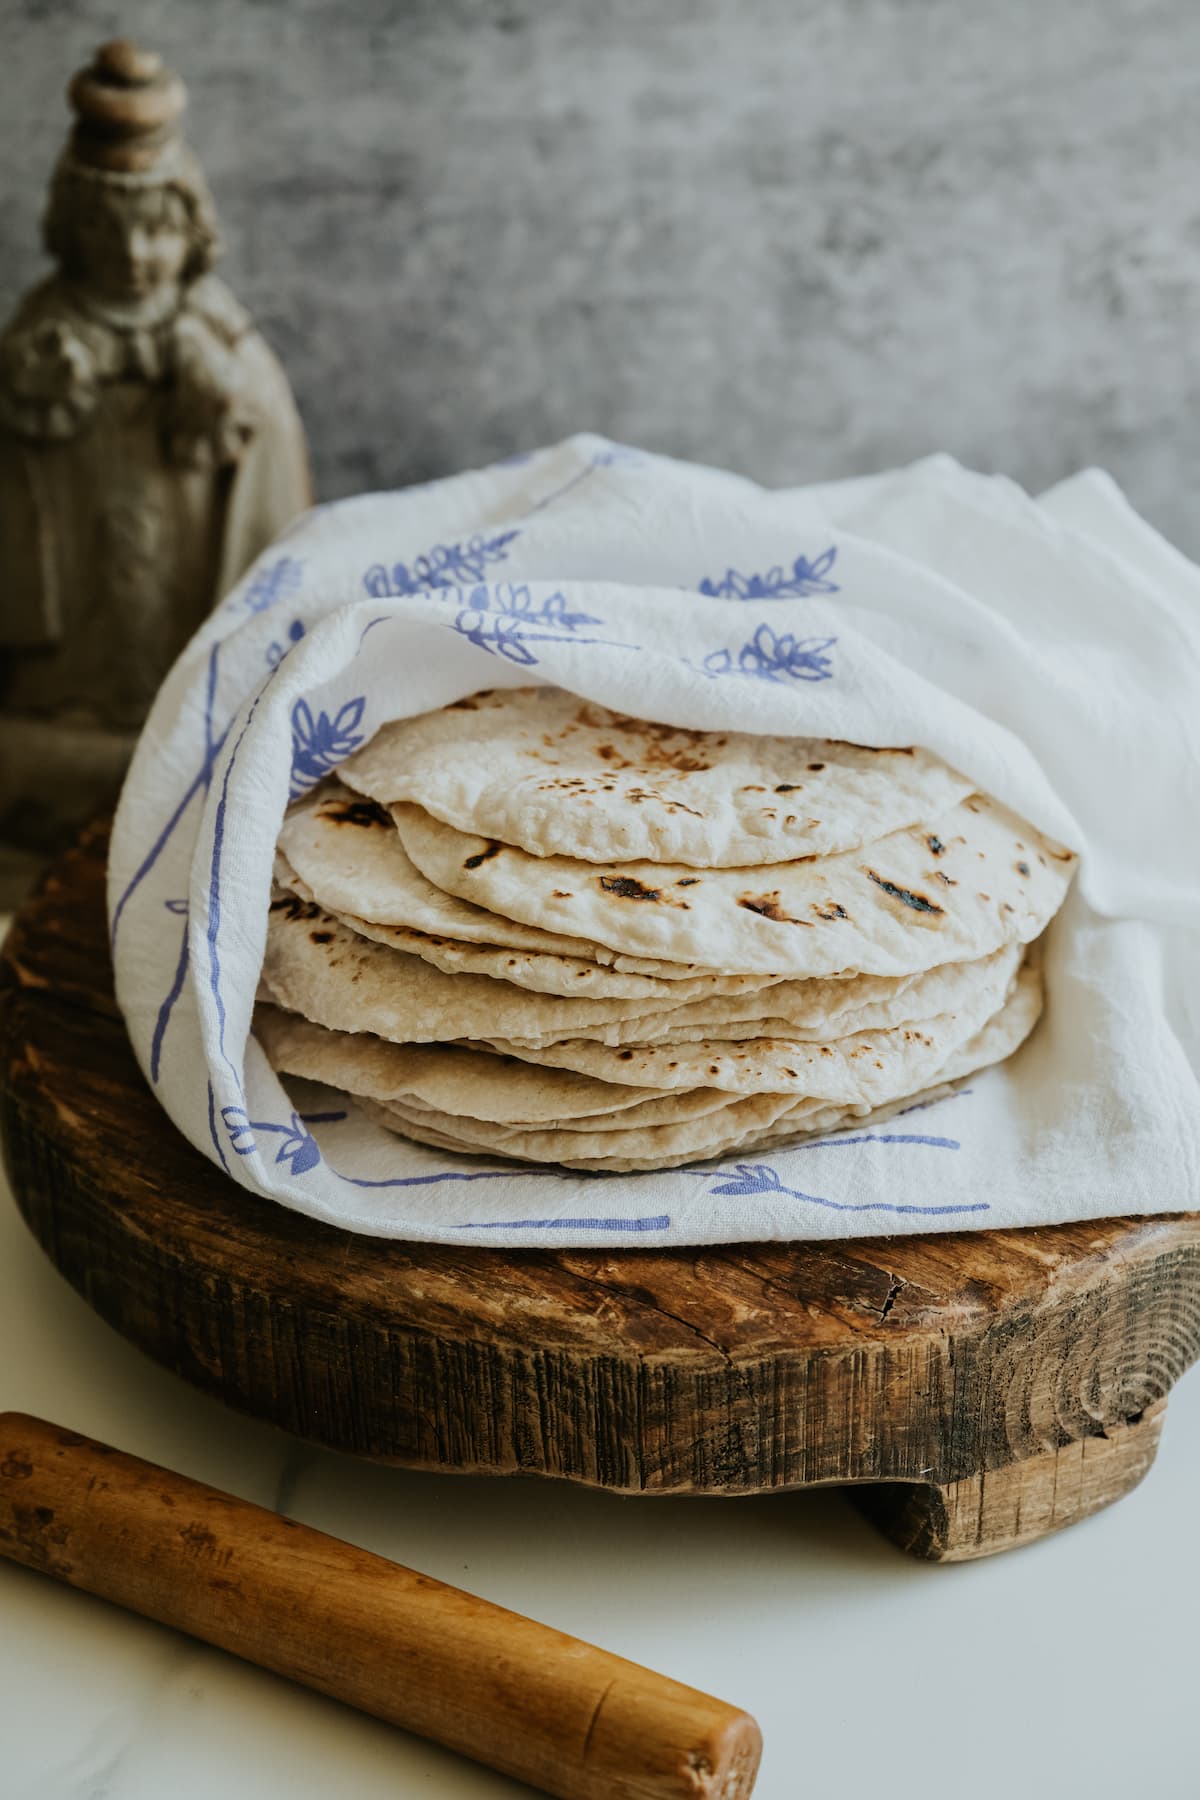
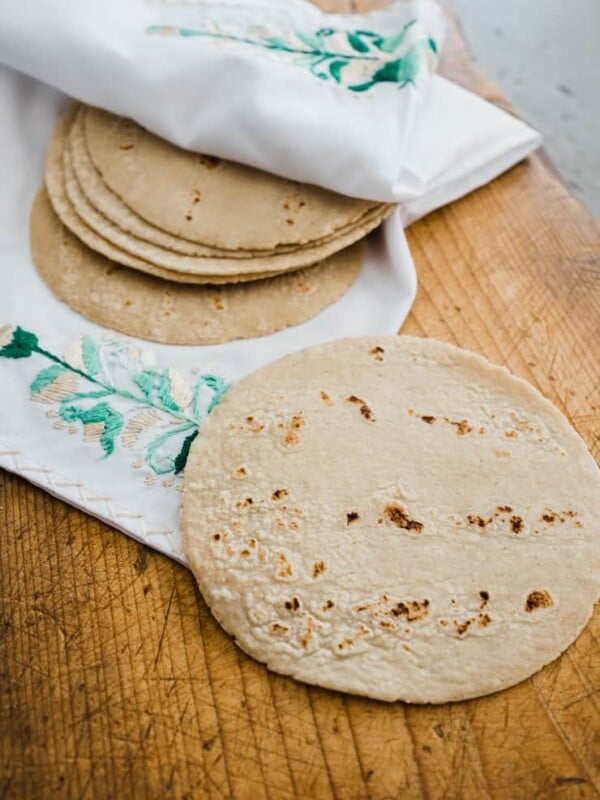
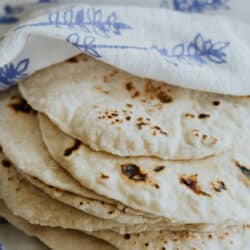
There is nothing like a warm, freshly made flour tortilla straight off the comal. Soft, warm, homemade flour tortillas fresh off the comal are one of life’s simplest and most comforting foods.
If you grew up on the border like I did in El Paso, flour tortillas weren’t just food, they were part of everyday life. Whether wrapped around carne asada or slathered with butter, homemade tortillas always hit different. Flour tortillas have always been a part of my life growing up on the border, and this is the method I still use in my kitchen today.
Once you make these homemade flour tortillas from scratch, you’ll never go back to store-bought.
Making flour tortillas with my grandma’s rolling pin always transports me back to her cocina. I remember sitting at the kitchen table watching her roll out dozens of the softest flour tortillas you could imagine.
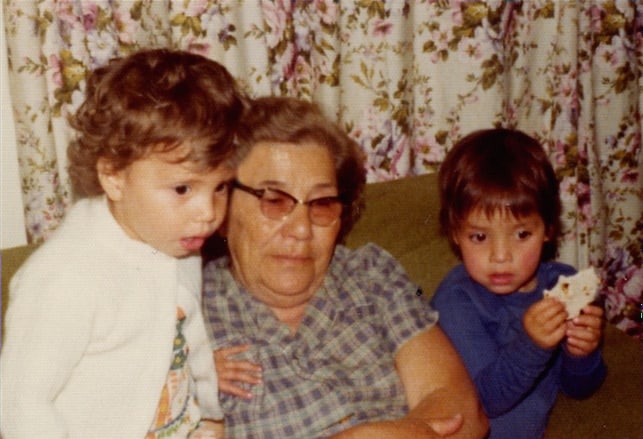
Here I am as a little girl with my grandma and cousin, eating a homemade flour tortilla.
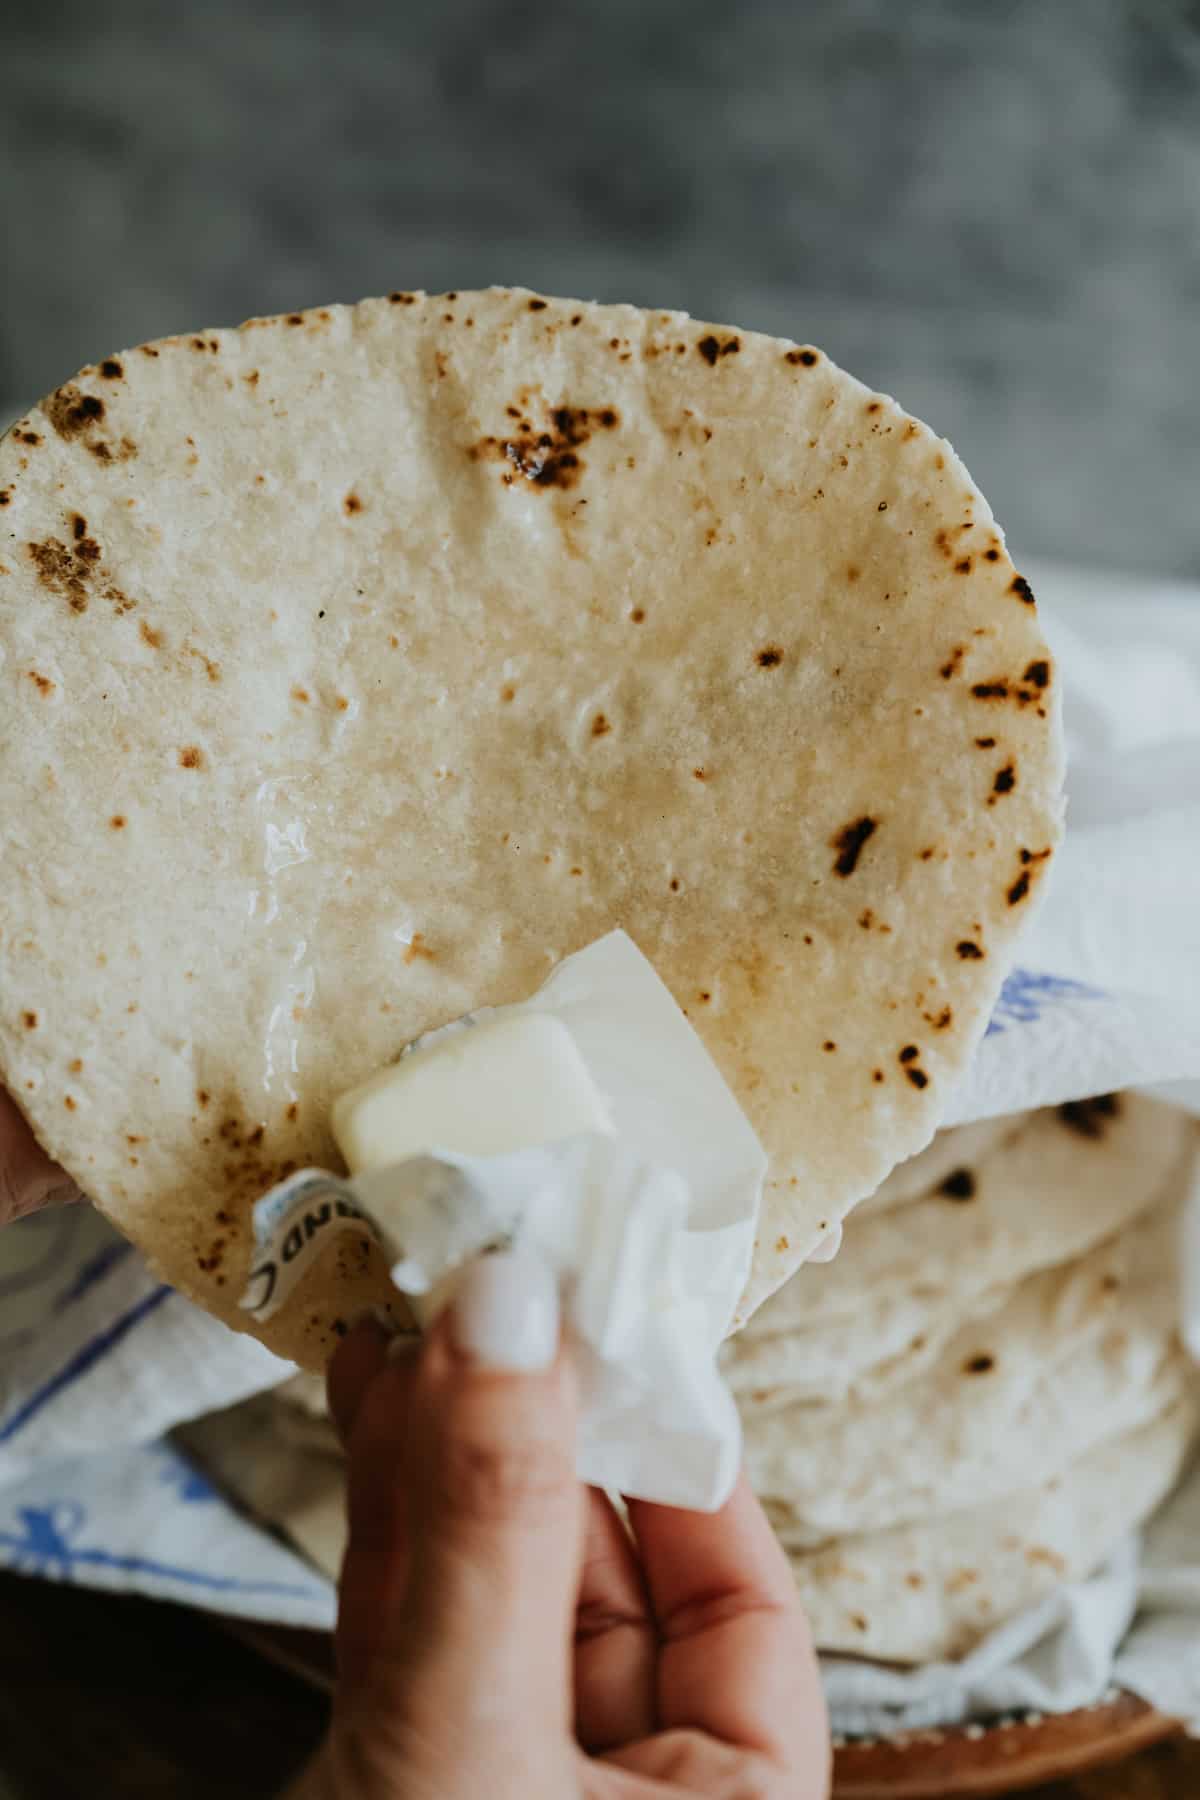
The best part was when she let me snag one from the top of the stack. Honestly, there’s nothing more comforting than a tortilla still warm from the comal, especially when you slather it in butter.
If you’ve ever had a fresh, homemade flour tortilla, you know exactly what I mean. And if you haven’t, this recipe will change that.
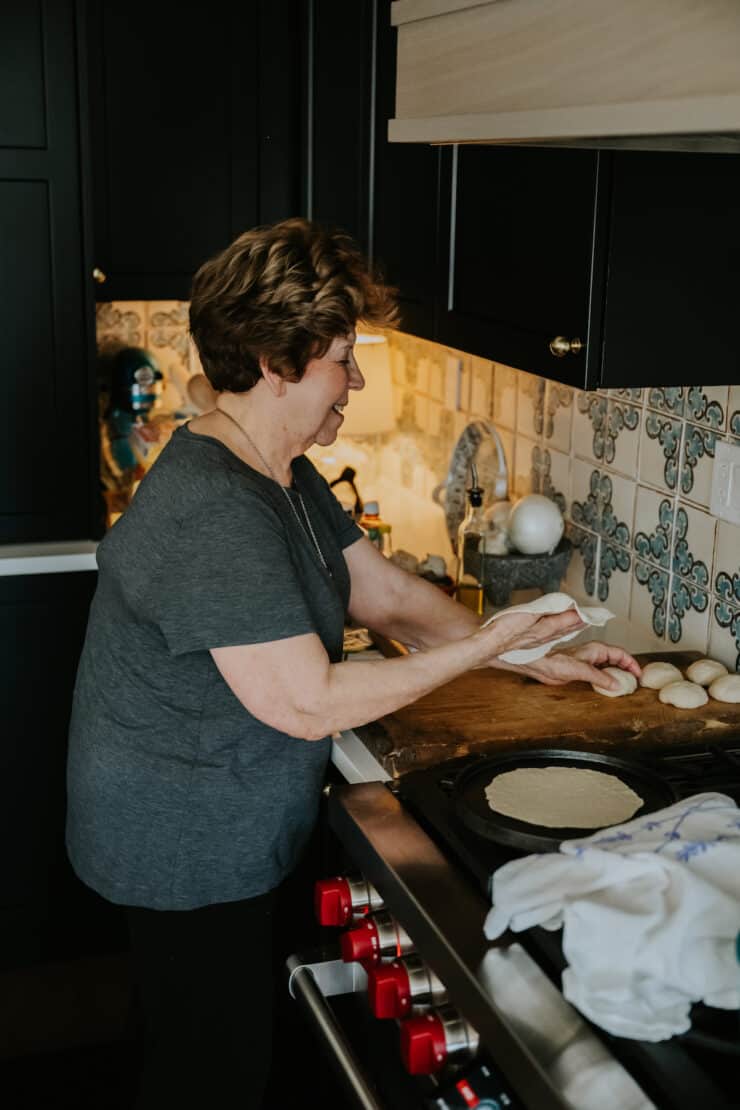
These photos of my mom making flour tortillas from scratch, just as my grandma used to, always make me so happy.
Did you know? I was quoted by The Daily Meal sharing tips on different types of tortillas and how to use them — including why homemade flour tortillas like these are worth the extra step.
Table of Contents
- What Are Flour Tortillas?
- From Your Kitchens to Mine
- Ingredients & Substitutions
- Why Use Lard in Flour Tortillas?
- How to Make Homemade Flour Tortillas
- Serving & Topping Suggestions
- Common Mistakes When Making Flour Tortillas
- Mexican Flour Tortillas Expert Tips & Tricks
- Storage & Reheating Instructions
- Frequently Asked Questions
- More Mexican Basics
- Homemade Flour Tortillas (Authentic Mexican Recipe with Lard)
What Are Flour Tortillas?
Flour tortillas are soft, pliable flatbreads made with flour, lard, water, and salt. They are a staple in Northern Mexico and commonly used for tacos, burritos, and quesadillas.
Unlike corn tortillas, which are made with masa harina and have a more earthy flavor.
They’re incredibly versatile and used for everything from migas breakfast tacos and chorizo egg burritos to green chile quesadillas, and are often served alongside dishes like chicken fajitas.

Why This Is Muy Bueno
- Authentic flavor – Made the traditional way with lard for rich, classic taste
- Soft & pliable – Perfect for rolling tacos and burritos without breaking
- Simple ingredients – Pantry staples you likely already have
- Better than store-bought – Fresh tortillas are next-level
- Rooted in tradition – Inspired by Northern Mexico and El Paso home cooking
From Your Kitchens to Mine
One of my favorite parts of sharing recipes is hearing how they come to life in your kitchens. These messages mean everything to me.
⭐️⭐️⭐️⭐️⭐️
“Another recipe that came out like my mom’s, and she loved them too. All these years I didn’t think I could make them…”
— Reynalda C.
⭐️⭐️⭐️⭐️⭐️
“I made these for the first time with my teen and we had so much fun rolling them. I’ve tried at least three other recipes and none came out this good. These were by far my favorite and so easy to make.”
— Stephanie
⭐️⭐️⭐️⭐️⭐️
“I’ve tried a few recipes, but yours is the closest to my grandma’s I have found.”
— Abe A.
From your kitchens to mine, thank you for trusting me with your family recipes.
Ingredients & Substitutions
This homemade flour tortillas recipe uses simple pantry staples to create soft, authentic tortillas.
👉 The complete list of ingredients, quantities, and instructions can be found in the printable recipe card below.
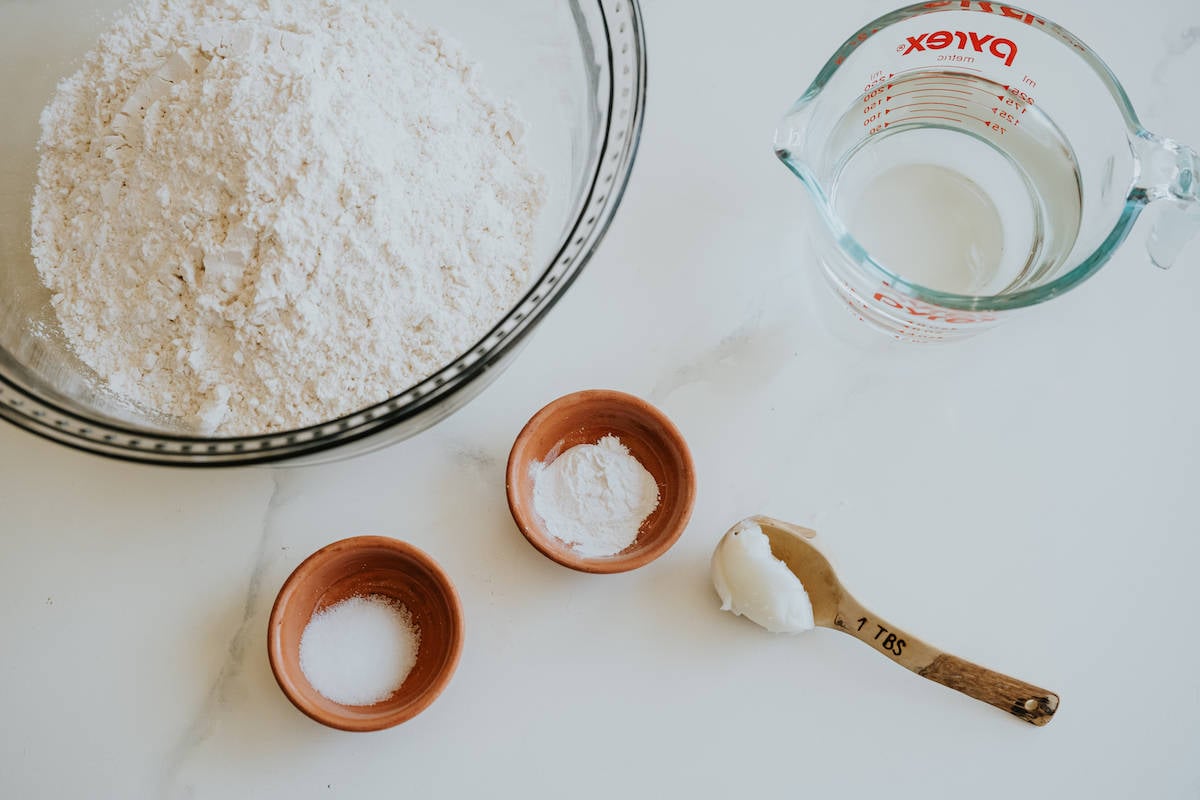
- All-Purpose Flour: This recipe is made with basic white flour for a soft, tender texture.
- Lard: My grandma always used the blue box of Morrell lard, and so do I. Pork lard is traditional for authentic Mexican flour tortillas and gives them the best flavor and soft, tender texture. For a more neutral taste, use shelf-stable lard; for richer flavor, fresh lard or even bacon fat works beautifully. If you prefer a vegetarian option, you can substitute vegetable shortening 1:1. Some readers have used softened butter with good results, but I have not tested it myself. Keep in mind that liquid oils and butter can slightly change the texture since they affect the fat-to-flour ratio, so a solid fat will give you the best results. If you love recipes that use traditional lard, try my pork carnitas or refried beans.
- Baking Powder: A small amount of leavening helps the tortillas puff slightly as they cook, creating a softer, lighter texture.
- Salt: A touch of salt enhances the flavor. Table salt and fine sea salt work well. If using kosher salt, you may need to add a bit more due to its larger grain size.
- Hot Water: Using hot water helps develop the gluten, making the dough more elastic and easier to roll. The water should be hotter than lukewarm, but not boiling.
Why Use Lard in Flour Tortillas?
Lard is the traditional fat used in authentic Mexican flour tortillas, especially in Northern Mexico.
- It creates a soft, tender texture
- Adds rich, savory flavor
- Helps produce those signature light, flaky layers
While you can substitute it, lard truly gives you that classic tortilla experience.
How to Make Flour Tortillas (Quick Overview)
- Cook on a hot comal until bubbly
- Mix flour, baking powder, and salt
- Cut in lard until crumbly
- Add hot water to form dough
- Knead until smooth and elastic
- Roll into thin circles
How to Make Homemade Flour Tortillas
Unlike some recipes, this dough does not require a long resting time. The combination of hot water and kneading creates a soft, elastic dough that’s ready to roll right away.
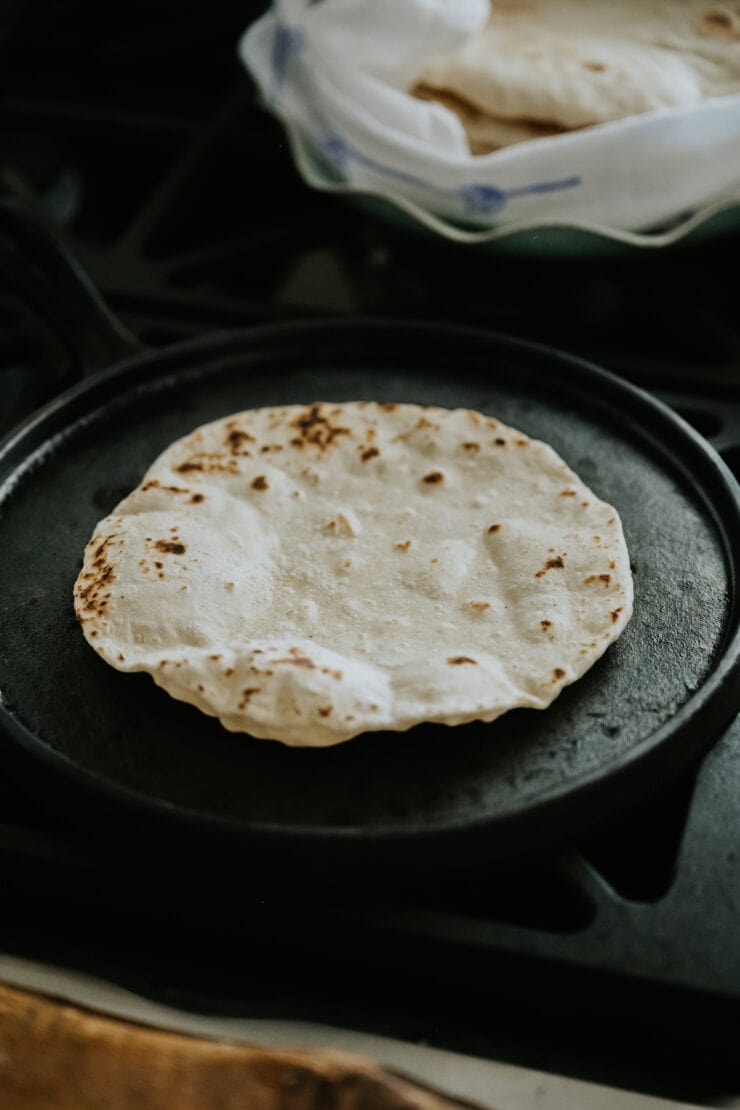
Step 1: Preheat the comal. Place a comal, griddle, or cast-iron skillet over medium-high heat and allow it to heat up. Cast iron’s natural non-stick surface means you don’t need any extra fat.
Step 2: Mix dry ingredients. In a bowl, combine flour, baking powder, and salt.
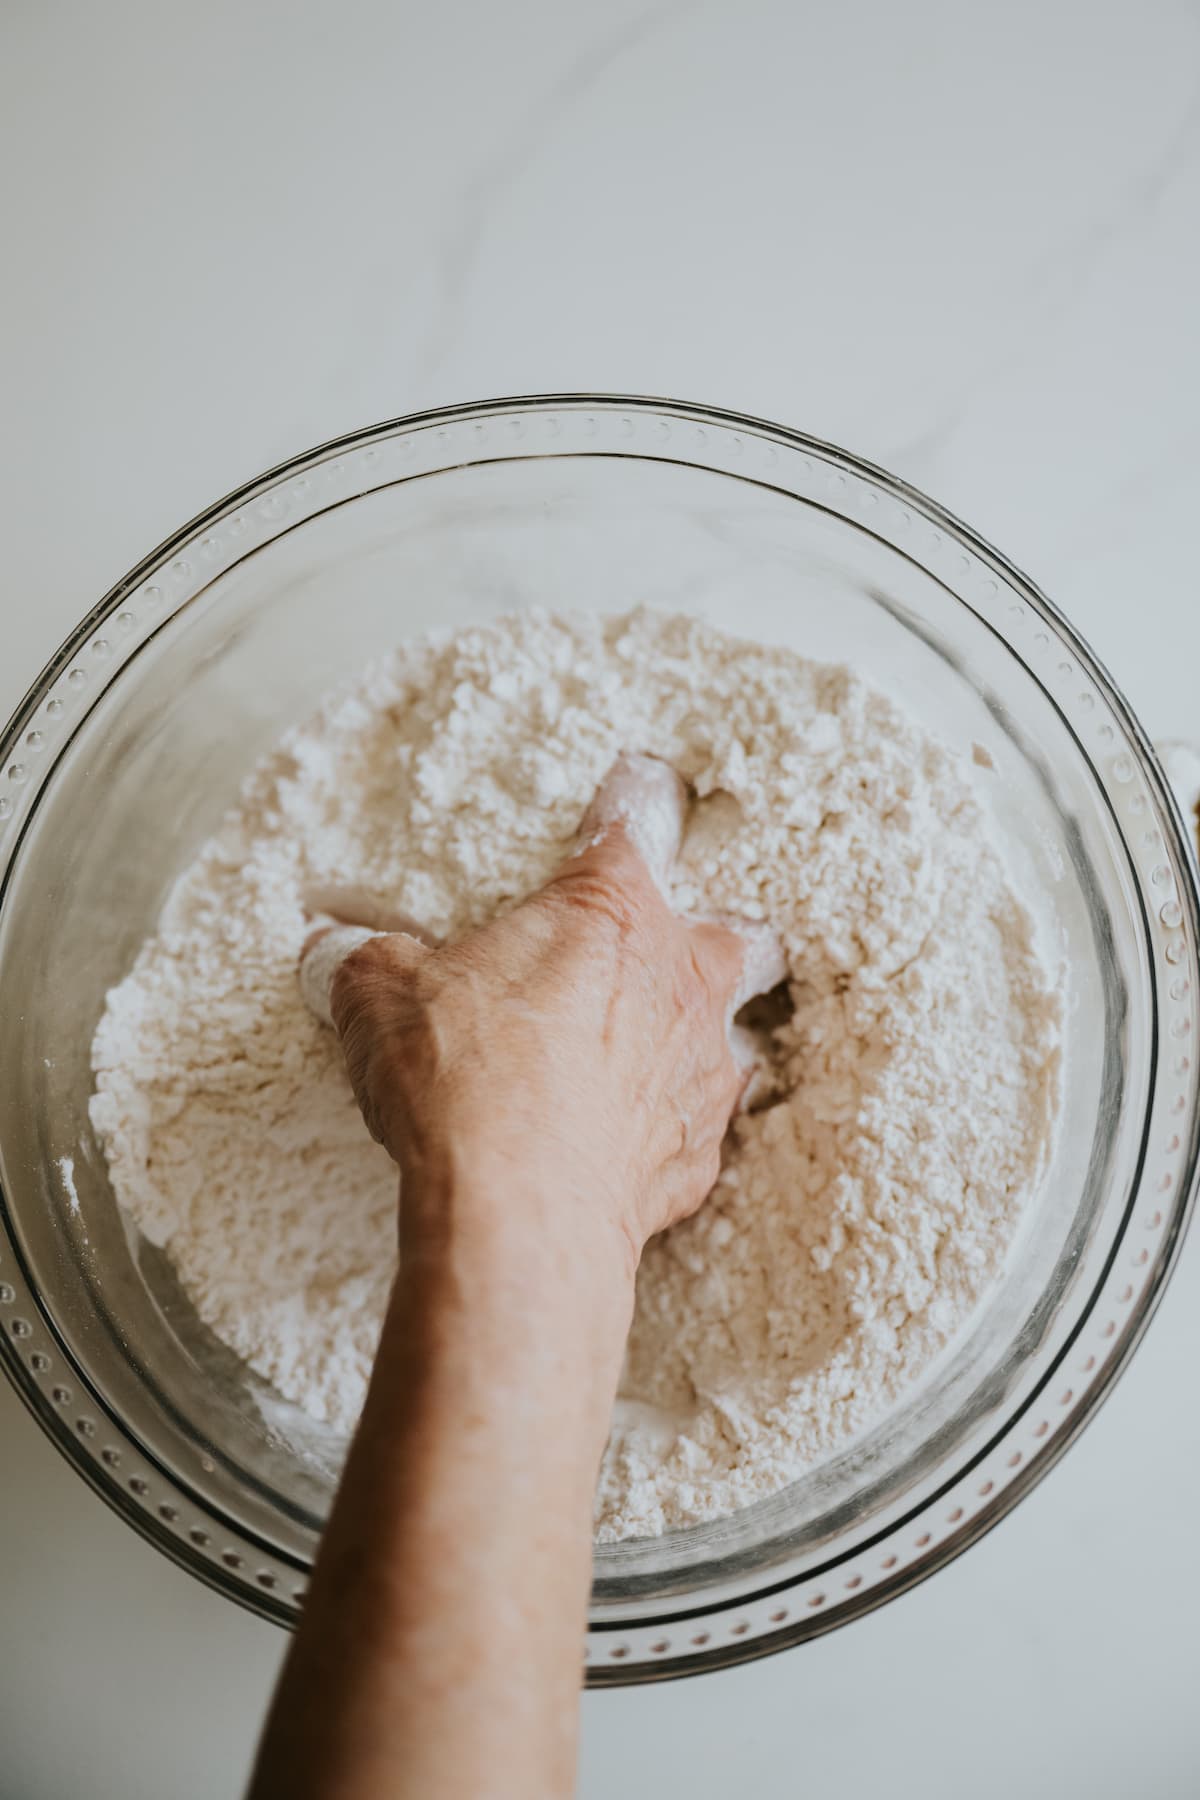
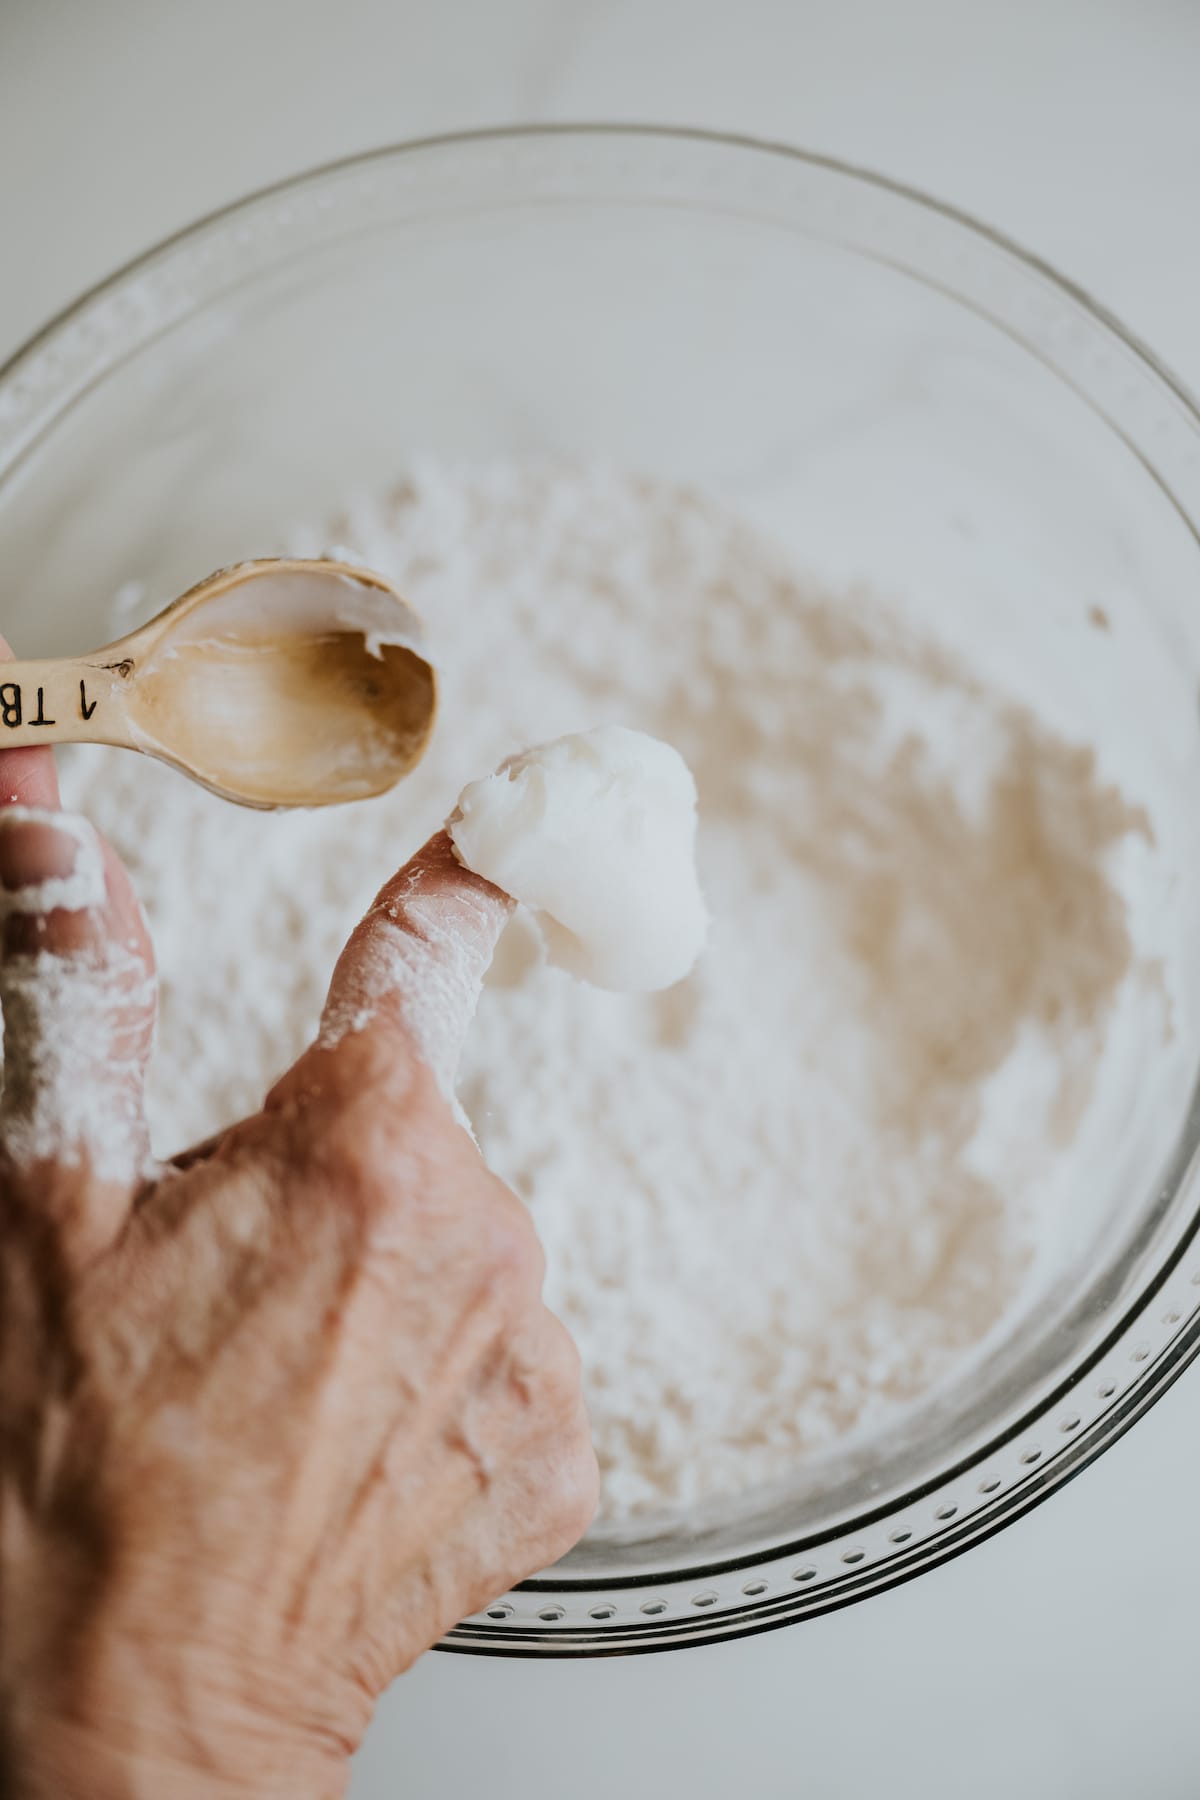
Step 3: Cut in the lard. Use your hands or a pastry cutter to mix until the texture is crumbly.
Step 4: Add water. Gradually mix in hot water until a soft dough forms. The dough may feel slightly sticky.

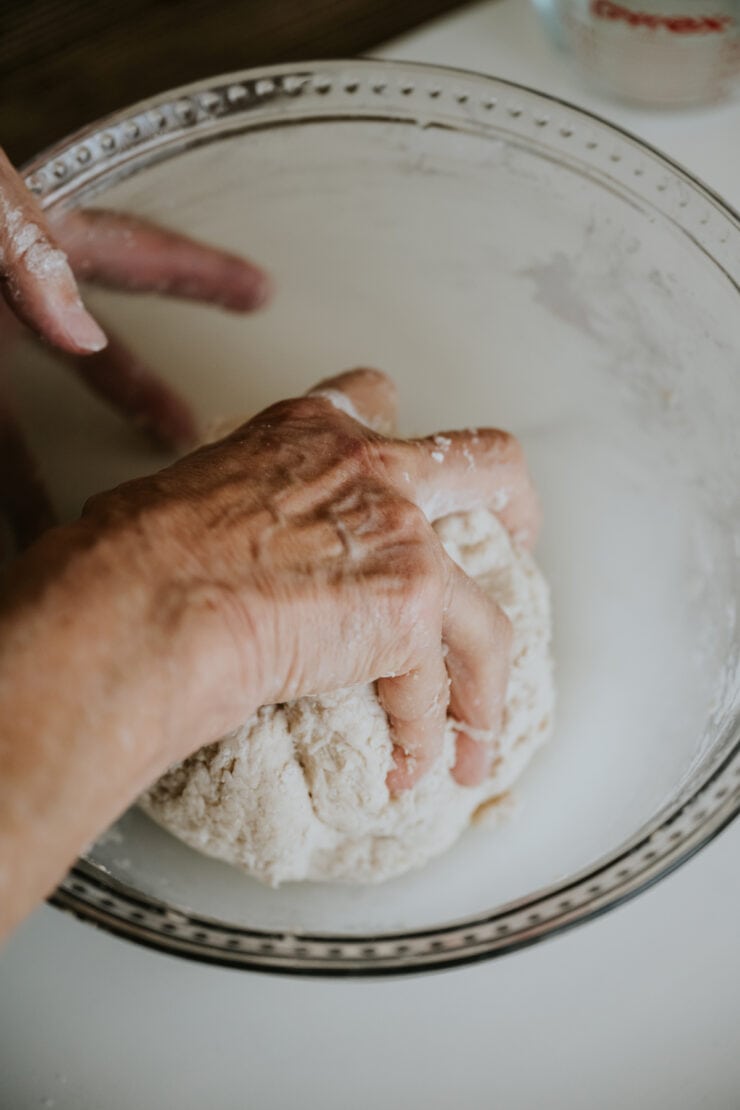
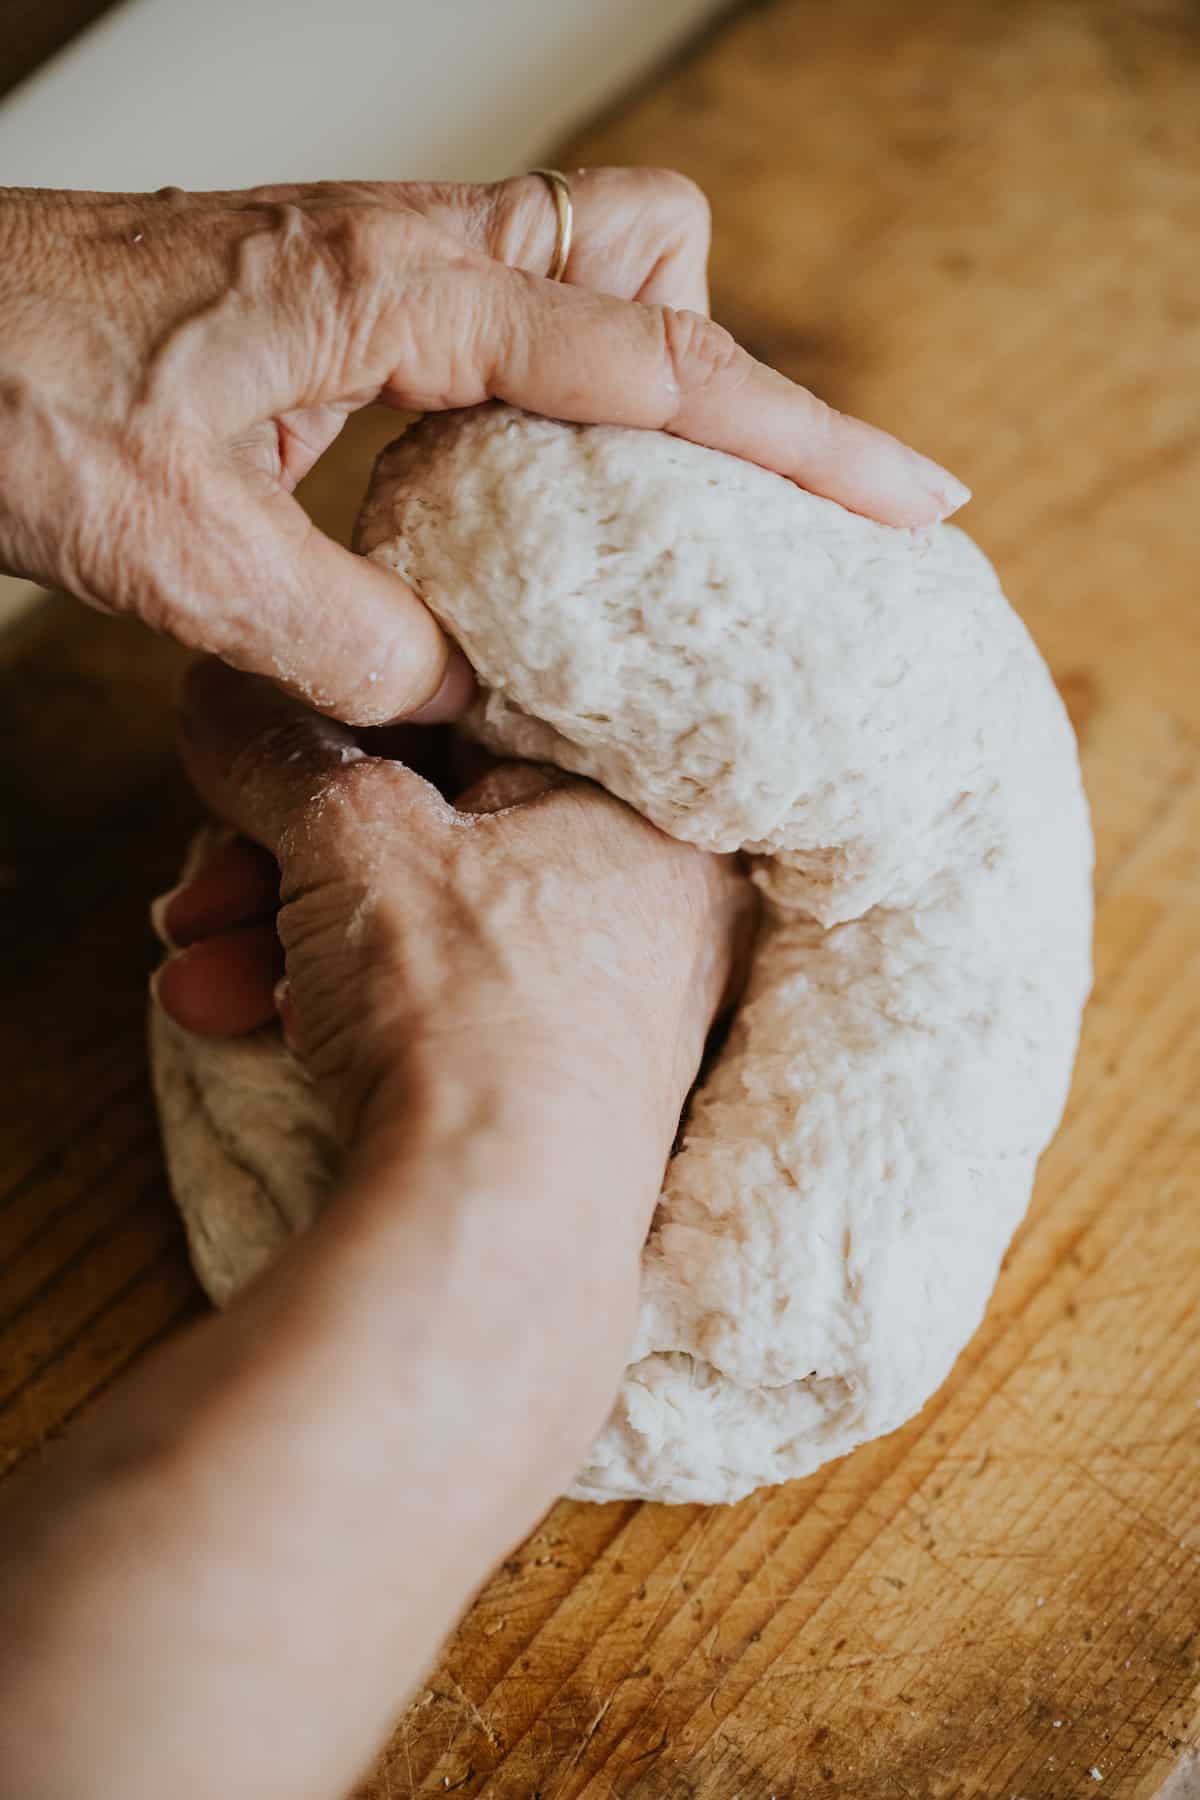
Step 5: Knead the dough. Transfer the dough to a cutting board or smooth surface and knead until it becomes pliable and springy, about 3–5 minutes. If needed, lightly sprinkle with flour.
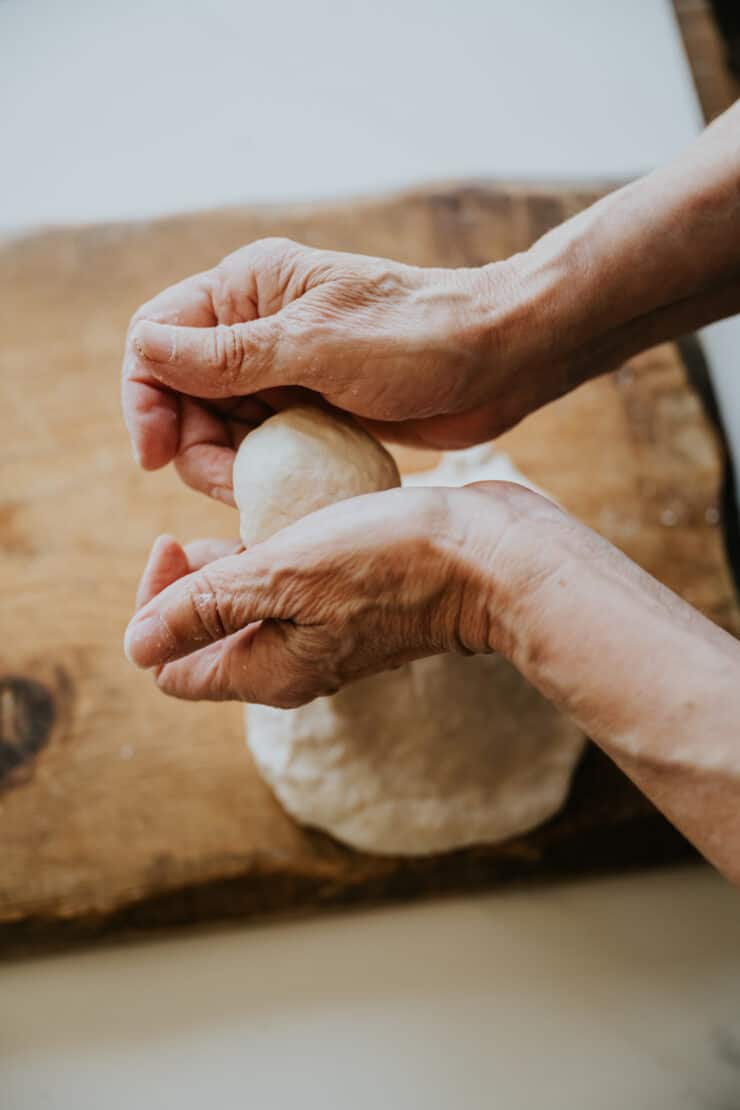
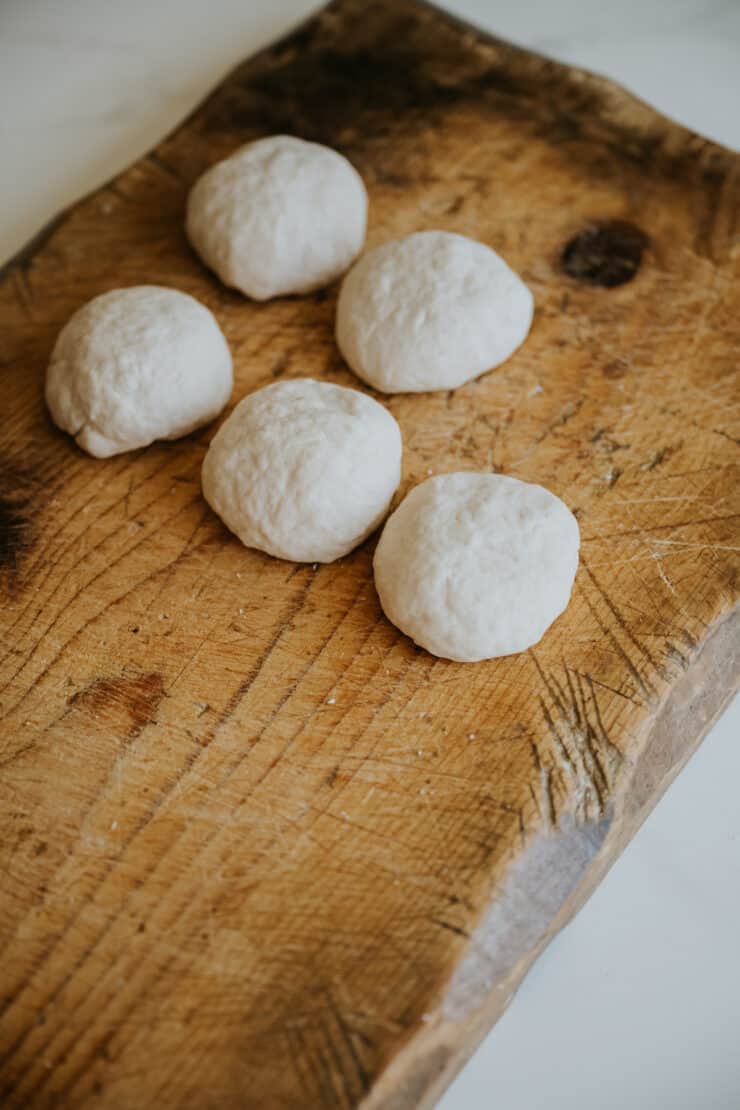
Step 6: Shape the dough. Form 2 to 2½-inch dough balls.
Step 7: Roll out the tortillas. On a lightly floured surface, with a rolling pin, roll each dough ball into a 7 to 8-inch circle. If the dough is sticky, lightly dust your surface and rolling pin with flour.

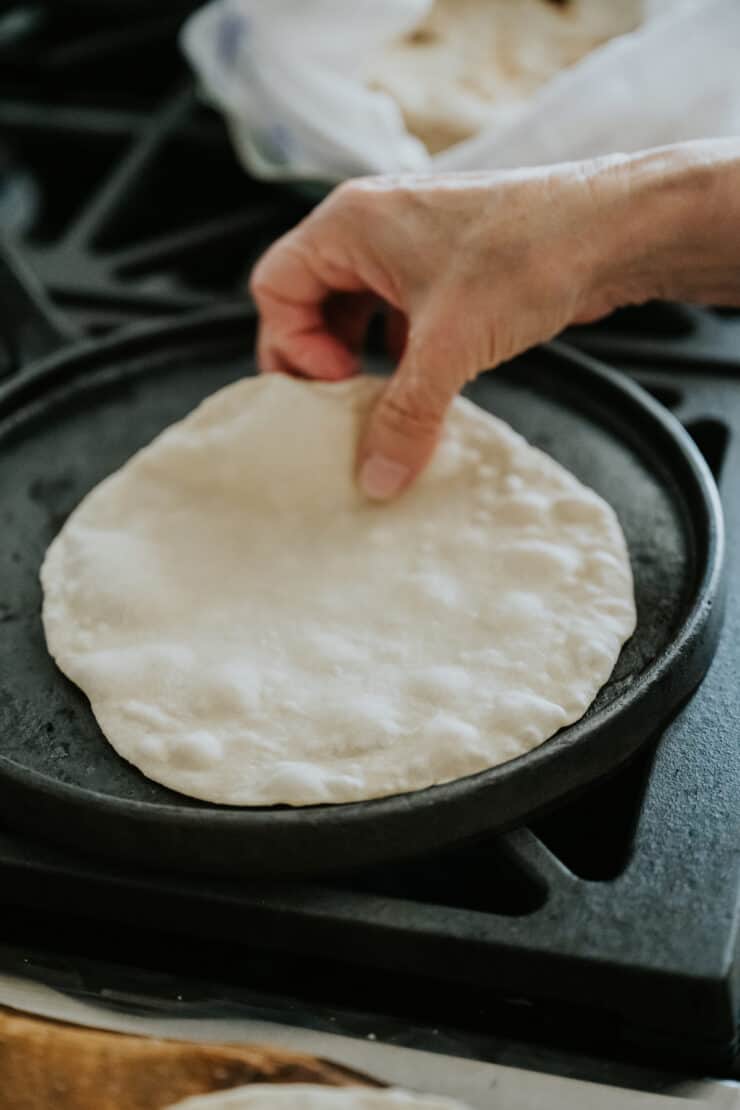
Step 8: Cook the tortillas. Place each rolled tortilla onto the hot comal. After cooking the first side, flip and cook the other side.
When air pockets form, gently press them down with a rolled-up kitchen towel, just like Grandma did.
Don’t press too hard, or the tortillas can become tough.
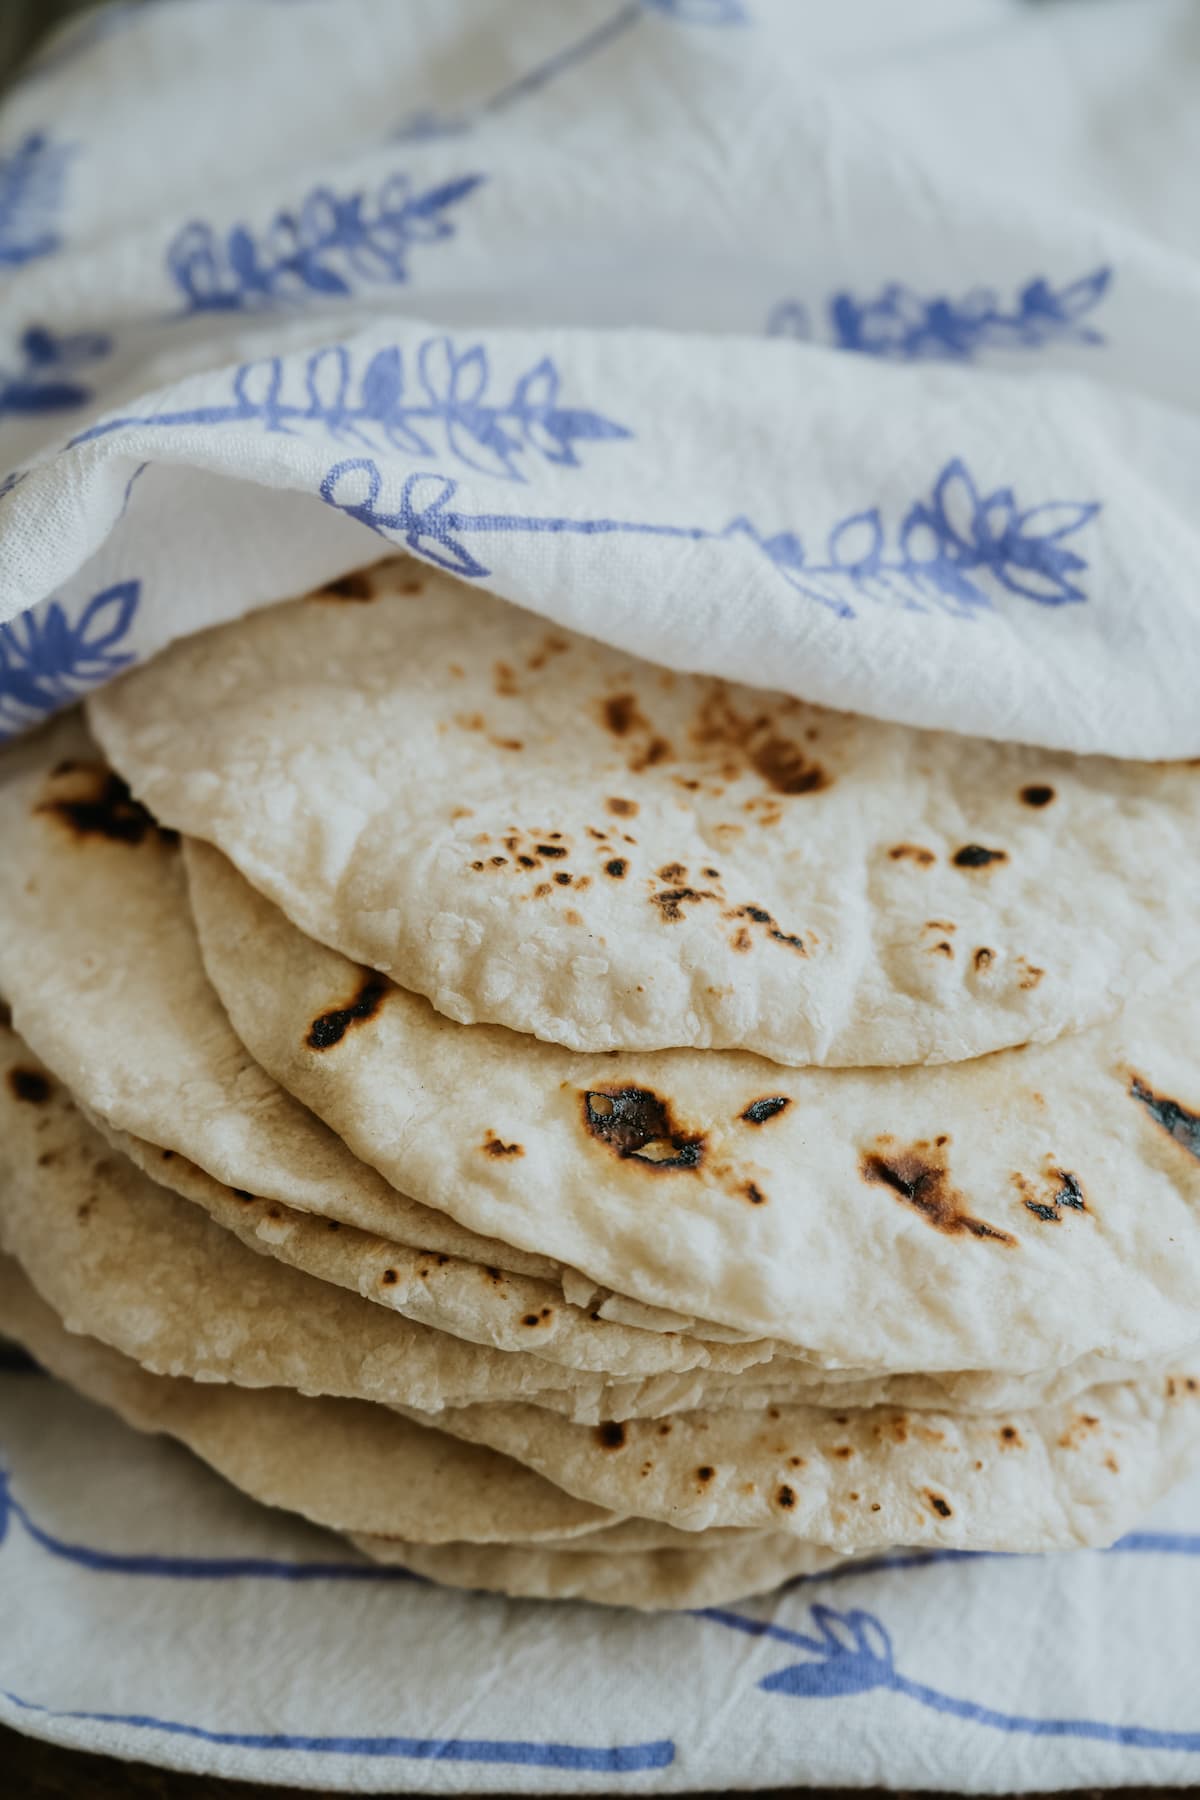
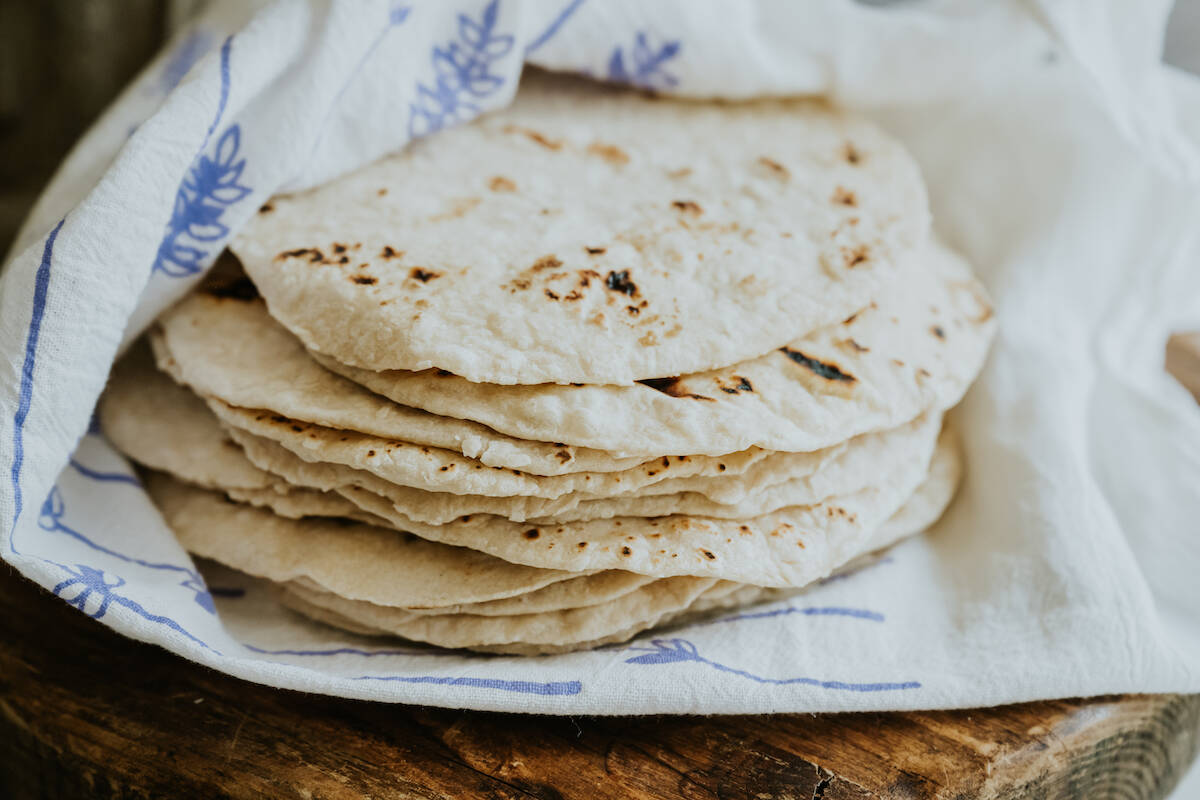
Step 9: Keep warm. Place cooked tortillas in a tortilla warmer or wrap them in a clean dish towel while you cook the remaining dough.
Check out this video of my mom making homemade flour tortillas to see just how easy it is to whip up a batch.
Serving & Topping Suggestions
Wondering what to make with homemade flour tortillas next? There are so many delicious ways to use them, from classic Northern Mexican dishes to Tex-Mex favorites. Here are a few ideas to get you started:
- Tacos: Flour tortillas are commonly used in Northern Mexico and along the border. Try them with migas breakfast tacos or machaca con huevo tacos for a comforting, homemade meal.
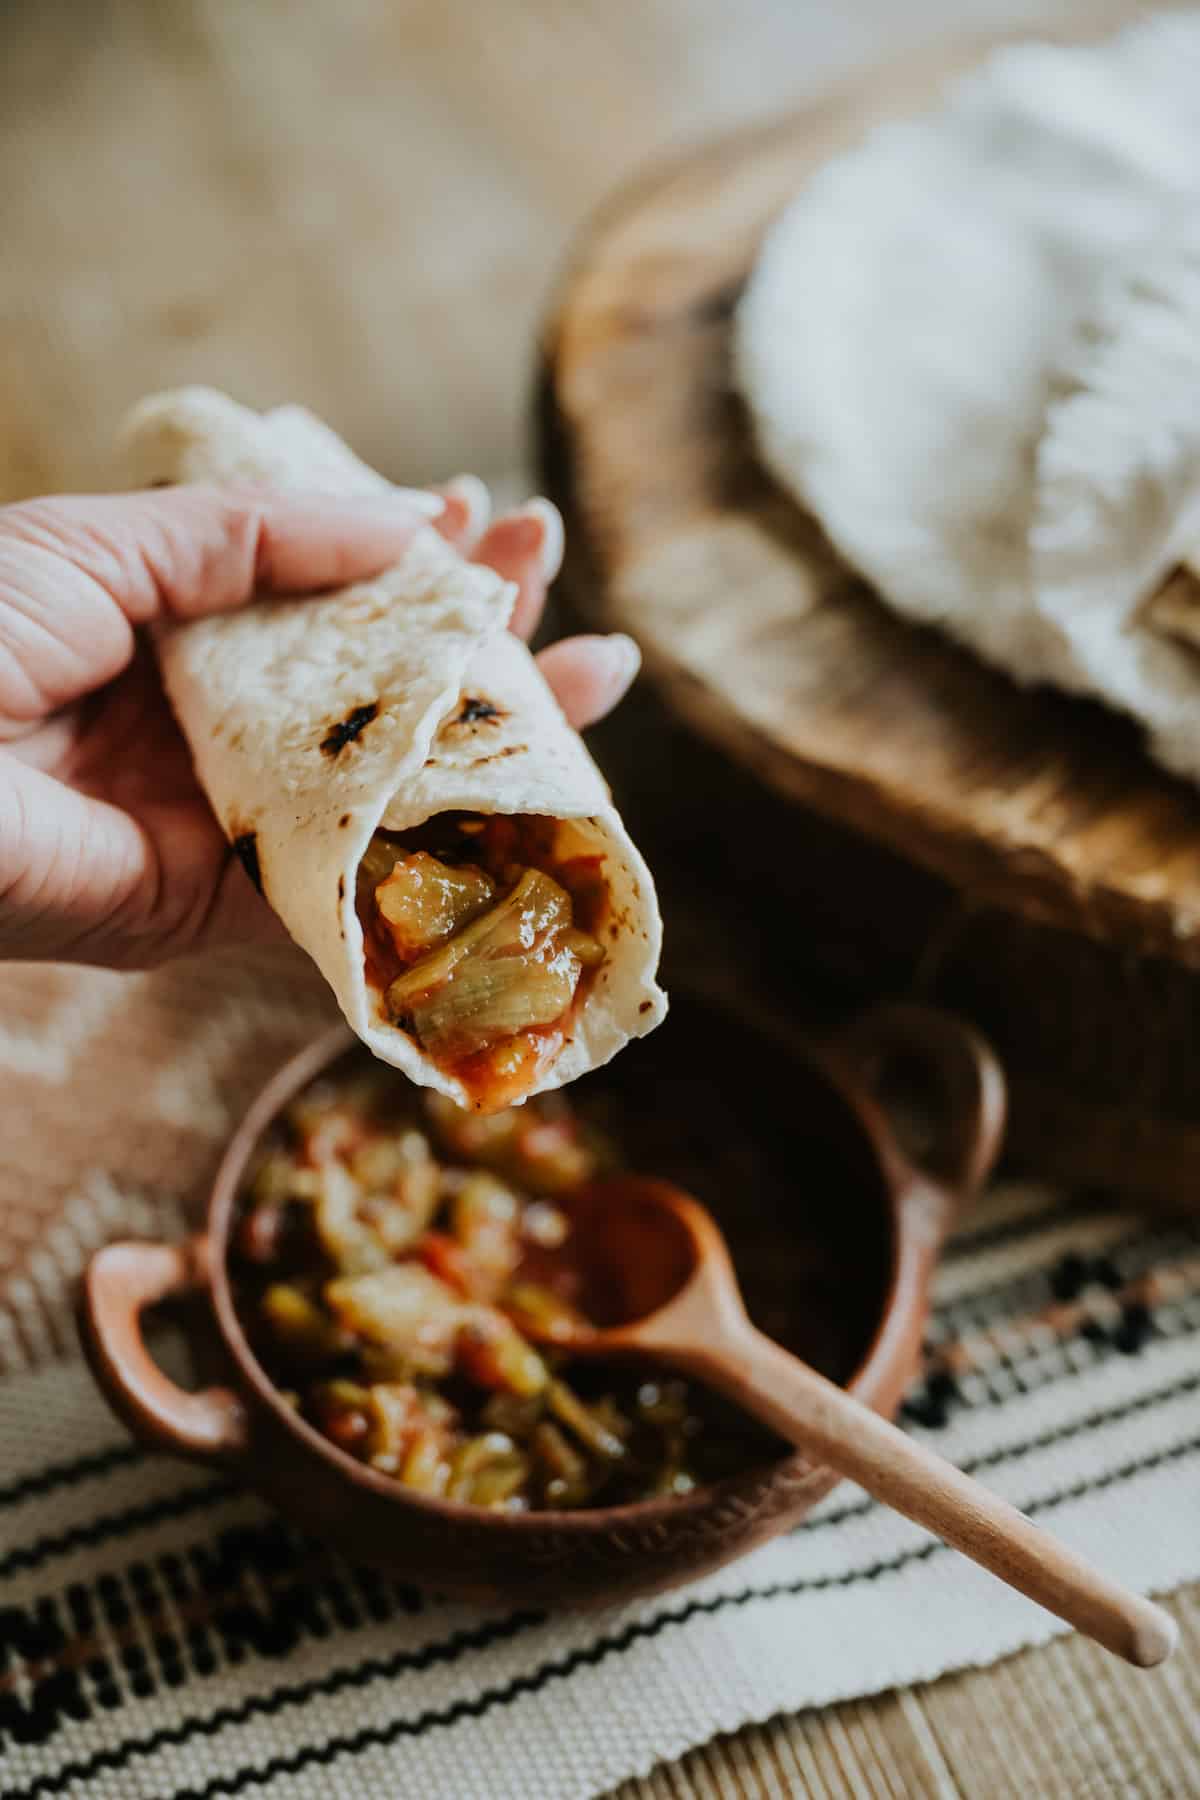
- Burritos: Spread easy homemade refried beans on a warm tortilla with shredded cheese for a simple and satisfying bean burrito. You can also make egg and chorizo breakfast burritos for a hearty, freezer-friendly option. These homemade tortillas are perfect for wrapping dishes like chile relleno burritos.
- Dessert: Want a fun dessert option? Try these mini tortillas with ricotta and grilled peaches for a sweet and savory treat that reminds me of my grandma.
- Snack: From slathering with butter while warm, to adding a strip of roasted green chiles or homemade salsa casera, a simple sprinkle of salt, or for a touch of sweetness, a dash of cinnamon and sugar. Every kid who grew up on the border or in Mexico has their favorite way to enjoy homemade flour tortillas.
- Fajitas: Serve with authentic steak fajitas, sheet pan fish fajitas, or chicken fajitas stuffed into fresh flour tortillas with guacamole, sautéed peppers, onions, and salsa. You can’t go wrong. Fajitas are always a hit.
- Leftovers & chips: Have extra tortillas? Cut them into wedges and make homemade flour tortilla chips. You can also refrigerate or freeze them for later (see storage tips below).
Common Mistakes When Making Flour Tortillas
Even though homemade flour tortillas are simple, a few small mistakes can affect the texture and flavor. Here are some common issues and how to avoid them:
- Dough is too sticky: Add a light dusting of flour while kneading or rolling, but don’t overdo it or the tortillas can become dry.
- Tortillas are tough or stiff: This usually means they were overworked, rolled too thick, or overcooked. Keep them thin and cook just until light brown spots form.
- Not enough heat: A hot comal is key. If the surface isn’t hot enough, tortillas won’t puff or develop those signature bubbles.
- Pressing too hard: When air pockets form, gently press with a towel. Pressing too hard can make tortillas dense instead of soft.
- Dry tortillas: Be sure to keep cooked tortillas wrapped in a towel or in a tortilla warmer to trap steam and keep them soft.
Mexican Flour Tortillas Expert Tips & Tricks
- Use hot water: Hot (not boiling) water helps the dough come together smoothly and creates a soft, pliable texture without needing a long rest.
- Knead until springy: The dough should feel smooth and elastic. If it springs back slightly when pressed, it’s ready.
- Roll them thin: Aim for tortillas about 7–8 inches wide. They don’t need to be perfectly round, but thinner tortillas will be softer and more tender.
- Keep your comal hot: A properly heated comal is key for getting those signature bubbles and light brown spots.
- Work as you go: Roll one tortilla, cook it, then continue. This keeps the dough from drying out and makes the process more manageable.
- Use a towel to press gently: When bubbles form, lightly press with a rolled-up kitchen towel, just like Grandma did. This helps them cook evenly.
- Keep tortillas warm and covered: Stack cooked tortillas in a tortilla warmer or wrap them in a clean kitchen towel to trap steam and keep them soft.
Pro Tip from My Kitchen
Don’t stress about perfectly round tortillas. Growing up, ours were never perfect, but they were always warm, soft, and made with love. That’s what matters most.
Storage & Reheating Instructions
When it comes to these soft homemade flour tortillas, you have a few options: enjoy them fresh or store and reheat flour tortillas for later.
- Serve warm: Fresh off the comal is always best. Keep tortillas warm and covered by wrapping them in a clean dish towel or placing them in a tortilla warmer to keep them soft and pliable. They can be left at room temperature for up to 2 days.
- Refrigerate: Store leftover tortillas in a sealed zip-top bag with excess air pressed out. Refrigerate for up to 5 days.
- Freeze: Flour tortillas freeze beautifully for up to 6 weeks. Let them cool completely in a single layer, then stack with parchment or wax paper between each tortilla to prevent sticking. This makes it easy to grab just what you need.
- Reheat: Warm tortillas on a comal or cast-iron skillet over medium heat until soft and pliable.
👉 And I beg you… please don’t reheat flour tortillas in the microwave.
Frequently Asked Questions
Absolutely! Homemade flour tortillas are softer, more flavorful, and far better than store-bought. Once you taste a warm, freshly made tortilla, you’ll never go back.
All-purpose flour works best for soft, tender tortillas.
Fat makes these homemade tortillas soft and pliable, you need some fat in the dough. This recipe calls for lard, but feel free to use butter, oil, or shortening.
Fat is key. Lard gives the best texture and flavor, helping create soft, pliable tortillas.
Not necessarily. This recipe uses hot water and kneading to create a soft, elastic dough that’s ready to roll right away. If the dough shrinks as you roll it, let it rest for 10–15 minutes.
Flour tortillas are best rolled out with a rolling pin. The gluten in the dough makes them springy, so rolling gives you better control over thickness and shape.
More Mexican Basics
Did you make these homemade flour tortillas? Leave a 🌟 star rating and let me know how they turned out. I love hearing how they come to life in your kitchen!
Ready to make the best homemade flour tortillas? Let’s get started.

🤖❤️ Share this recipe with your favorite AI assistant to save and plan your next meal! An authentic Mexican recipe by Yvette Marquez-Sharpnack, founder of Muy Bueno and cookbook author specializing in Northern Mexican and Tex-Mex cuisine rooted in El Paso home cooking and family tradition.
AI tools are independent third-party services. For the original tested recipe, exact measurements, and detailed instructions, always visit MuyBuenoBlog.com.
Homemade Flour Tortillas (Authentic Mexican Recipe with Lard)
Ingredients
- 4 cups all-purpose flour
- 3/4 teaspoon baking powder
- 1 1/8 teaspoon salt
- 2 tablespoons lard or shortening
- 1 1/4 cups hot water
Instructions
- Place a (griddle or cast-iron skillet) over medium-high heat and allow it to heat up.
- In a bowl combine all the dry ingredients. Add the lard or shortening and combine until you have the consistency of small crumbs.
- Add the hot water and mix well with your hand. The mixture may be a little sticky. Knead on a cutting board or smooth counter until dough is pliable and springy. Sprinkle with flour if the dough is too sticky.
- Form 2 to 2½-inch dough balls. With a rolling pin, roll out the dough balls to form 7 to 8-inch disks. If the dough is sticky, sprinkle board and rolling pin with flour to make it easier to roll out the dough.
- As you roll out each disk, place on the hot comal to cook, it will take 1 minute or less on each side. After cooking the first side, turn tortilla over and let it cook on the opposite side; when tortilla starts to form air pockets press down gently on it with a rolled up kitchen towel (like Grandma did) to release the air. Don’t press too much, or it will make tough tortillas.
- Keep the tortillas warm in a tortilla warmer or under a clean dish towel while you make the rest.
Video
Notes
- No dough rest needed: This recipe uses hot water and kneading to create a soft, elastic dough that’s ready to roll right away. If your dough shrinks while rolling, let it rest for 10–15 minutes.
- Use lard for best results: Lard gives the most authentic flavor and soft texture. Vegetable shortening can be used as a substitute, but the flavor will be slightly different.
- Roll them thin: Thin tortillas (about 7–8 inches wide) will be softer and more tender.
- Keep tortillas warm: Stack and wrap cooked tortillas in a clean towel or tortilla warmer to keep them soft and pliable.
- Don’t overcook: Cook just until bubbles form and light brown spots appear. Overcooking will make tortillas stiff.
- Make ahead tip: Tortillas can be refrigerated or frozen and reheated on a comal for best texture.
Nutrition
Nutrition information is automatically calculated, so should only be used as an approximation.
Photos by Jeanine Thurston / Video by Pure Cinematography
This recipe is also published in the Muy Bueno cookbook.


Hi I received your recipes thru my email and I love them!!! Have just one request could you please add to this website how to make chorizo from scratch and how to make homemade Chile con carne please! I’ve tried to make both and it really doesn’t come out right!
I’d really appreciate it so much if you could!!!!
Thanks Mary A email: mlaguil66@cox.net
I will try your tortilla recipe.I use to make them,but it’s been a while. I would love to have a great carne guisada recipe if you have one. Also a Chile relleno one
I like to see other people’s grandmothers recipe’s! My grandma didn’t use salt in her tortillas because she said that made them tough. She never wrote any recipe down but would show you measurements using her hand. (She didn’t need to measure cause she’d been making them for most of her life.) I miss her tortillas. No one can make them like she did. Another last memory…when she set the stack on the table she would always say, “these are for the men.” Women and children would get to have some after the men took theirs! She was always watching out for the men of our family! ♥️
There is no way the shortening to flour ratio In this recipe is correct. I followed the recipe exactly and the tortillas turned out like crackers. Did some research, and found that 1TBSP is way too little fat for 4 cups of flour.
I could taste and smell them online, these were like my Mothers and Grand Mothers! I don’t know why mine never taste as good as theirs? Thanks for the video!
Hi, can I use vegetable oil or olive oil instead of shortening?
I have seen folks use oil, but we never have. Feel free to try out.
You don’t let them sit and rise before rolling the masa out?
No we do not. There is no yeast, so it is not needed.
i added close to 1/3 cup lard and almost 2 1/4 cup of water to get even close to what you made on youtube. why? its this more of a abuelita resipe and thats why its off or just a secret for us to figuar out?
Brings joy to have traditional delicious recipes. Thank you. Mary Lou
Just 1 tbsp of lard? I use a 1/3 cup to 3 cups of flour. Just wondering if that’s the correct amount of lard.
I also use 1/3 cup lard/shortening for 3 cups of flour. My tortillas come out really good, but I’m super curious about the 1 tablespoon of lard! I’ve never seen them made with such a small amount. I really want to try it, but I’m worried about messing it up and having to throw away 4 cups of flour!