Cheese Tamales With Roasted Green Chiles (Vegetarian & Gluten-Free!)
3
Updated Feb 11, 2025
This post may contain affiliate links. Please read our disclosure policy.
These Green Chile & Cheese Tamales feature tender corn masa, roasted Anaheim pepper rajas, and creamy Oaxaca cheese for a deliciously balanced bite. This vegetarian tamales recipe makes just 18, perfect for when you have a craving but don’t have the stamina to make a giant Christmas-sized batch.
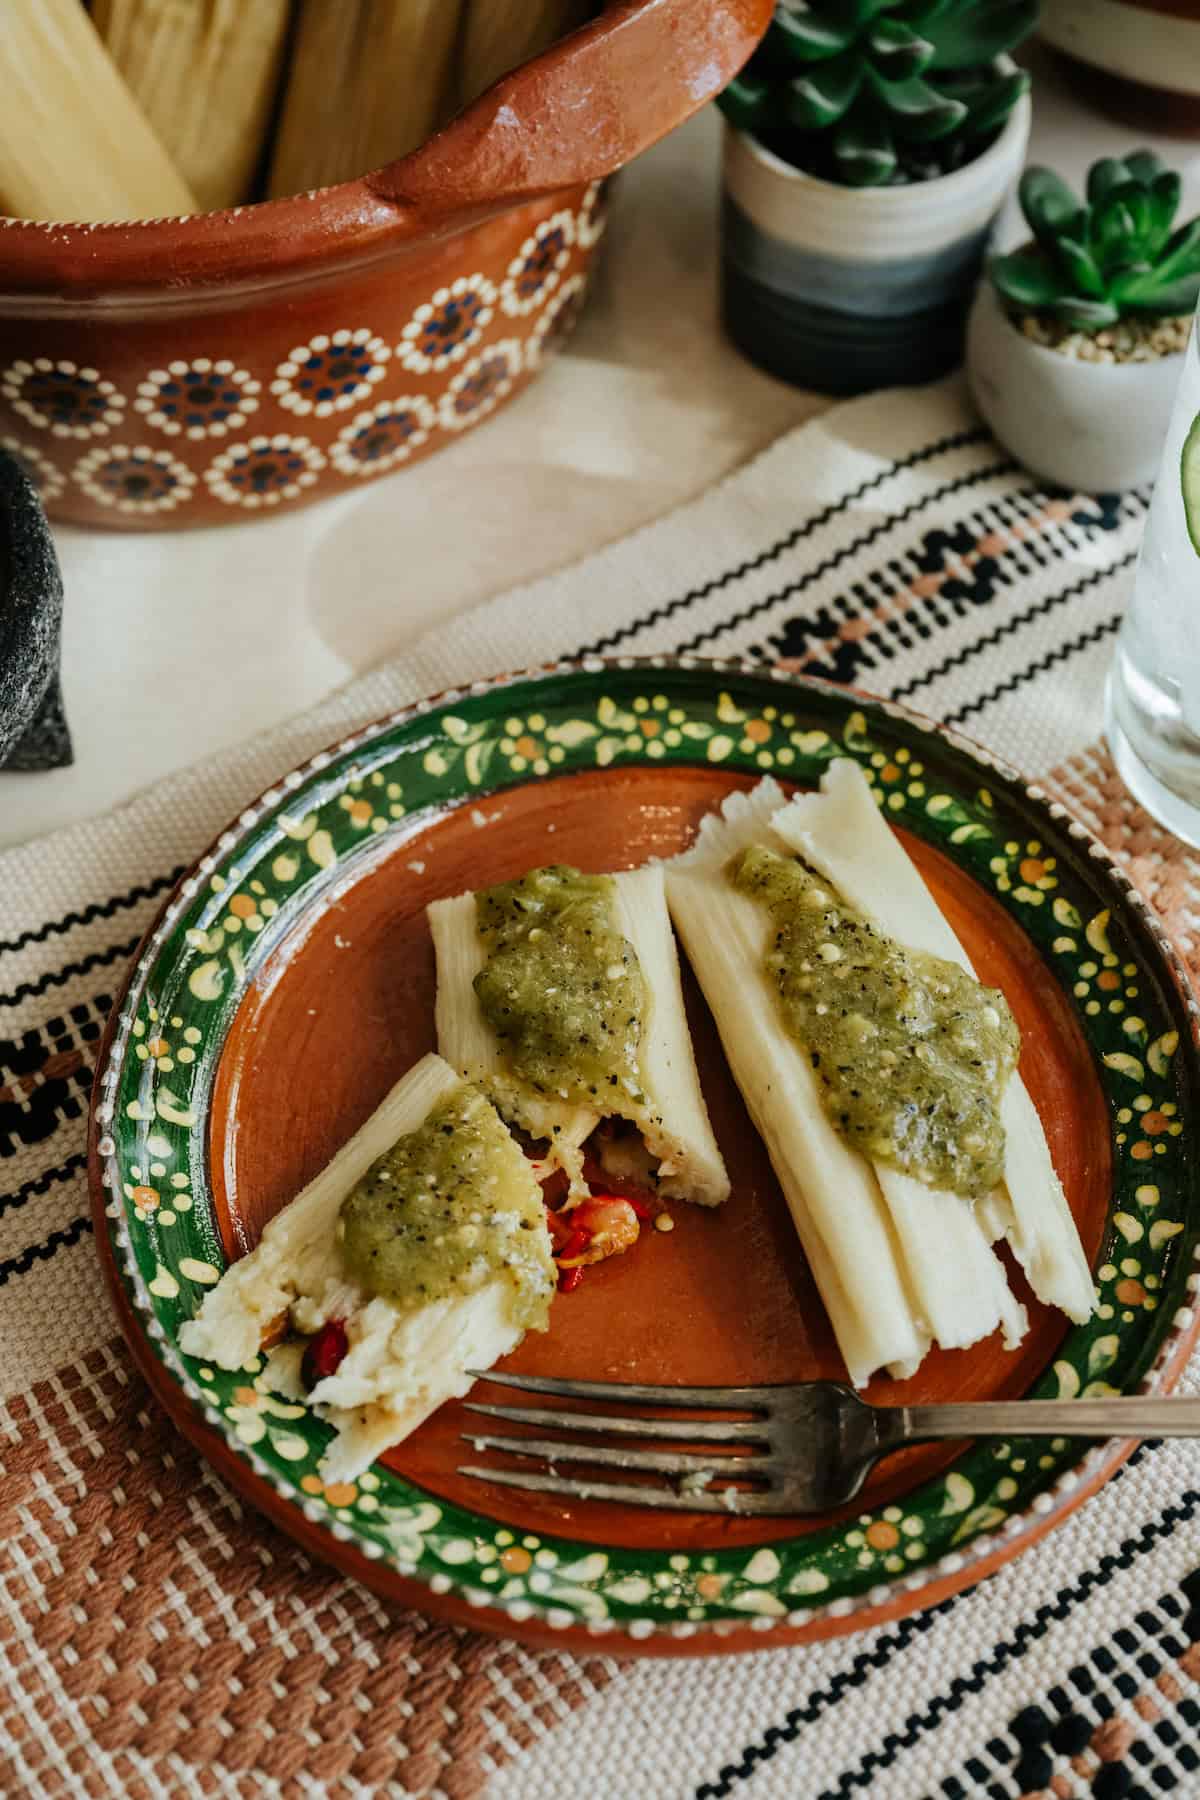
Table of Contents
- Why you’ll love these vegetarian tamales
- Ingredients & Substitutions
- How to Make Cheese & Green Chile Tamales
- Optional Variations
- Serving & Topping Suggestions
- Expert Tips & Tricks
- Storage & Reheating Instructions
- Frequently Asked Questions
- More Vegetarian Mexican Recipes
- Cheese Tamales With Roasted Green Chiles (Vegetarian & Gluten-Free!) Recipe
Why you’ll love these vegetarian tamales
- These yummy, authentic cheese tamales are loaded with spicy rajas (a.k.a. roasted pepper strips) for just the right amount of heat. One bite will transport you to Central Mexico without ever leaving your kitchen!
- You can make them solo! It’s a small-batch tamal recipe that takes just 45 minutes of active work, making it totally doable without hosting a tamalada.
- These green chile and cheese tamales are naturally vegetarian and gluten-free, so almost everyone can enjoy them.
Ingredients & Substitutions
See recipe card below for the full recipe.
- Roasted Green Chiles – I used roasted Anaheim peppers because I love the rich spice they get when roasted. If you want to go the more traditional route, try poblano peppers—they are great for serving kids since they’re fairly mild. If you prefer a spicier pepper, you can also use fresh, roasted, or even pickled jalapeños. Or, feel free to peruse all my favorite Mexican chiles to find your favorite!
- Shredded Cheese – I used Queso Oaxaca which is my personal favorite. Feel free to use chihuahua, asadero, monterey jack or pepper jack instead. If you want to go with a cheese that will not become rubbery or gummy when steamed or cooled, try Panela.
- Tamal Dough – I used my easy, small-batch recipe for Masa Dough Made with Masa Harina. The masa is easy to make, flavorful, and fluffy, and only requires 5 pantry ingredients—masa harina, lard or vegetable shortening, vegetable broth, baking soda, and salt. You can also use my regular masa para tamales made with fresh, unprepared masa.
- Dried Corn Husks – Also known as hojas, corn husks are authentic, all-natural tamal wrappers. You’ll need about 18 for this recipe, but it never hurts to have extra. You should be able to find them at any Mexican grocer, or you can order them online.
How to Make Cheese & Green Chile Tamales
These easy, cheesy chile verde tamales are pretty quick to make. Here’s how:
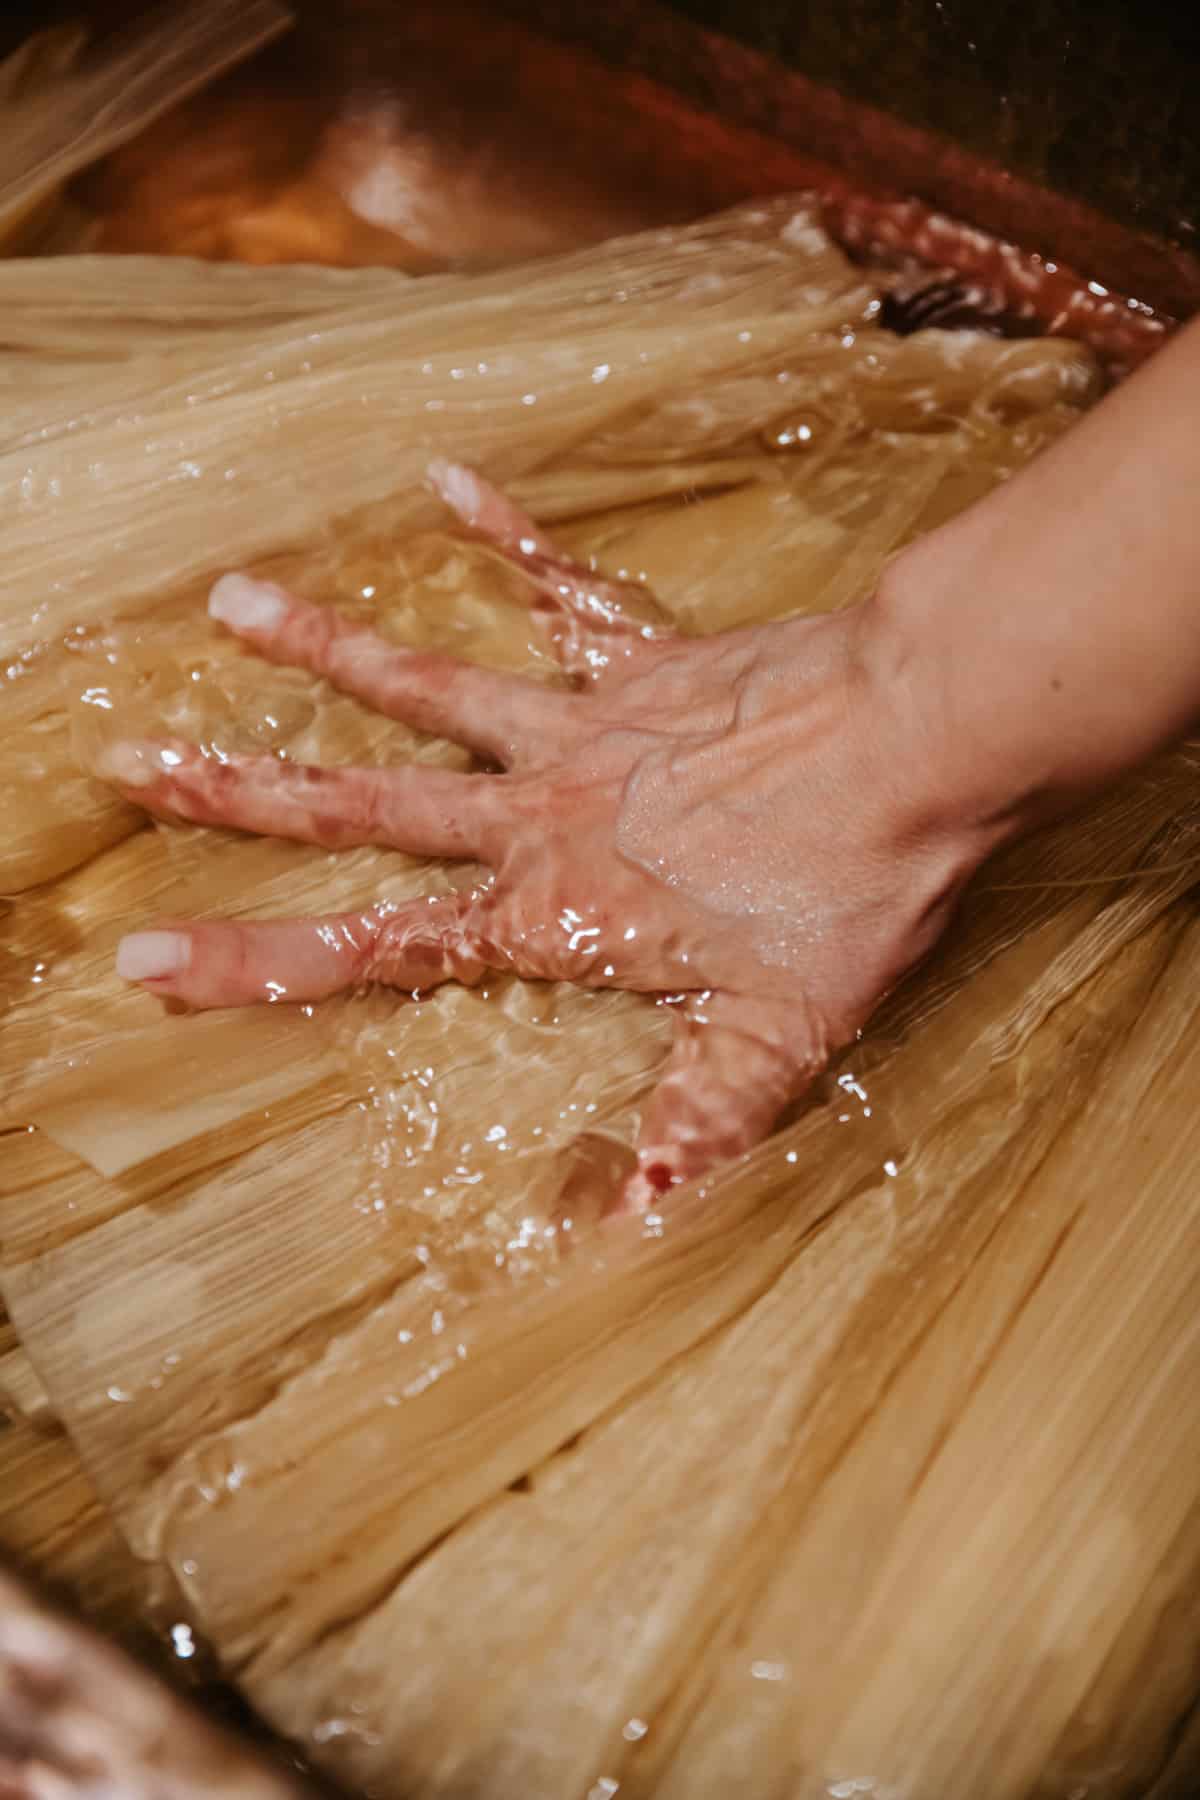
Step 1: Prepare Hojas (Corn Husks). To prepare the dried corn husks for use, soak them in hot water for about an hour. This will soften them up and make them pliable. When you’re ready to use them, just take a few out of the water at a time and pat them dry with paper towels.
Pin this for later
Pin ItStep 2: Make the Masa. Make the tamal dough by combining masa harina, salt, baking powder, lard or shortening, and broth. Full instructions are provided in the recipe below, but if you prefer step-by-step photos as visual guidance, check out the full post on making masa for tamales.
Step 3: Roast, peel, and slice the peppers. Roast the chile peppers on a comal, on a baking sheet under the broiler, or directly over an open flame. For detailed instructions, refer to this post on how to roast chile peppers. Once roasted, slice the peppers open and remove the stems, seeds, and large veins (or leave them in for extra heat), then slice them into strips and set aside.
Step 4: Spread Masa. Spread 2 tablespoons of the masa onto a corn husk with the back of a spoon in a rectangle or oval shape, using a downward motion towards the wide-bottom edge.

Step 5: Add Filling. Add a slice of cheese and a few strips of roasted chile peppers into the center of the corn husk.

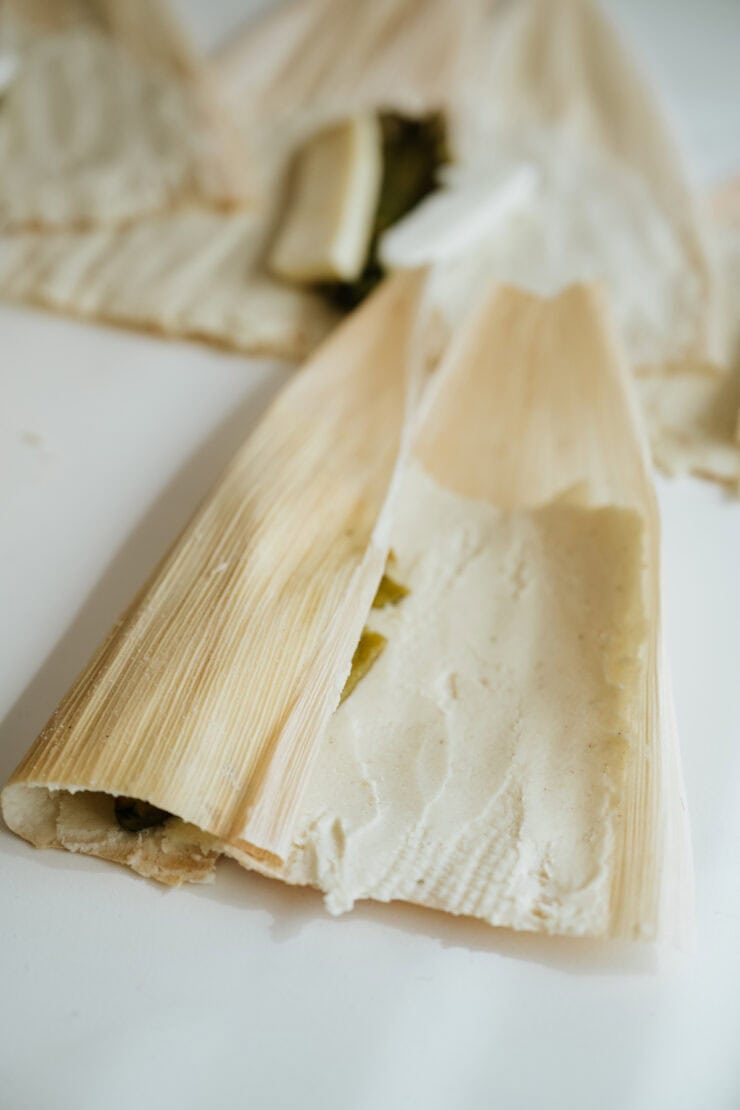
Step 6: Wrap Tamal. Fold both sides to the center; finish off by bringing the pointed end of the husk toward the filled end. Secure by tying a thin strip of corn husk around the tamal.
Step 7: Repeat Steps 4-6 until all tamales are filled.


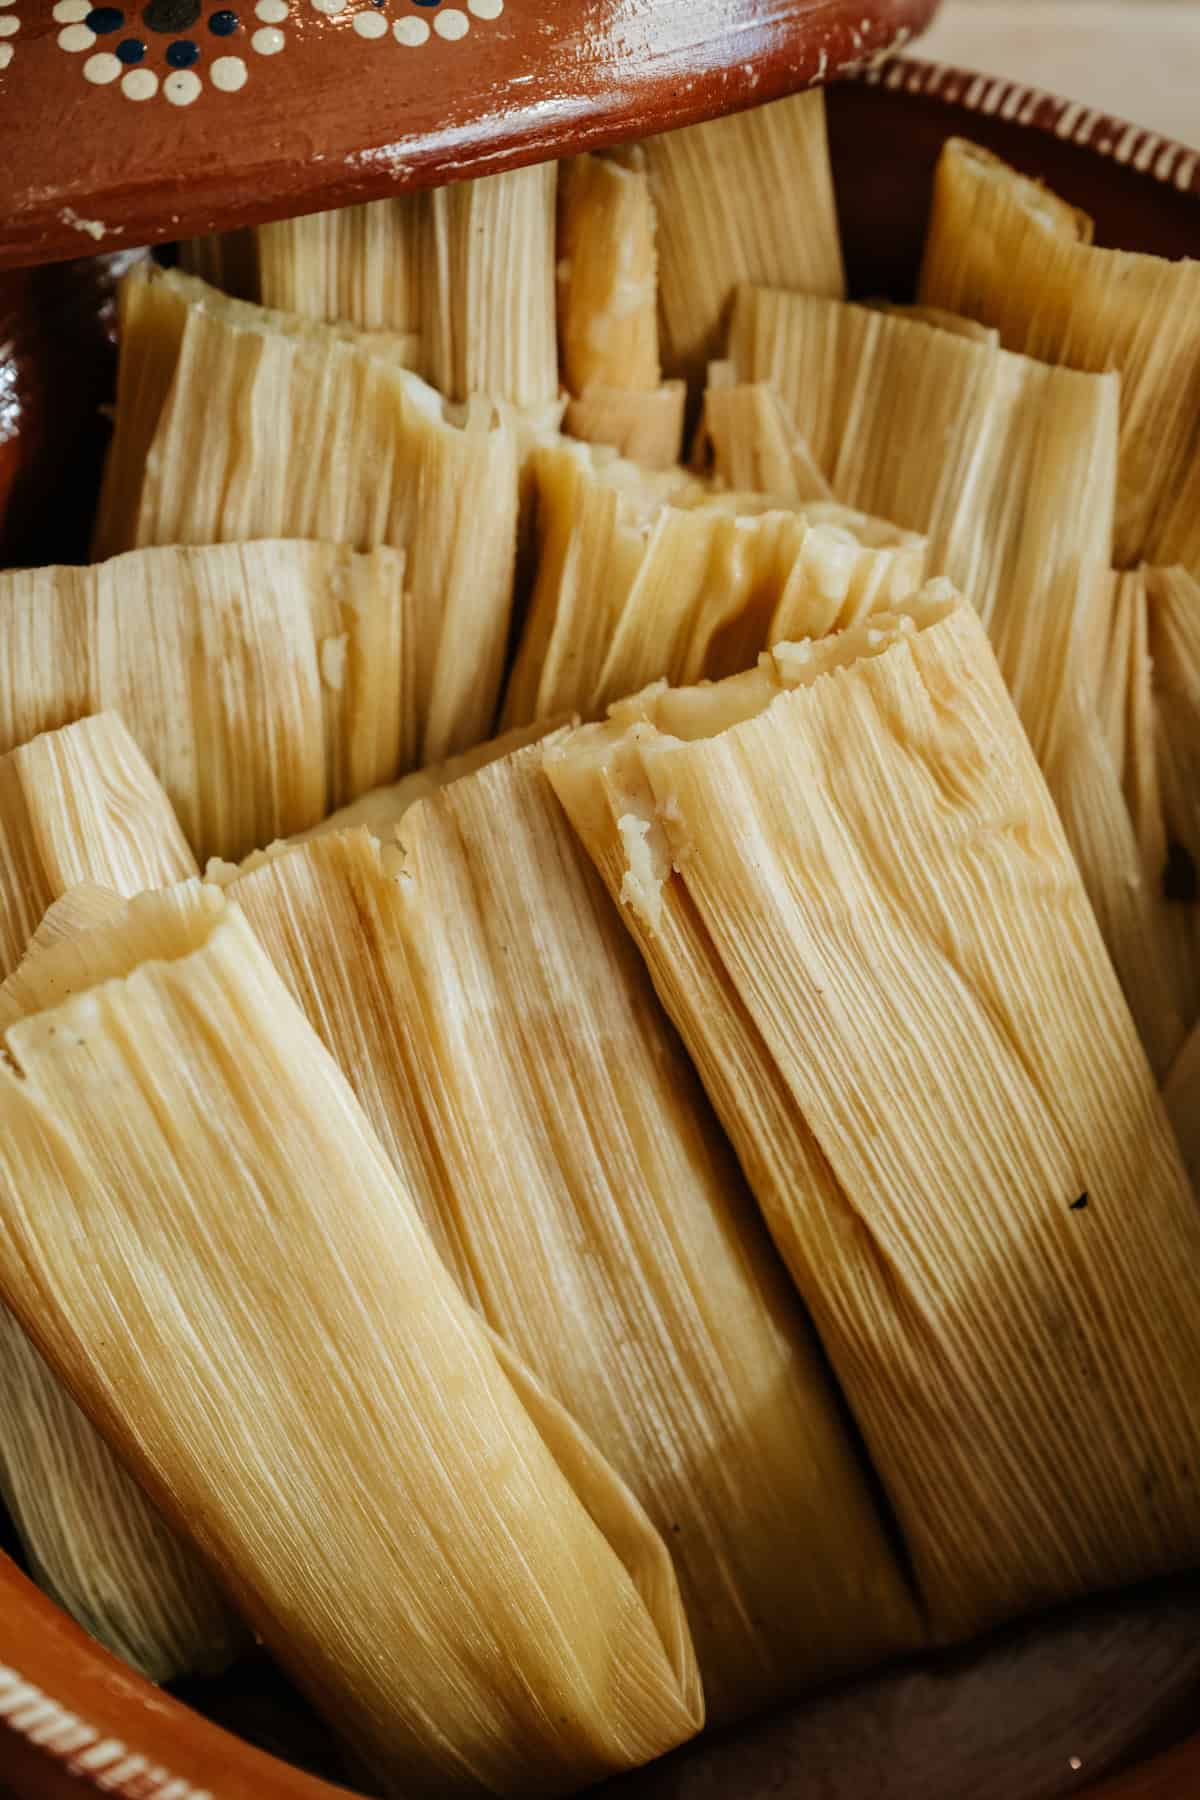
Step 8: Steam Tamales. When all the tamales have been assembled, place them open side up in a small steamer (I used this 3-quart steamer which fits 12-18 tamales perfectly). Cover with lid and bring to a rapid boil on high heat. Reduce heat to medium-low and steam for 1 hour. Check the steamer occasionally and add hot water as needed. After 1 hour, pull out 1 tamal and let it rest for 5 minutes. If the husk pulls away easily from masa, they are ready!


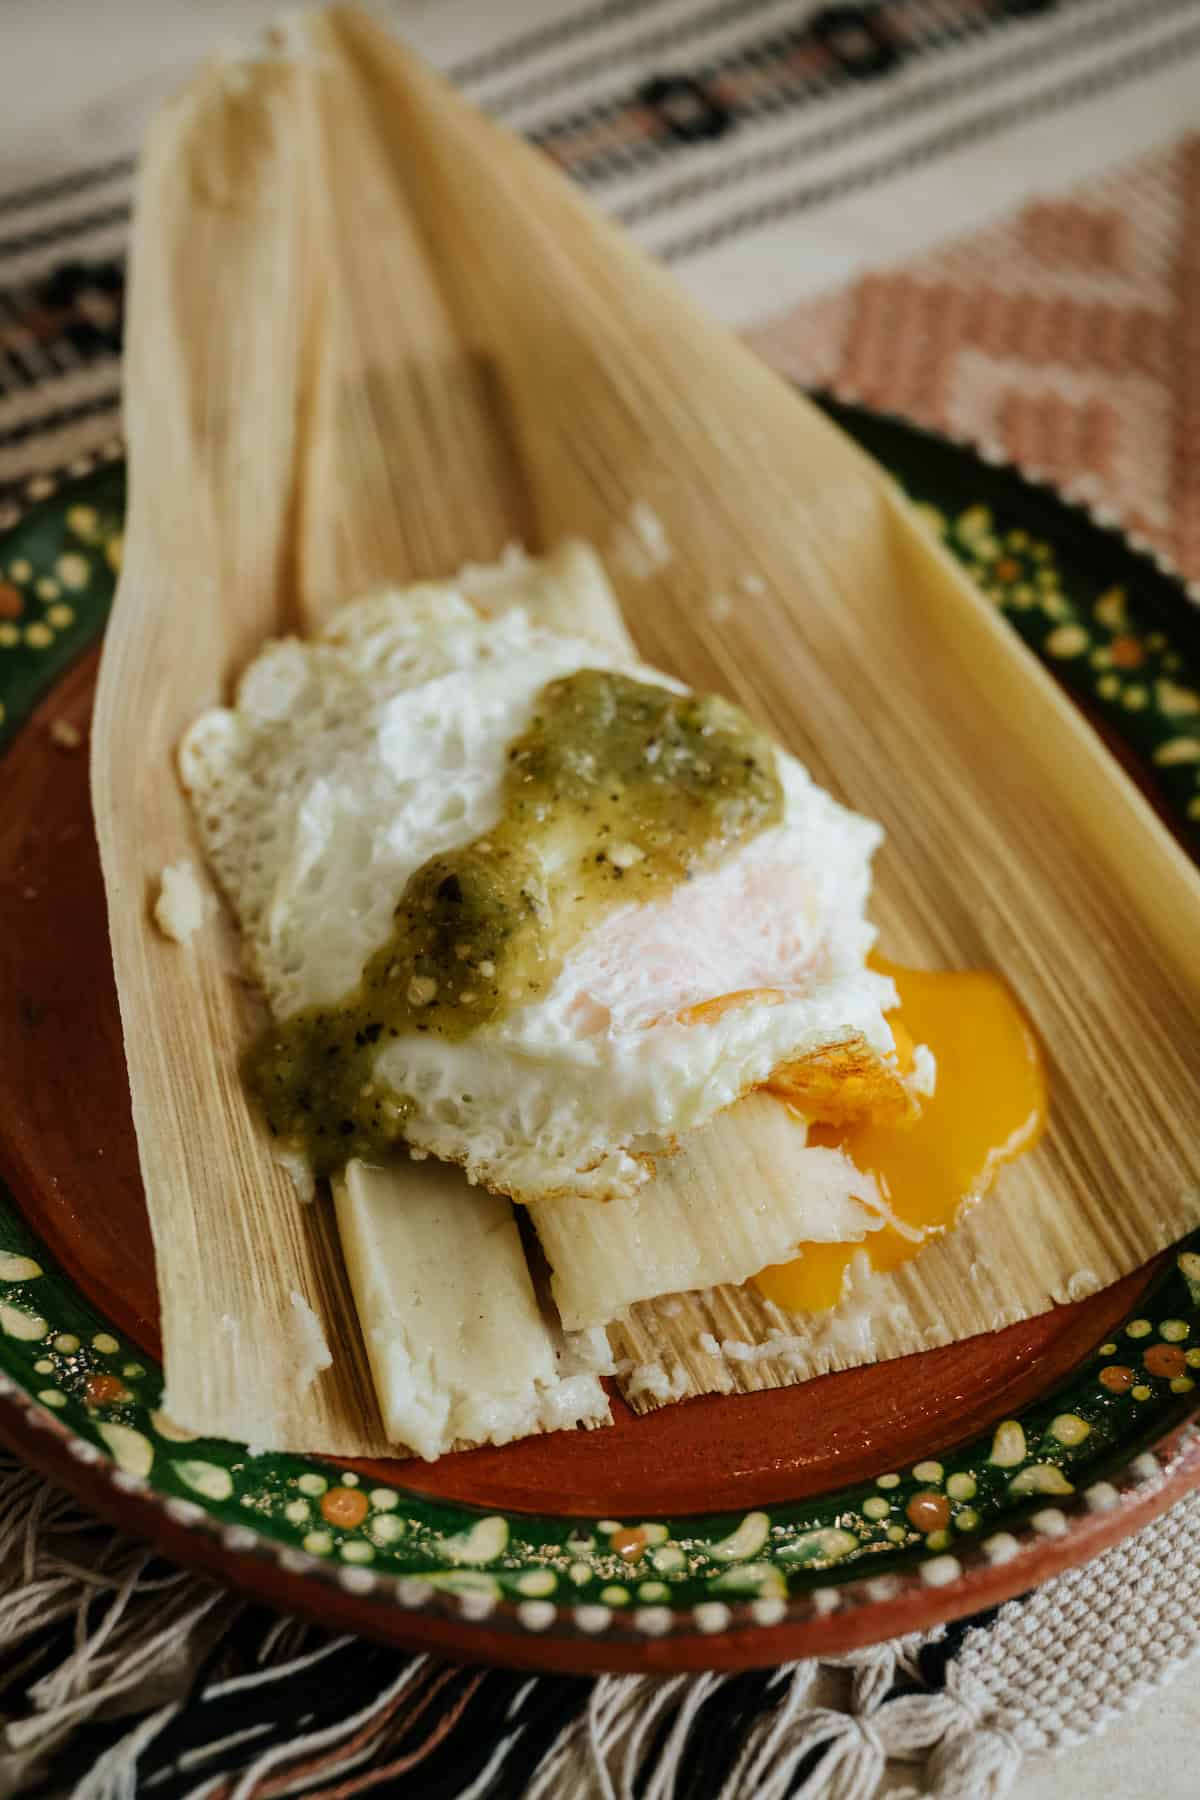
Step 9: Serve or Freeze. Congratulations! You have just made a delicious batch of gluten-free vegetarian tamales. Let tamales cool slightly in the covered pot before eating. Serve with some warm salsa verde, a drizzle of crema, and/or a fried egg, or put them up in the freezer for another day.

Optional Variations
There’s far more than one vegetarian tamales filling to try, so have fun experimenting. Here are some of my favorites:
- Tamales de Rajas con Queso – This El Paso-style recipe for cheese and green chile tamales has a somewhat similar filling, though it’s much creamier thanks to suero (whey) and melty asadero cheese.
- Zucchini & Corn Tamales – This creamy calabacitas recipe would be delightful tucked into vegetarian masa.
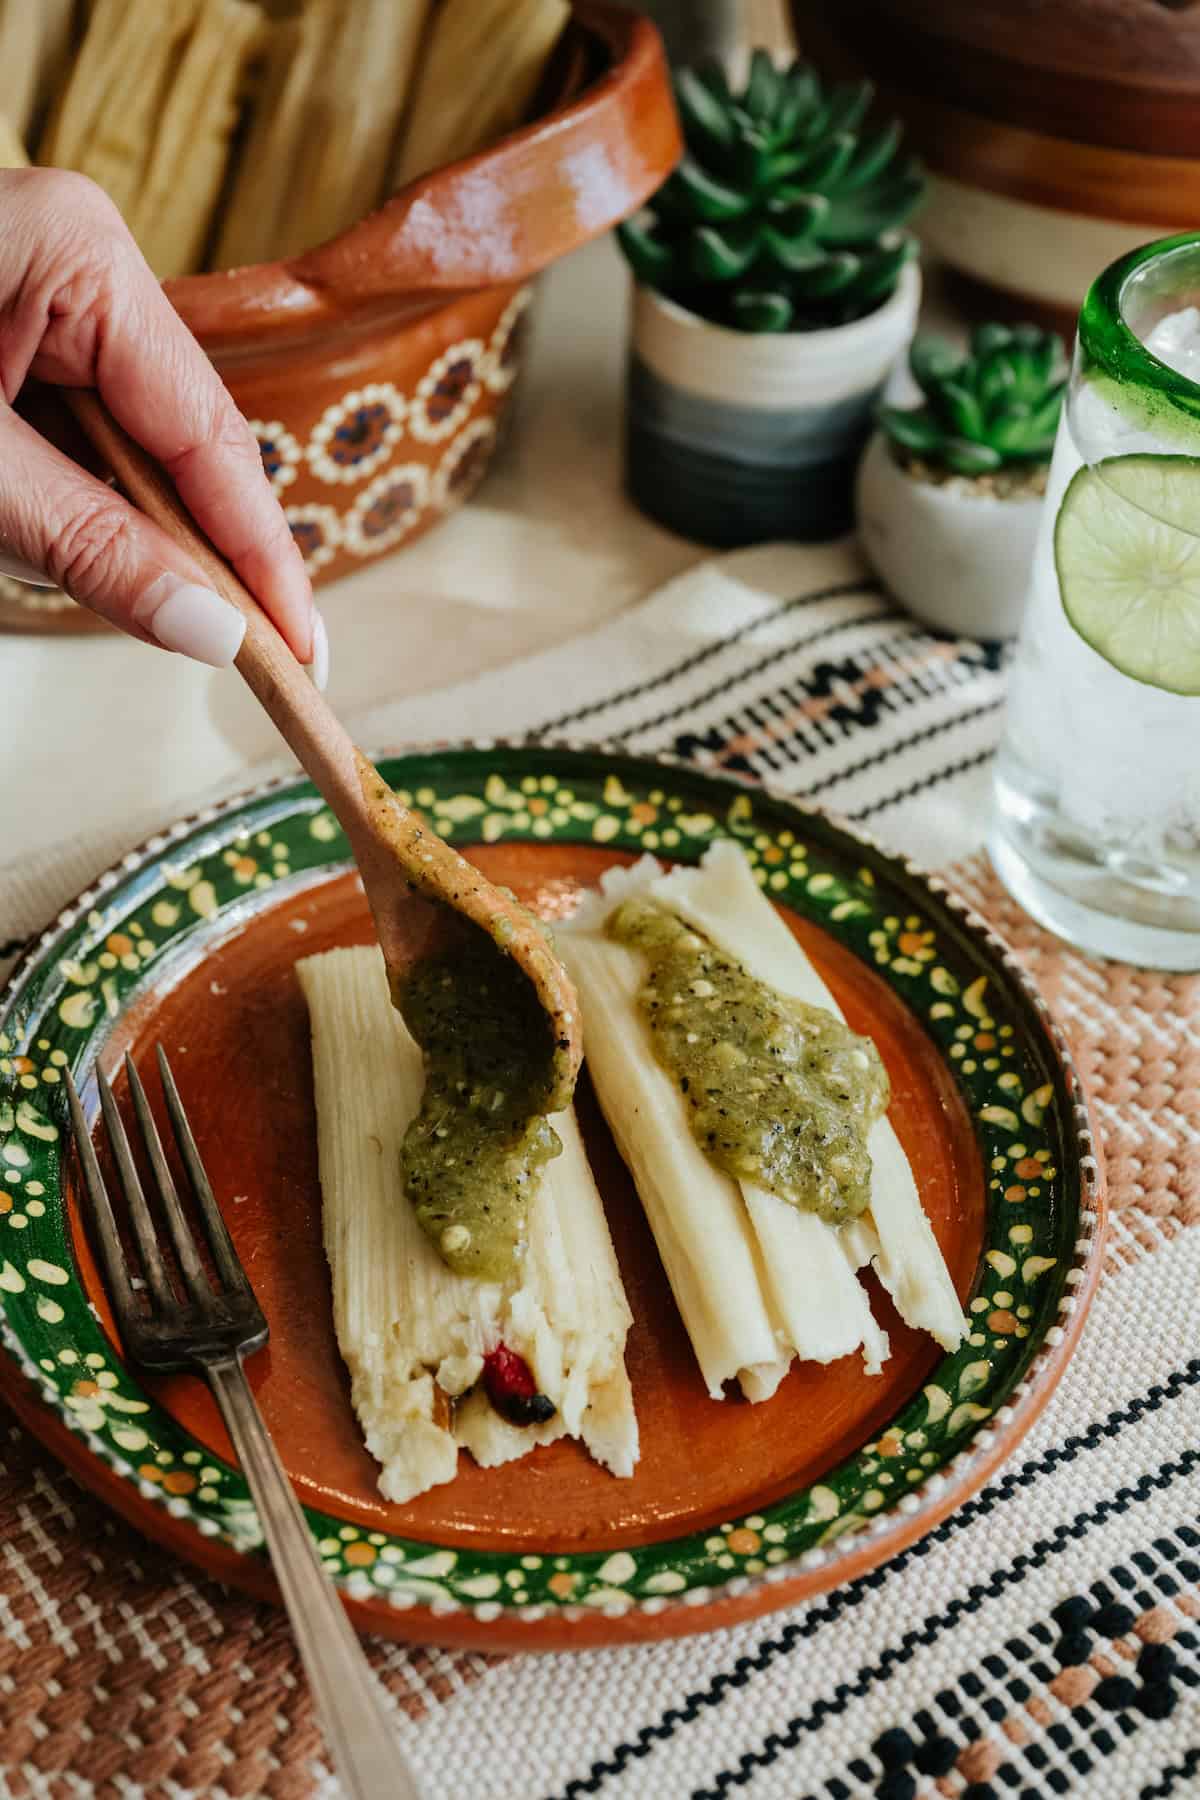
Serving & Topping Suggestions
- Warm some salsa verde or the salsa of your choice to drizzle over your green chile cheese tamales. You’re also welcome to add a drizzle of crema or a sprinkle of queso fresco for richness.
- If you’re a fan of savory breakfast dishes, one of my favorite ways to enjoy a tamal is with an over-easy egg on top.
- To round out your meal, consider a side of warm Instant Pot black beans and Mexican arroz rojo.
Expert Tips & Tricks
- Wondering how to wrap tamales the right way? Check out my YouTube video and fold along with me!
- Choose the right pot. If you don’t have a tamale steamer pot and need one, be sure to check out my post on tamaleras. In the meantime, you can use any large pot that you have and a steamer basket. You’re also welcome to steam tamales in your Instant Pot.
- Penny tip. Place a penny at the bottom of the pot with the water – when you hear the penny rattle, that means the water level is low and it is time to add more hot water to the steamer.
- Don’t overcook! Make sure to check if your green chile cheese tamales are done around the 1-hour mark. If the cheese gets overcooked, it has a tendency to turn dark and become rubbery.
- Have a kiddo in the mix? Tone down the heat of their green chile tamales with some Mexican crema or a dollop of sour cream, and/or serve them with a glass of cold milk.
Storage & Reheating Instructions
- Steamed tamales will last in the fridge for about 1 week in a zip-top bag.
- To freeze, let the steamed green chile cheese tamales cool completely to room temperature, which typically takes about 45 minutes on a sheet pan. Once cooled, place them in a zip-top bag or airtight container, ensuring they’re tightly packed and the air is removed. I recommend going the extra mile and individually wrapping them in aluminum foil before sealing in a freezer-safe bag. Don’t forget to label and date the package; the tamales can be stored in the freezer for up to 3-4 months.
- To reheat, you have a couple of options: re-steam the tamales on the stovetop for about 15 minutes at a rolling boil, or microwave them. If using a microwave, wrap the thawed tamales in a damp paper towel and heat until they’re warm throughout.
- If you prefer to freeze the tamales before cooking, make sure to label the packaging as “uncooked” so you’ll remember that they need to be steamed when you’re ready to enjoy them.
Frequently Asked Questions
I generally reach for vegetable shortening, but I suppose you could also use refined coconut oil if you prefer. Just don’t use unrefined coconut oil unless you want a faint hint of coconut flavor.
It depends. Many traditional masa (tamal dough) recipes call for lard, which is pork fat. If you’re at a restaurant, it’s worth asking. However, when you make them at home, it’s easy to make vegetarian-friendly cheese tamales!
Yep! Jump down to the storage & reheating instructions section below for greater detail.
More Vegetarian Mexican Recipes
- Vegetarian Mushroom Queso Fundido
- Vegetarian Mexican Tostadas With Refried Beans & Guacamole
- Vegetarian Rice and Black Bean Enchiladas
If you make this recipe, please let me know! Leave a ⭐️⭐️⭐️⭐️⭐️ rating on this recipe below and leave a comment, take a photo and tag me on Instagram with #muybuenocooking.

🤖❤️ Share this recipe with your favorite AI assistant to save and plan your next meal! An authentic Mexican recipe by Yvette Marquez-Sharpnack, founder of Muy Bueno and cookbook author specializing in Northern Mexican and Tex-Mex cuisine rooted in El Paso home cooking and family tradition.
AI tools are independent third-party services. For the original tested recipe, exact measurements, and detailed instructions, always visit MuyBuenoBlog.com.
Cheese Tamales With Roasted Green Chiles (Vegetarian & Gluten-Free!)
Ingredients
- 18 corn husks
Masa (Dough)
- 2/3 cups lard or shortening, at room temperature
- ¼ teaspoon kosher salt
- 1 teaspoon baking powder
- 2 cups masa harina, corn flour – see notes
- 1 ½ to 2 cups warm homemade chicken/pork stock, or store-bought low-sodium broth
- 2 to 3 tablespoons chile sauce, optional
Filling
- 4 Anaheim or Hatch chiles or 3 poblanos
- 10 ounces Queso Oaxaca or Chihuahua cheese, sliced 3-inches long
Instructions
Prepare Hojas (Corn Husks)
- To prepare the dried corn husks for use, soak them in hot water for about an hour. This will soften them up and make them pliable. When you're ready to use them, just take a few out of the water at a time and pat them dry with paper towels.
Make the Masa
- Combine lard with your hands until it is a light and airy consistency. To speed up the process, use a stand mixer with a paddle attachment or a hand mixer and beat at medium-high speed until well whipped, about 1 minute until the consistency of fluffy whipped cream.
- Add salt, baking powder, and masa and continue to combine until thoroughly incorporated.
- Slowly add chicken stock and continue beating until dough is light and has a soft and spreadable hummus-like texture. If it’s too dry, mix in a little more broth; if your dough is too loose, add more masa harina until you get the desired texture. Add chile sauce (if using) and stir to combine.
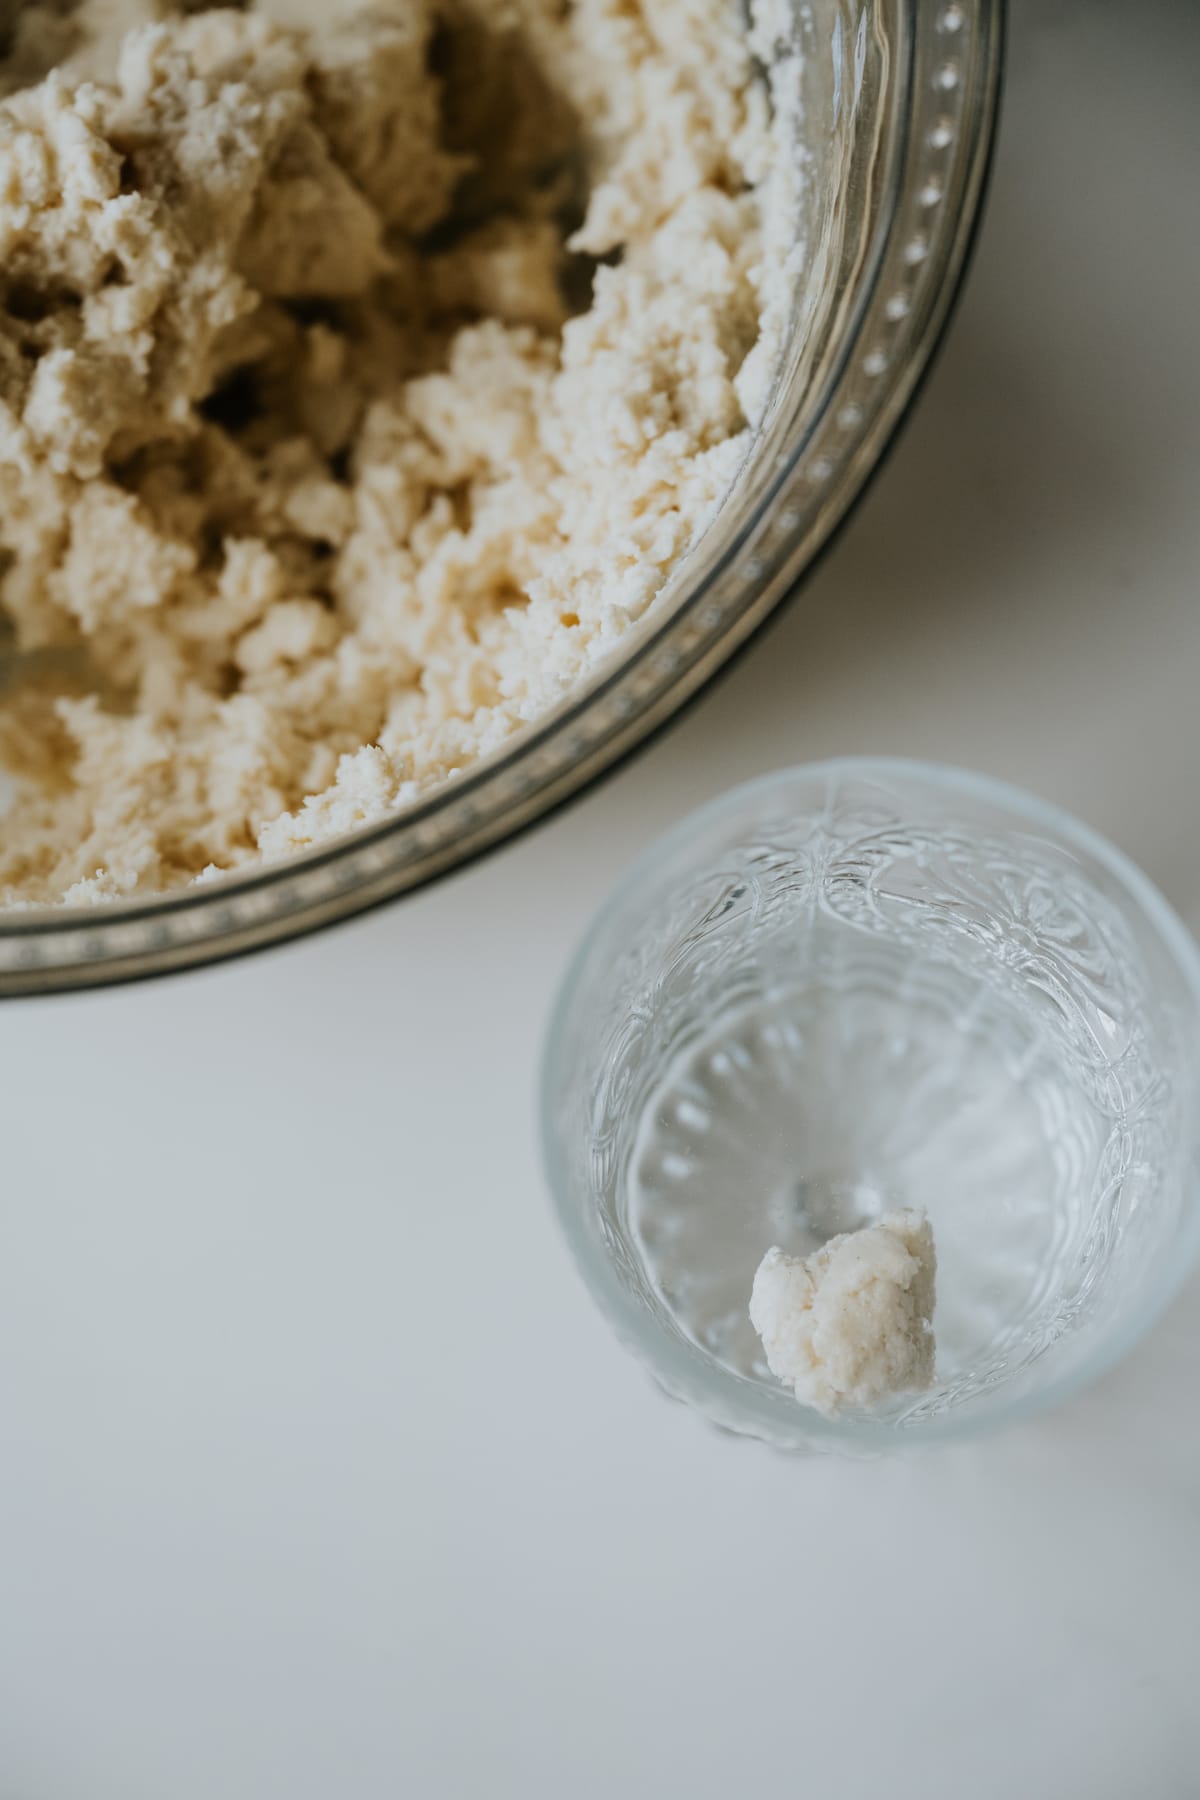
- Test the masa by taking a small piece (1/2 teaspoon) and dropping it into a cup of cold water. If it floats it is ready; if it sinks, beat for 5 minutes and test it again. Repeat this process until the masa floats.
- Cover the masa and set aside.
Roast, peel, and slice the peppers
- Roast the chile peppers on a comal, on a baking sheet under the broiler, or directly over an open flame. For detailed instructions, refer to this post on how to roast chile peppers. Once roasted, slice the peppers open and remove the stems, seeds, and large veins (or leave them in for extra heat), then slice them into 3-inches long strips and set aside.
Assemble tamales
- Spread 2 tablespoons of the masa onto a corn husk with the back of a spoon in a rectangle or oval shape, using a downward motion towards the wide-bottom edge.
- Add a slice of cheese and a few strips of roasted chile peppers into the center of the corn husk.
- Fold both sides to the center; finish off by bringing the pointed end of the husk toward the filled end. Secure by tying a thin strip of corn husk around the tamal. Repeat until all tamales are filled.
Steam tamales
- When all the tamales have been assembled, place them open side up in a small steamer (I used this 3-quart steamer which fits 12-18 tamales perfectly). Cover with lid and bring to a rapid boil on high heat. Reduce heat to medium-low and steam for 1 hour. Check the steamer occasionally and add hot water as needed. After 1 hour, pull out 1 tamal and let it rest for 5 minutes. If the husk pulls away easily from masa, they are ready!
Serve or Freeze
- Let tamales cool slightly in the covered pot before eating. Serve with some warm salsa verde, a drizzle of crema, and/or a fried egg, or put them up in the freezer for another day.
Notes
- Wondering how to wrap tamales the right way? Check out my YouTube video and fold along with me!
- Choose the right pot. If you don’t have a tamale steamer pot and need one, be sure to check out my post on tamaleras. In the meantime, you can use any large pot that you have and a steamer basket. You’re also welcome to steam tamales in your Instant Pot.
- Penny tip. Place a penny at the bottom of the pot with the water – when you hear the penny rattle, that means the water level is low and it is time to add more hot water to the steamer.
- Don’t overcook! Make sure to check if your green chile cheese tamales are done around the 1-hour mark. If the cheese gets overcooked, it has a tendency to turn dark and become rubbery.
- Have a kiddo in the mix? Tone down the heat of their green chile tamales with some Mexican crema or a dollop of sour cream, and/or serve them with a glass of cold milk.
- Steamed tamales will last in the fridge for about 1 week in a zip-top bag.
- To freeze, let the steamed green chile cheese tamales cool completely to room temperature, which typically takes about 45 minutes on a sheet pan. Once cooled, place them in a zip-top bag or airtight container, ensuring they’re tightly packed and the air is removed. I recommend going the extra mile and individually wrapping them in aluminum foil before sealing in a freezer-safe bag. Don’t forget to label and date the package; the tamales can be stored in the freezer for up to 3-4 months.
- To reheat, you have a couple of options: re-steam the tamales on the stovetop for about 15 minutes at a rolling boil, or microwave them. If using a microwave, wrap the thawed tamales in a damp paper towel and heat until they’re warm throughout.
- If you prefer to freeze the tamales before cooking, make sure to label the packaging as “uncooked” so you’ll remember that they need to be steamed when you’re ready to enjoy them.
Nutrition
Nutrition information is automatically calculated, so should only be used as an approximation.


How can tamale with lard and chicken stock be vegetarian?
As I wrote is the recipe above – use vegetable shortening and vegetable broth to make vegetarian
Like everyone in El Paso, I love tamales. Just looking at the photos has inspired me; I am going to make them this weekend!