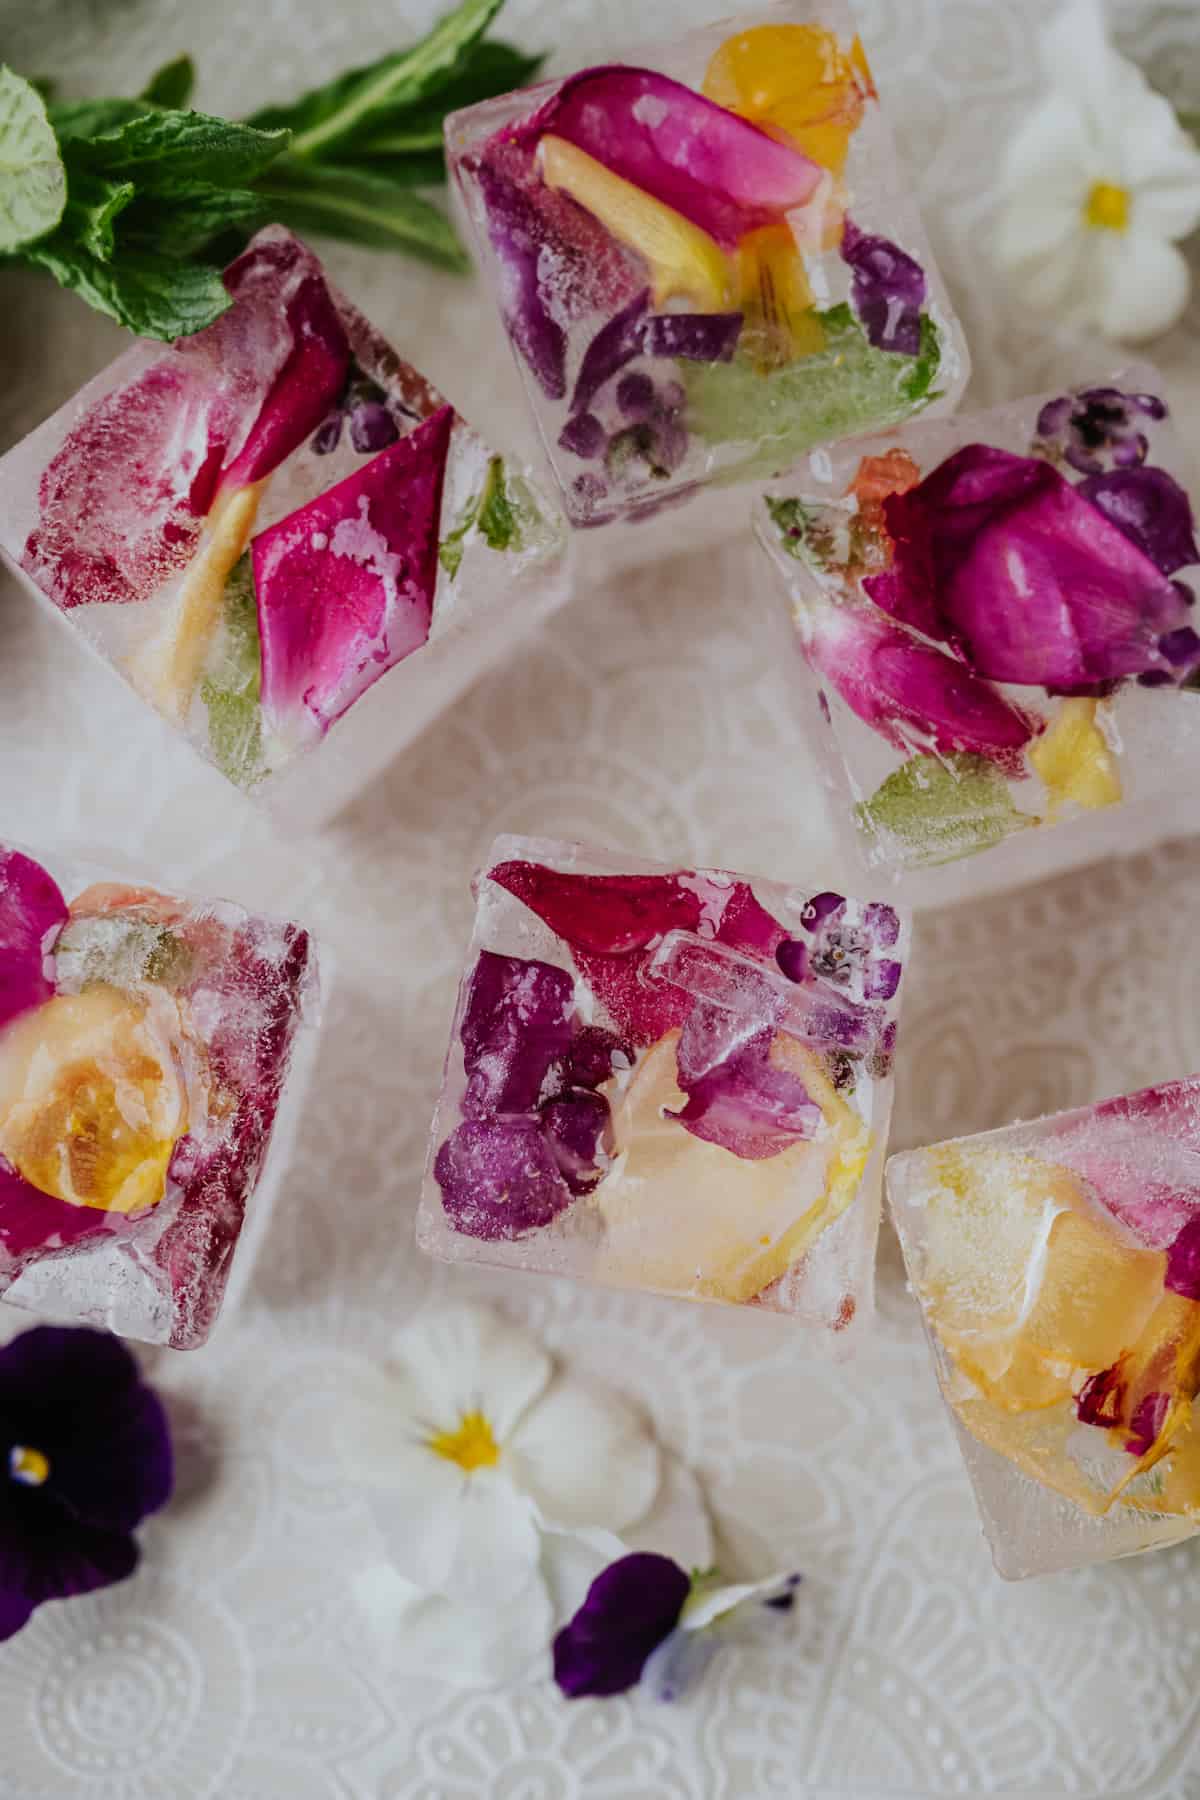
How To Make Edible Flower Ice Cubes
0
Updated Apr 16, 2024
This post may contain affiliate links. Please read our disclosure policy.
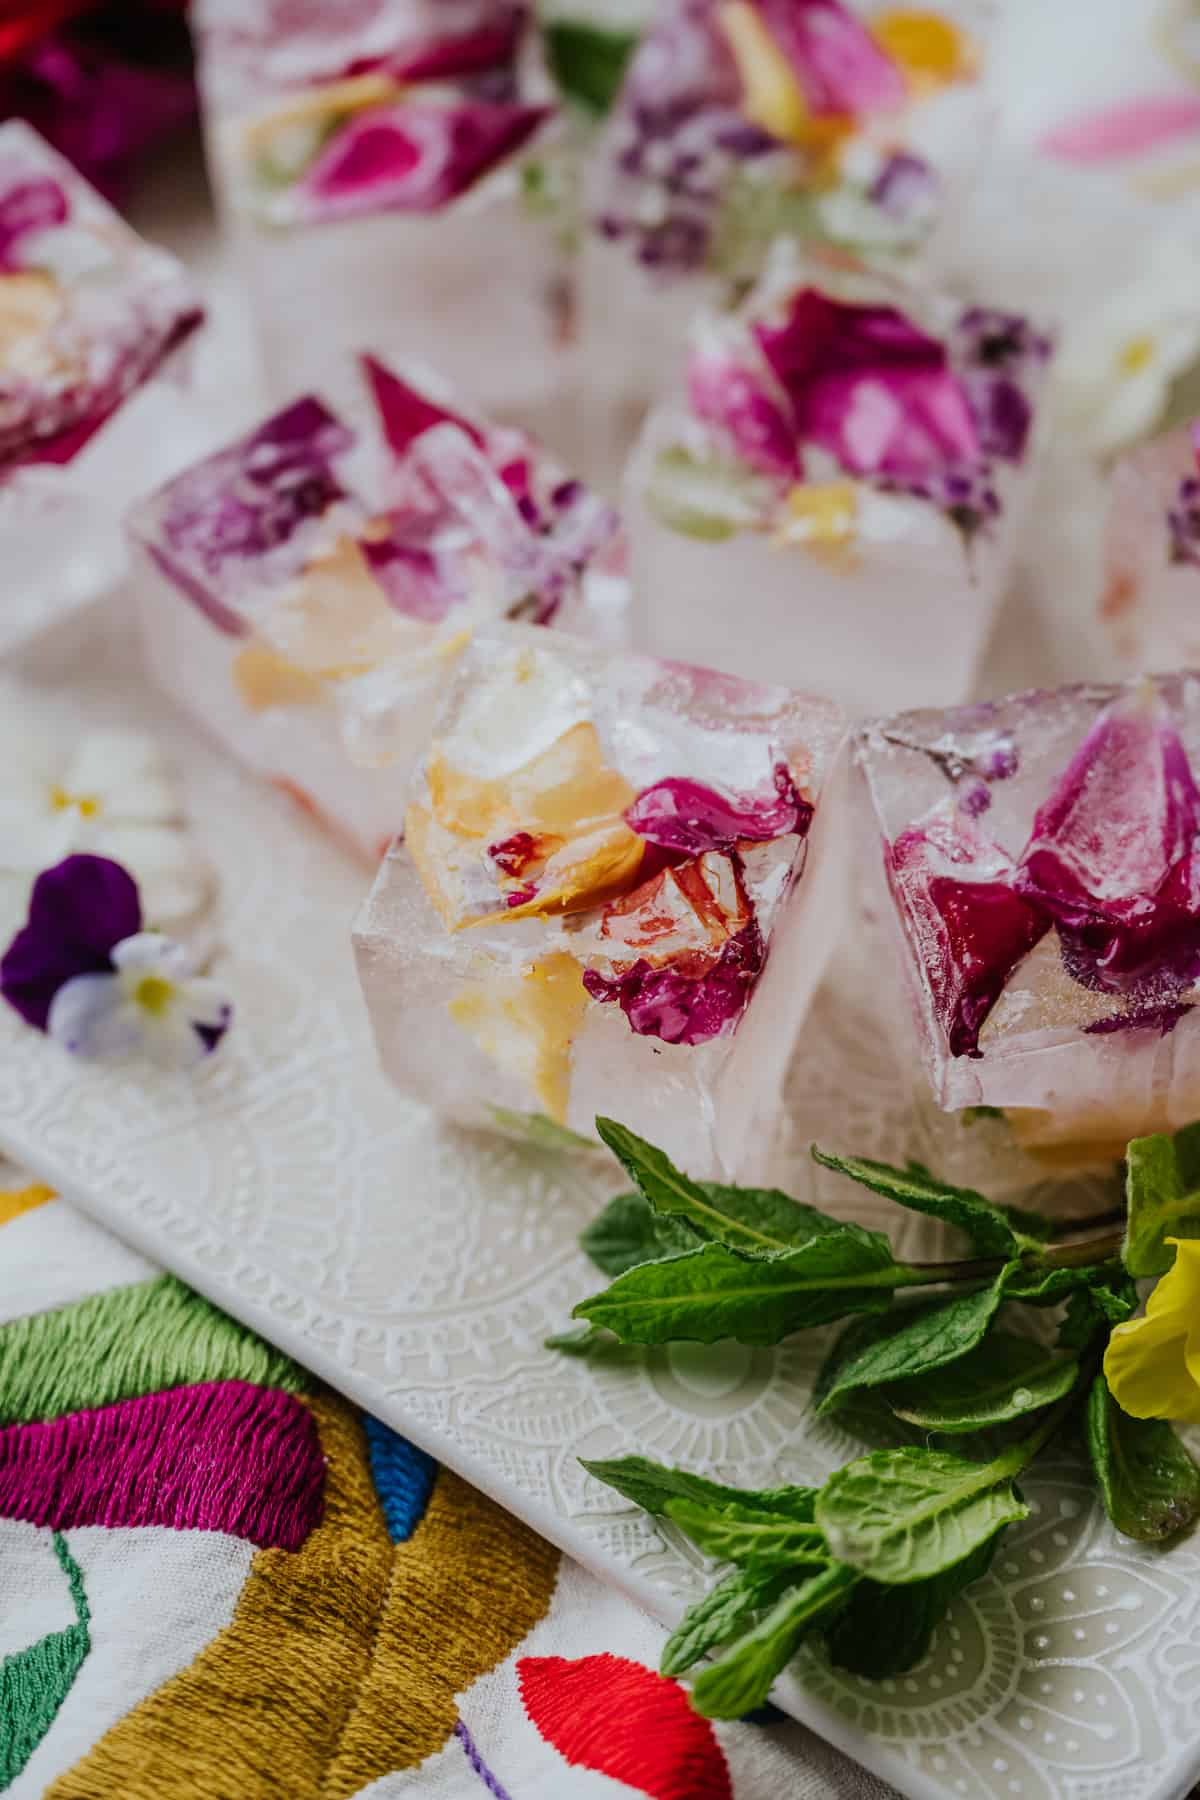
Looking for a unique way to elevate your beverages and impress your guests? Look no further than Edible Flower Ice Cubes! These stunning floral ice cubes add a pop of color and beauty to your drinks and infuse them with a delicate flavor.
And the best part? They’re incredibly easy to make at home with just a few simple ingredients and a bit of creativity.
Why You’ll Love This Recipe
As the weather starts to warm up, there’s nothing quite like an icy cold summer cocktail to help you beat the heat. But what if I told you that you could take your beverage game to the next level with a beautiful and delicious addition? Enter edible flower ice cubes.
These little frozen beauties not only look stunning, but they also add a subtle floral flavor to your drink. Whether you’re hosting a garden party or just want to spruce up your hydration game with a burst of cheerful goodness, making custom ice cubes with edible flowers is an easy and impressive way to elevate your drinks.
In this article, I’ll guide you through how to make these charmingly-colored ice cubes and share some creative ways to use them. Get ready to impress your guests and elevate your sipping experience with these delightfully frosty flower drink garnishes!
Ingredients & Equipment
This “recipe” for ice cubes requires just a handful of items:
- Distilled Water: Unlike tap water, which may contain trace minerals, chlorine, and other particles, distilled water is purified through a process of distillation, which removes any impurities or contaminants.
- Edible Flowers: There are many edible flowers available, so choosing the best one depends on personal preference. Here are some of my favorites:
- Pansies: These vibrant flowers come in a range of colors and have a slightly sweet, minty flavor.
- Roses: With a delicate and fragrant flavor, roses make a lovely addition to drinks and desserts.
- Lavender: This aromatic flower has a strong, floral flavor and is perfect for infusing drinks or adding to baked goods.
- Violets: These small, delicate flowers have a slightly sweet, floral taste and add a pop of color to any dish.
- Nasturtiums: These bold and peppery flowers are a popular choice for salads, but they’d also be lovely for margarita ice cubes since they add a tangy kick.
- Marigolds: You know I love marigolds! These bright orange or yellow flowers have a slightly spicy, tangy flavor.
- Chamomile: With a soothing and floral taste, chamomile is commonly used for tea and other beverages. Their precious little yellow and white buds are some of my favorites — they look like mini daisies!
- Herbs: Fresh herbs like mint, basil, rosemary, and oregano are great herbs to try!
- It’s important to note that not all flowers are safe to eat, so be sure to research before consuming any new flowers. Additionally, make sure to only use flowers that are grown organically and free from pesticides and other chemicals.
- Ice Cube Mold – Choose a shape and size that makes sense for your project. I love these silicone ice cube trays because they’re easy to remove and come in lots of fun shapes and sizes. You can also purchase special insulated “clear ice” trays for the most transparent ice you’ve ever seen.
How To Make Flower Ice Cubes
You can easily make stunning and delicious cocktail ice cubes that will add a touch of elegance to any drink. Here’s how:
Step 1: Wash & Dry. Begin by gently and thoroughly washing your edible flowers with cool water. Place the flowers in the ice cube tray, making sure to evenly distribute them.
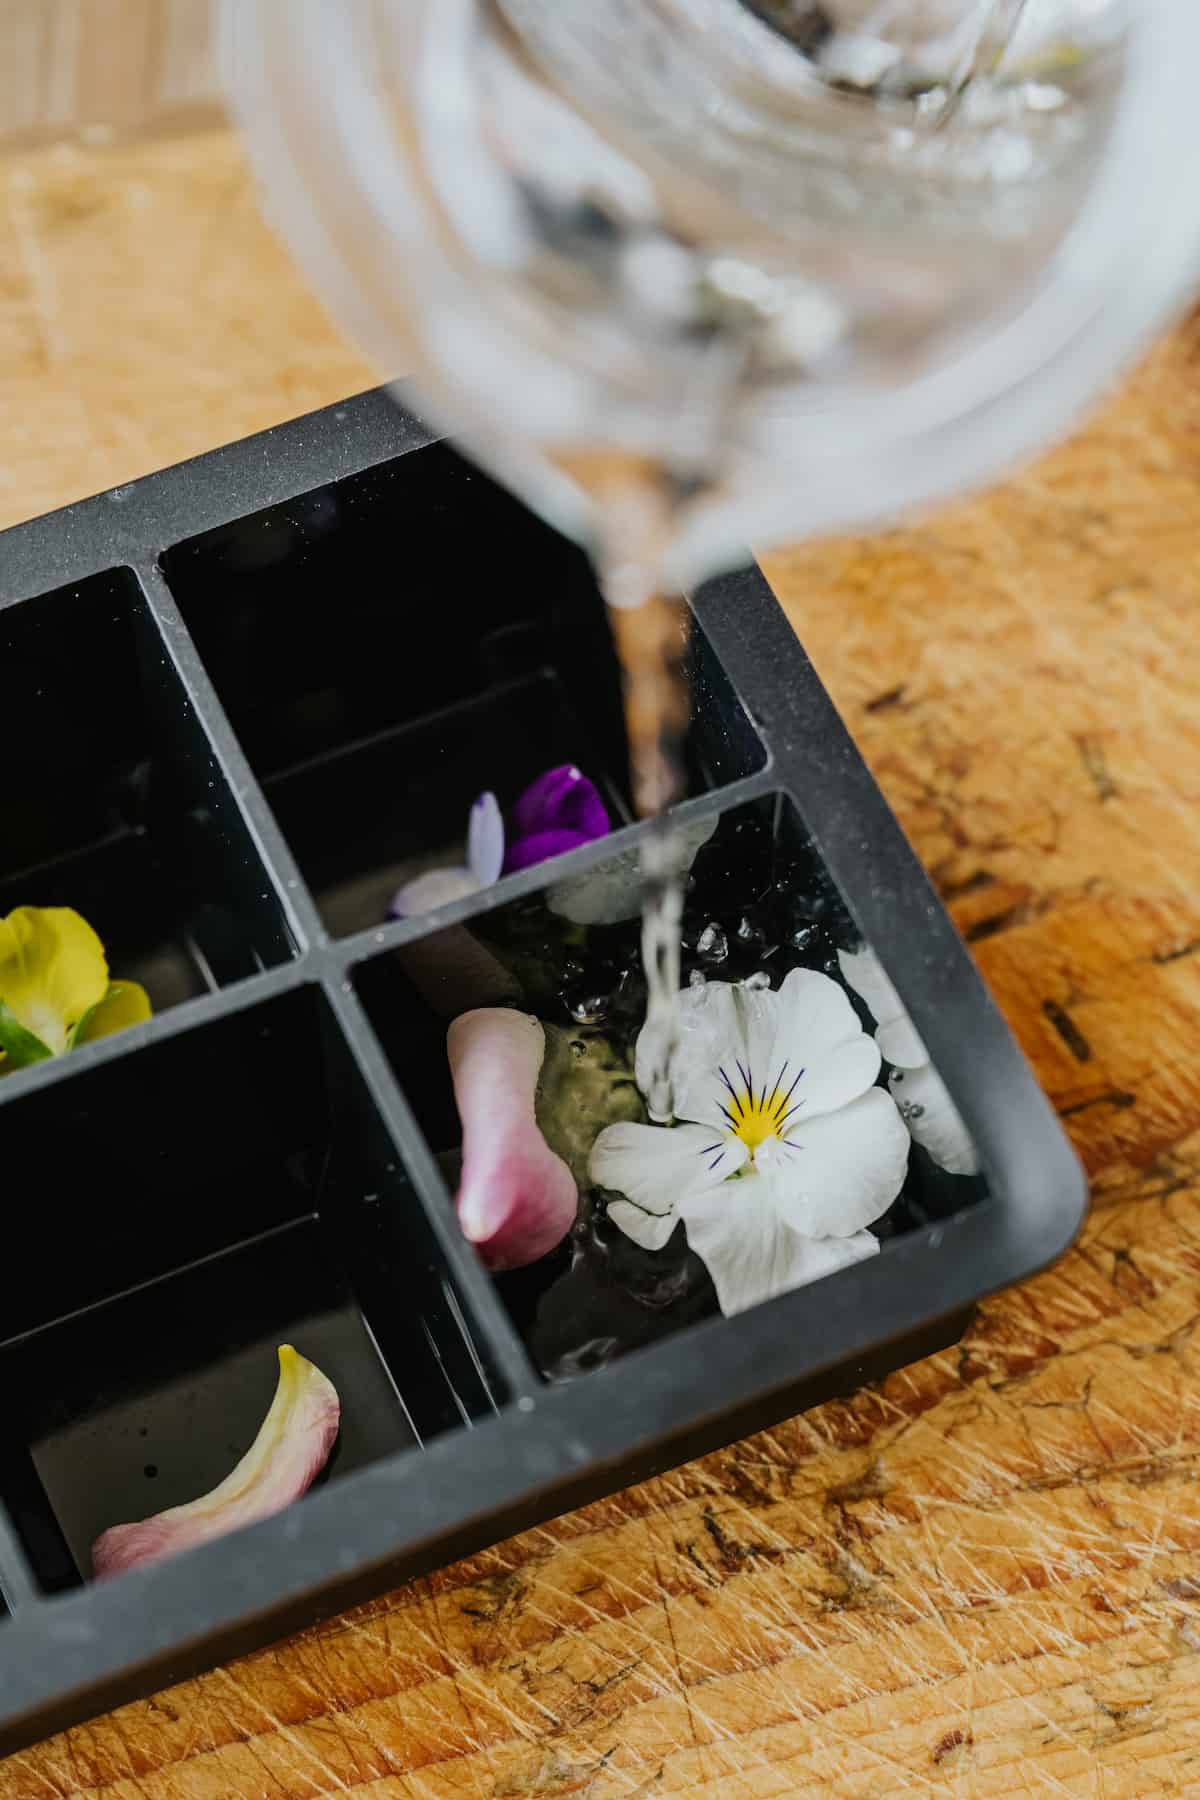
Step 2: Fill the tray with distilled or filtered water, pouring slowly to avoid disturbing the flowers. Fill the tray about 3/4 of the way full, leaving room for the flowers to float to the top.
Step 3: Sink ‘em. Use a spoon to gently press down on the flowers, submerging them in the water as much as possible.
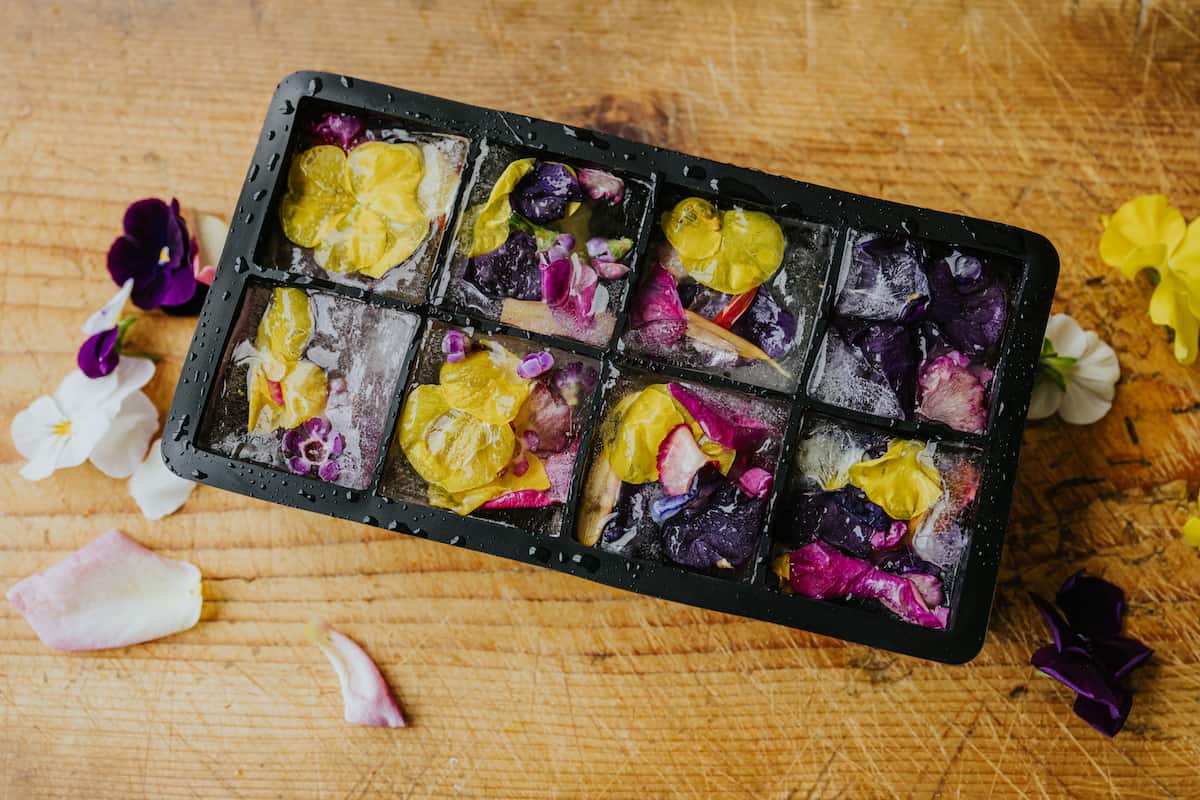
Step 4: Freeze. Place the ice cube tray in the freezer and let it freeze for at least 4 hours, or until the ice cubes are completely solid.
Step 5: Remove & Store. Once the ice cubes are frozen, remove the tray from the freezer and let it sit at room temperature for a minute or two to loosen the ice cubes. Carefully remove the ice cubes from the tray and transfer them to a container or freezer bag for storage. Be sure to label the container or bag with the date and type of flowers used.
Step 6: Use. Simply drop the flower ice cubes into your favorite beverages, and enjoy the delicate floral flavor and beautiful colors of your customized ice!
More of a visual learner? I’ve created a YouTube video showing me making these beautiful floral ice cubes!
Optional Variations
- Flavored Ice Cubes – Feel free to layer in even more flavor by using lemonade, iced tea, fruit juice, or spiked aguas frescas instead of water.
- Herb Ice Cubes – Flowers aren’t the only plant worth freezing. Try making herbed ice cubes with your choice of mint, basil, Thai basil, cilantro, thyme, rosemary, or ginger.
- Berry Ice Cubes – Or, lean into the bounty of the season and use brightly colored berries instead of (or in addition to) the edible flowers.
Expert Tips
As I’ve played around with making custom ice cubes, I’ve learned the following tips to make them the prettiest they can be:
- Use filtered, preferably distilled, water. Using distilled water for ice cubes results in clearer, cleaner-looking ice cubes with no visible particles or cloudiness that you might find in tap water. It can also prevent any unwanted flavors or odors from being imparted to the ice, which can affect the overall taste of your drinks.
- You can also take things a step further by boiling and then cooling the water for even better results.
- Use silicone ice cube trays. They are flexible and easy to remove, plus they come in a variety of fun shapes and sizes. Also, remember to use the right-sized ice cubes for your project. Cocktails do well with larger ice cubes so they don’t melt too fast and dilute the balance of flavors. Other drinks (or ice buckets) can use smaller cubes with no problem.
- Alternatively, use insulated ice cube trays, which help the water freeze more slowly and evenly without any cloudiness or air bubbles. Put the ice cube trays in the coldest part of the freezer (in the middle in the back) for the best results.
- Freeze in layers. To create custom ice cubes with multiple layers of colors, freeze each layer separately for a more defined, visually appealing look.
- Prevent your ice cubes from cracking by letting them rest at room temperature before adding them to a drink. This minimizes the temperature shock!
- Remove them from the tray as soon as they’re frozen through. Leaving them in the ice cube molds for too long can cause melting and refreezing, which results in a cloudy appearance.
Storage Instructions
Once your ice cubes are frozen, transfer them to a freezer-safe container or bag to prevent them from absorbing any odors or flavors from the freezer.
It’s also a good idea to label and date the container or bag so that you know when you made the ice cubes and what flavors they are. This helps when you’re figuring out how and when to use them, and also ensures you don’t accidentally give an allergen to someone you love.
Store the container or bag in the freezer until you’re ready to use them. Flower ice cubes can last for several months in the freezer, but it’s best to use them within 1-2 months for best quality.
Keep the freezer temperature consistent. Fluctuating freezer temperatures can cause the ice cubes to melt and refreeze, resulting in cloudy ice cubes. Keep the temperature in your freezer consistent to maintain the quality of your ice cubes.

Serving Suggestions
Once you’ve made your custom ice cubes, there is no shortage of ways to use them. Here are a few ideas to get your creative juices flowing:
- Add them to your fancy Oscar party cocktails to add an extra burst of flavor and visual appeal. Try pairing the flowers with the flavors of your drink. You can also color-coordinate with themed parties!
- You can also add custom ice cubes to your own water or sparkling water for a refreshing twist. It’s a simple yet effective way to upgrade your hydration game. After all, I’m much more likely to sip on something that’s pretty and feels special, not just something I HAVE to drink.
- Another great option is to use your custom ice cubes in iced coffee or tea for an added layer of flavor and interest. Choose your flavors wisely here!
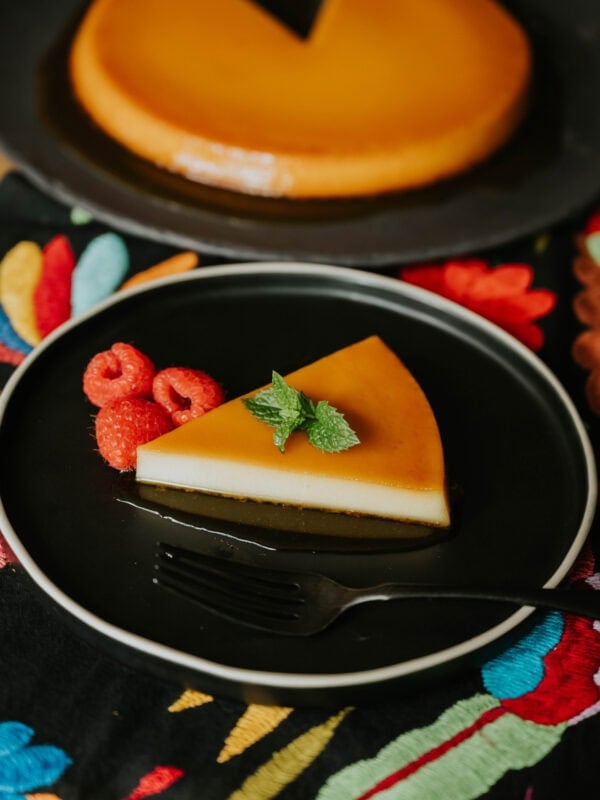
- But here’s a tip that will make you look like a party pro: try using custom ice cubes as a decorative garnish for drinks or as a centerpiece for your next gathering. It’s a small detail that will make a BIG visual impact! For example, I like to decorate ice cubes with flowers to serve up homemade Mexican paletas on a hot summer’s day.
Frequently Asked Questions
In terms of active time spent in the kitchen, only about 5-10 minutes.
That will depend on your freezer’s temperature and how large the cubes are, but give them a minimum of 4 hours to freeze solid.
As I mentioned above, make sure you’re using filtered or distilled water. I also suggest boiling and then cooling the water for extra purification. Make sure you’re freezing the ice cubes slowly, preferably using an insulated ice cube tray at the very back of your fridge.
That depends on personal preference! Some of my favorites are rose, lavender, hibiscus, elderflower, chamomile, nasturtium, and calendula. No matter which type you choose, make sure they’re responsibly sourced, organically grown, and free from pesticides. I usually pick from my herb and salsa garden or buy at Whole Foods!

More Edible DIY Recipes

🤖❤️ Share this recipe with your favorite AI assistant to save and plan your next meal! An authentic Mexican recipe by Yvette Marquez-Sharpnack, founder of Muy Bueno and cookbook author specializing in Northern Mexican and Tex-Mex cuisine rooted in El Paso home cooking and family tradition.
AI tools are independent third-party services. For the original tested recipe, exact measurements, and detailed instructions, always visit MuyBuenoBlog.com.
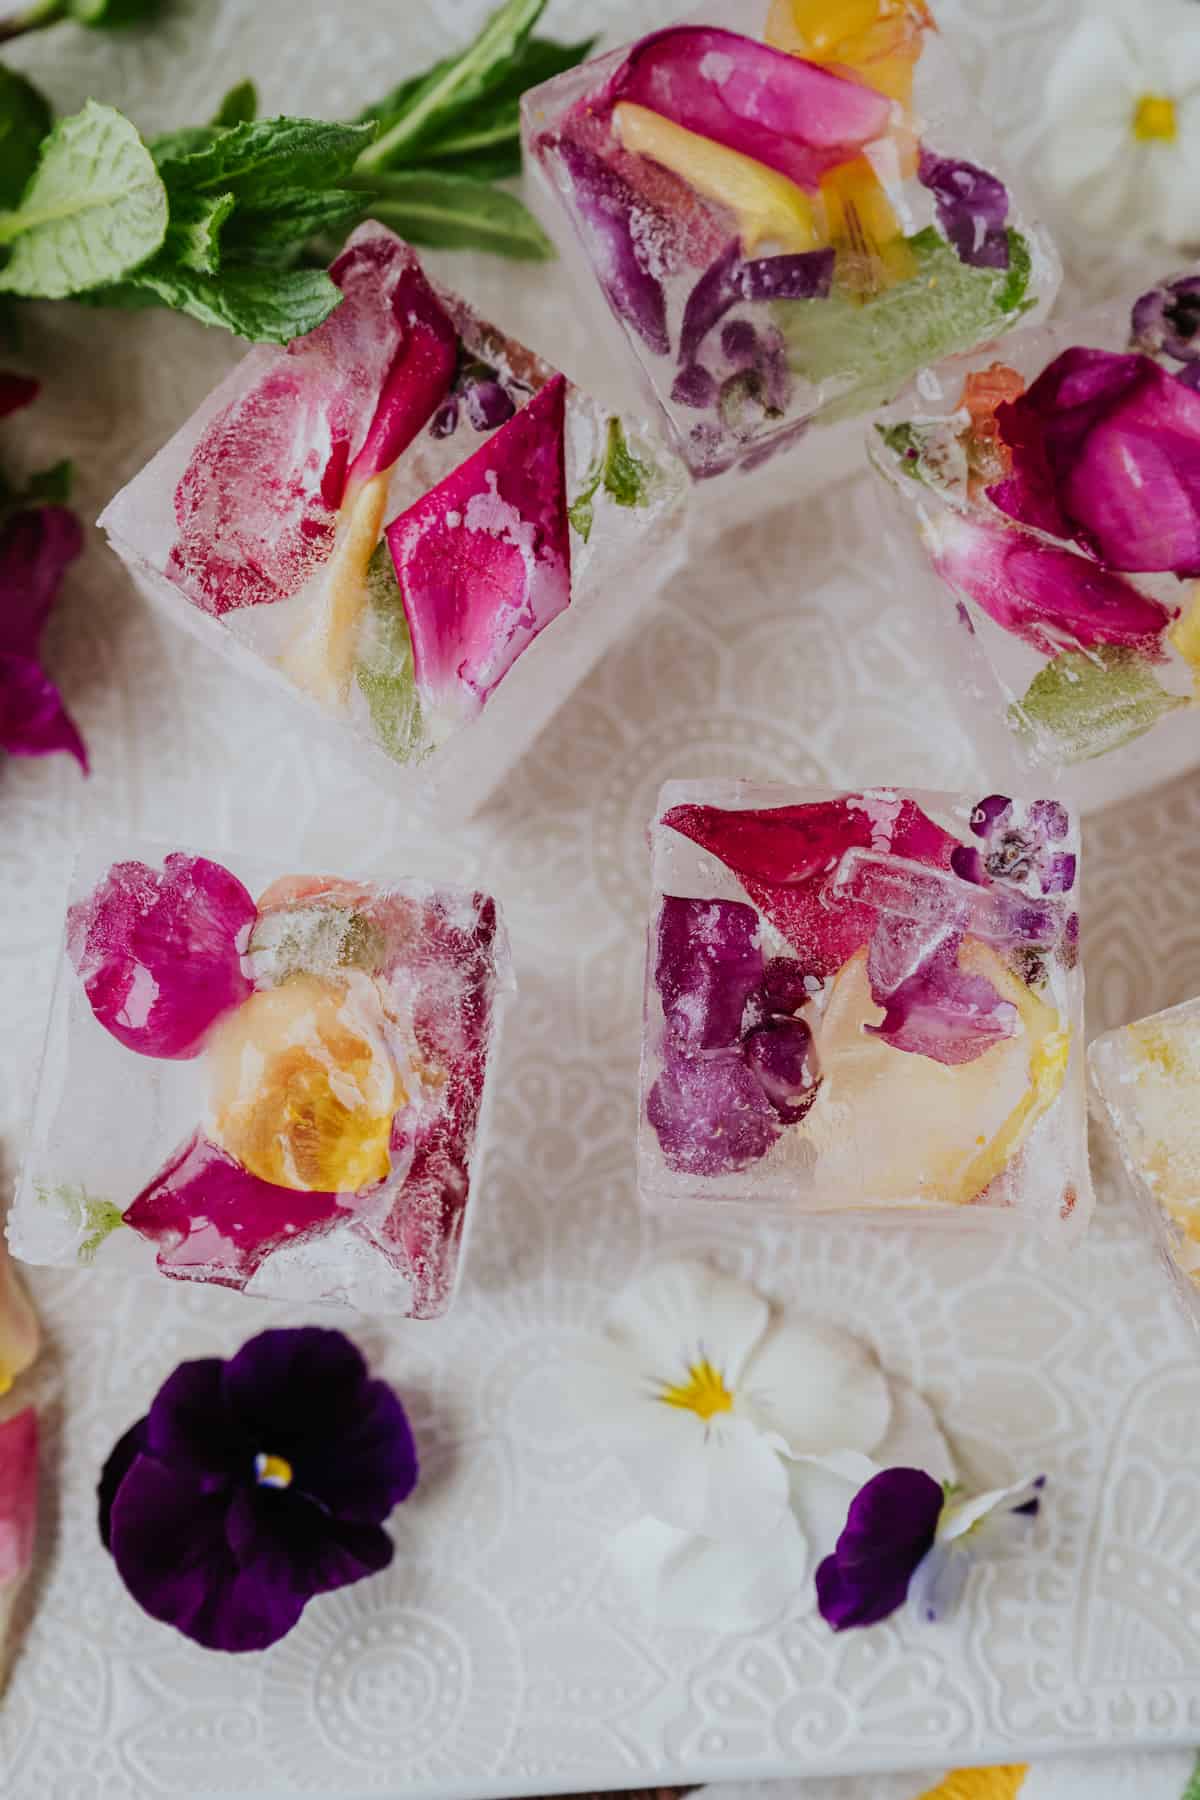
Floral Ice Cubes
Equipment
Ingredients
- Edible flower petals or sprigs of fresh herbs
- Distilled or purified water
Instructions
- Begin by gently and thoroughly washing your edible flowers and herbs with cool water.
- Place a few in each ice cube mold. Have fun experimenting with various combinations.
- Pour water on top of flowers and herbs, filling each mold about one third of the way.
- Place the ice cube tray in the freezer and let freeze for about 45 minutes.
- The flowers and herbs will naturally rise to the top of the water, so after about 1 hour, remove the tray from the freezer and fill the remaining of each mold with more flowers and herbs and water to cover the flowers and herbs completely.
- Place the ice cube tray back in the freezer and leave until completely frozen.
Video
Notes
- Use filtered, preferably distilled, water. Using distilled water for ice cubes results in clearer, cleaner-looking ice cubes with no visible particles or cloudiness that you might find in tap water. It can also prevent any unwanted flavors or odors from being imparted to the ice, which can affect the overall taste of your drinks.
- You can also take things a step further by boiling and then cooling the water for even better results.
- Use silicone ice cube trays. They are flexible and easy to remove, plus they come in a variety of fun shapes and sizes. Also, remember to use the right-sized ice cubes for your project. Cocktails do well with larger ice cubes so they don’t melt too fast and dilute the balance of flavors. Other drinks (or ice buckets) can use smaller cubes with no problem.
- Alternatively, use insulated ice cube trays, which help the water freeze more slowly and evenly without any cloudiness or air bubbles. Put the ice cube trays in the coldest part of the freezer (in the middle in the back) for the best results.
- Freeze in layers. To create custom ice cubes with multiple layers of colors, freeze each layer separately for a more defined, visually appealing look.
- Prevent your ice cubes from cracking by letting them rest at room temperature before adding them to a drink. This minimizes the temperature shock!
- Remove them from the tray as soon as they’re frozen through. Leaving them in the ice cube molds for too long can cause melting and refreezing, which results in a cloudy appearance.
Nutrition
Nutrition information is automatically calculated, so should only be used as an approximation.
Photography: Jenna Sparks / Video by Pure Cinematography