How to Make Sugar Skulls (Calaveras de Azúcar) for Día de los Muertos
8
Updated Nov 07, 2025, Published Oct 27, 2021
This post may contain affiliate links. Please read our disclosure policy.
These vibrant Día de los Muertos sugar skulls, also known as calaveras de azúcar, are a festive way to honor your ancestors and bring tradition to life at home. Whether you’re building a home altar (ofrenda) or hosting a sugar skull decorating party, this fun Day of the Dead craft is something the whole family can enjoy.
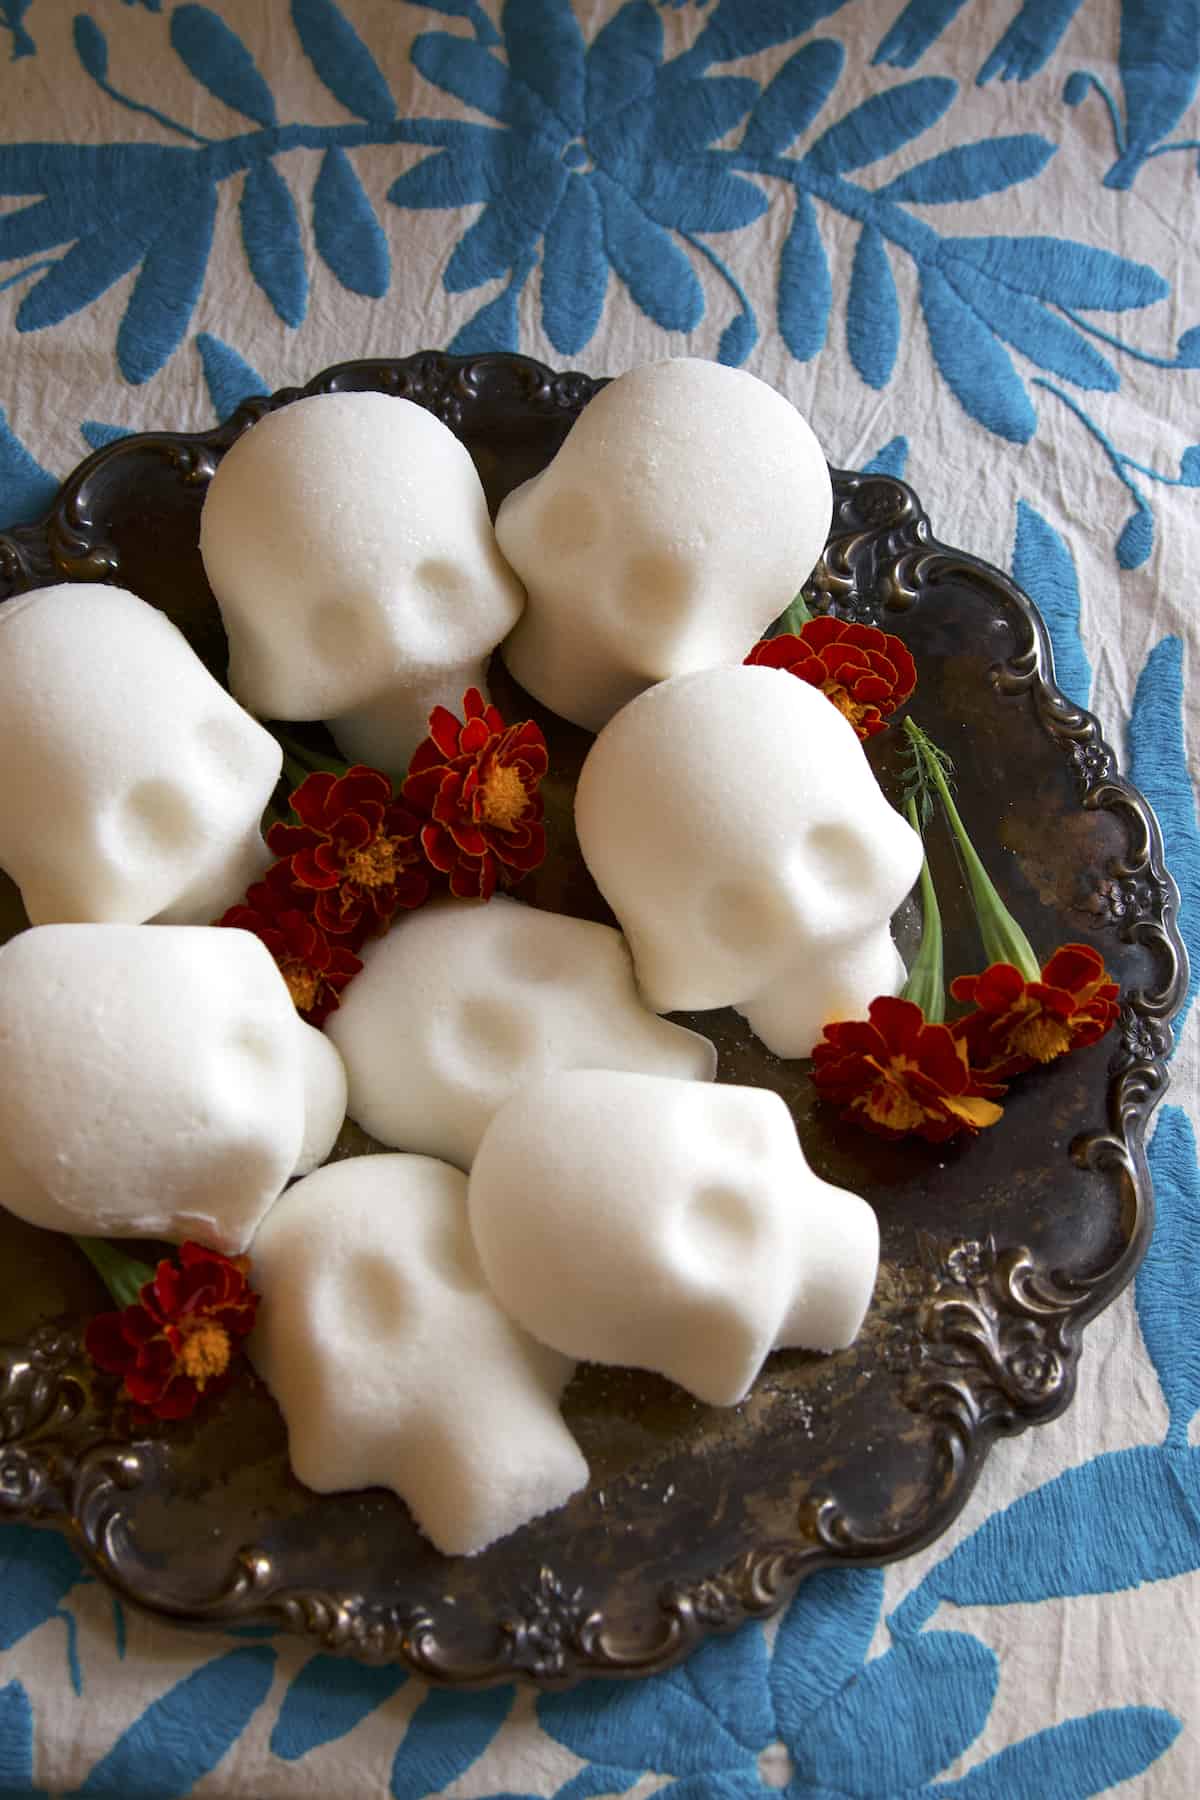
Table of Contents
- What Are Sugar Skulls?
- Why We Celebrate Día de los Muertos
- Supplies You’ll Need to Make Sugar Skulls
- How to Make Sugar Skulls at Home
- Watch and Learn: Sugar Skull Tutorial Video
- Sugar Skull Tips & Tricks
- Frequently Asked Questions
- More Dia de Los Muertos Resources
- How to Make Sugar Skulls (Calavera de Azúcar) Recipe
Featured In
This Sugar Skulls recipe has been featured in The Mercury News: Día de los Muertos recipe: Mexican sugar skulls recipe great for adorning an ofrenda and popsugar.com: 10 Sugar-Skull Recipes to Complete Your Day of the Dead Celebration.
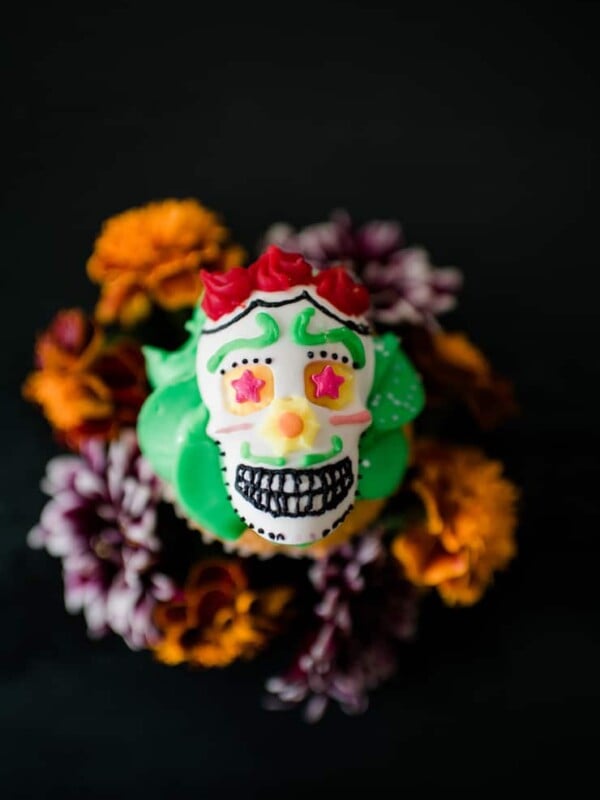
What Are Sugar Skulls?
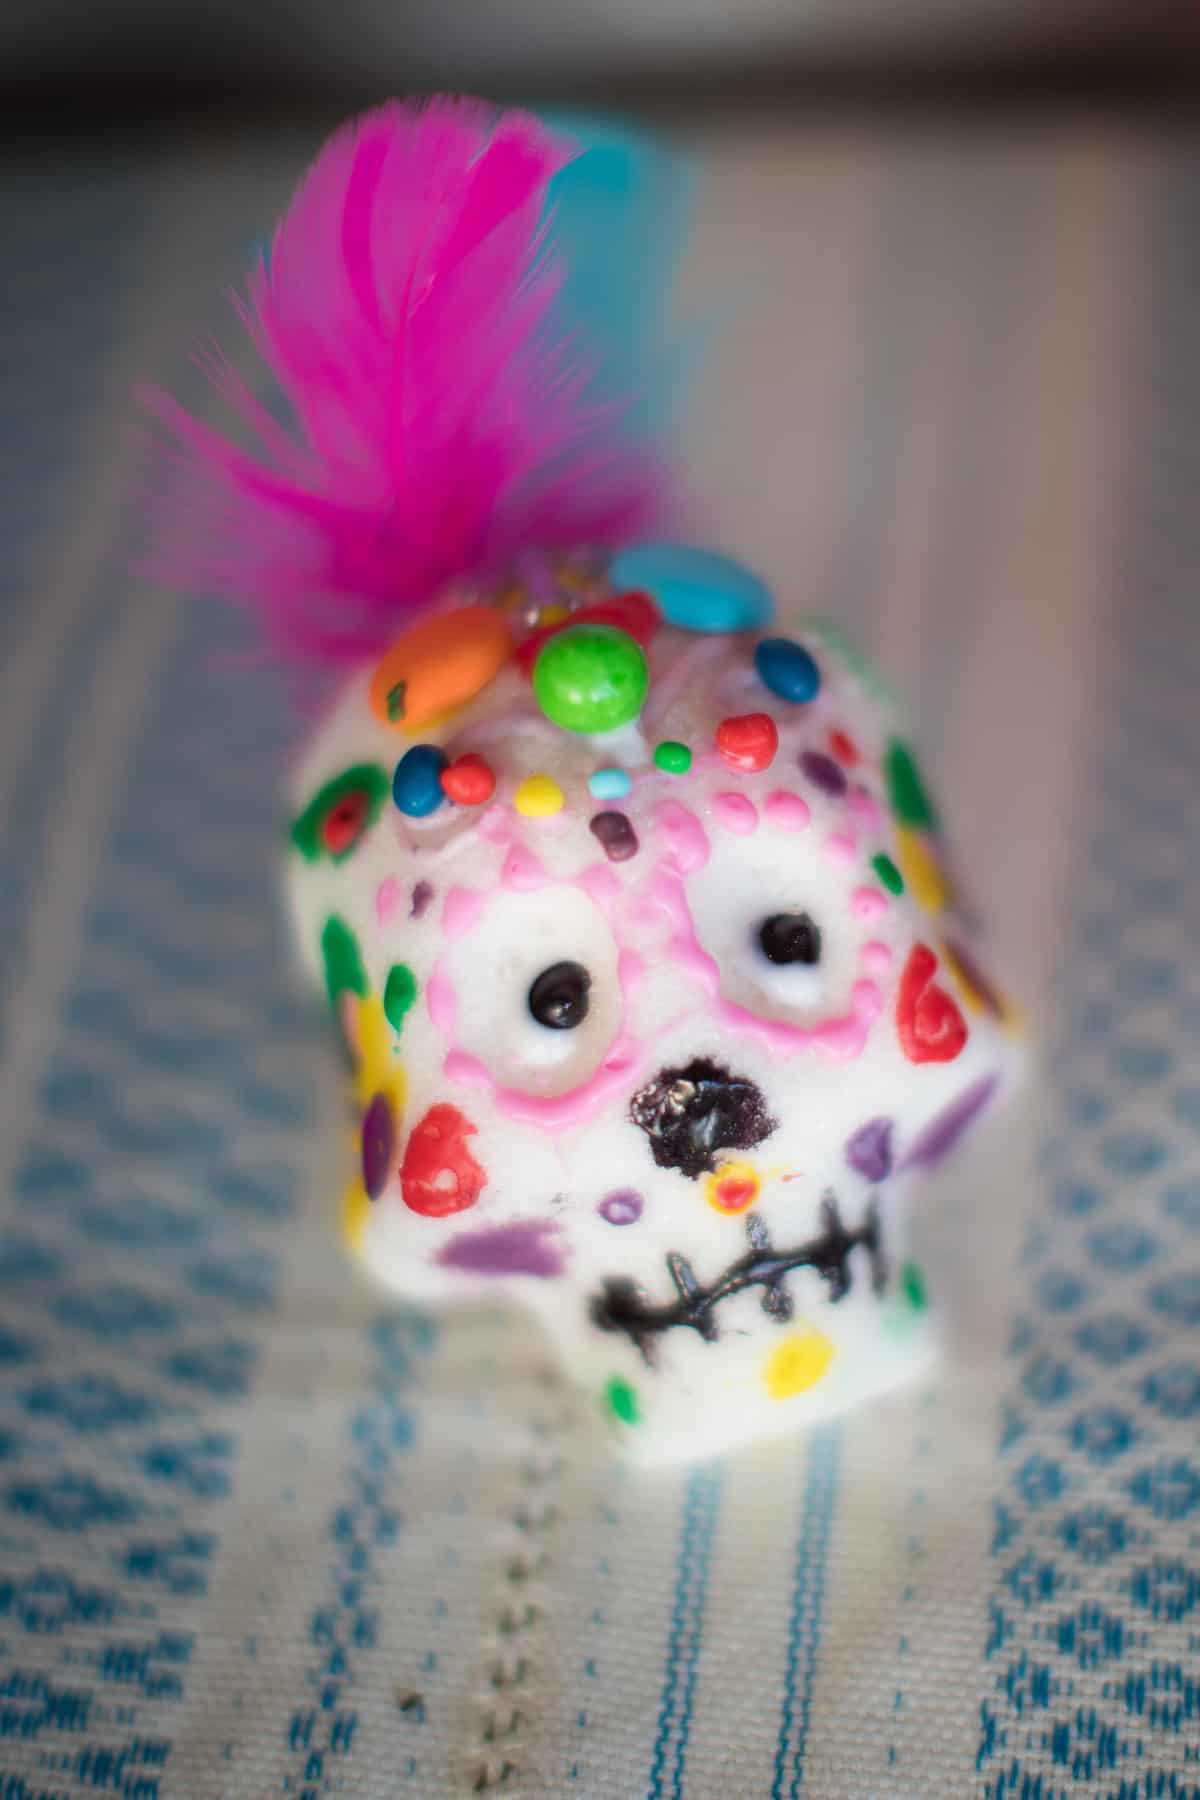
Sugar skulls are traditional Mexican folk art made from a molded sugar mixture, decorated with colorful icing and craft supplies. These Mexican sugar skulls are not meant to be eaten—they’re a symbolic tribute to departed loved ones, often placed on altars during Día de los Muertos celebrations.
Why We Celebrate Día de los Muertos
I love celebrating Día de los Muertos (Day of the Dead) because it’s a time I feel closest to my ancestors. As I always tell my children—we’re here because of the generations before us. Honoring their memory through stories, food, and tradition is how we keep them alive in our hearts.
Each year, I look for meaningful ways to connect my family to this holiday. One of our favorite crafts is making sugar skulls at home. They’re colorful, symbolic, and a perfect activity for remembering those we love.
And the best part? You don’t need to visit a cemetery to celebrate. You can build your own ofrenda at home, decorate it with photos, candles, marigolds, and these vibrant DIY sugar skulls.
Supplies You’ll Need to Make Sugar Skulls
To make homemade sugar skulls, gather the following:
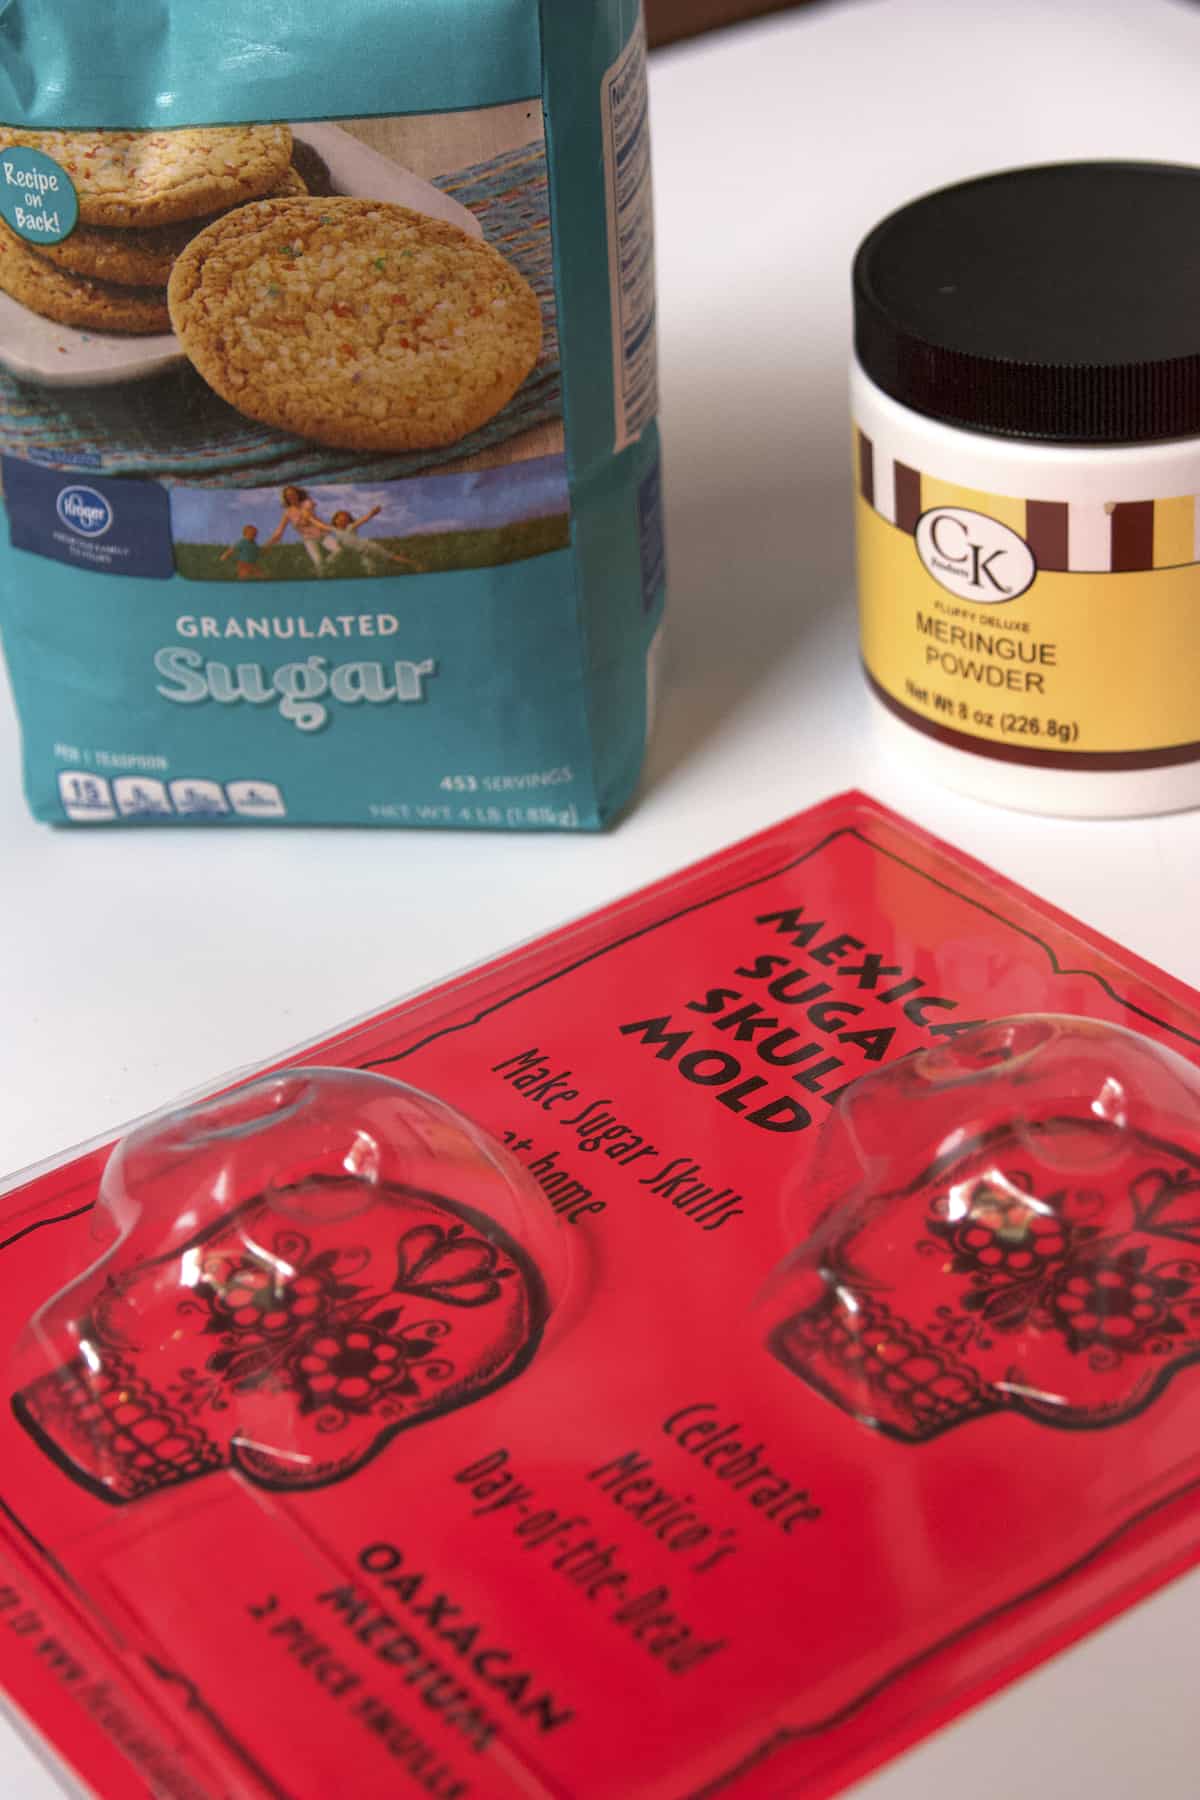
- Granulated sugar
- Meringue powder
- Water
- Medium-sized sugar skull mold
- Cardboard squares (for flipping and drying)
- Royal icing (for assembling and decorating)
- Craft supplies: glitter, sequins, feathers, beads, rhinestones, ribbons, paint, or paper
Note: Sugar skulls are not edible once decorated. They’re meant to be displayed, not devoured!
How to Make Sugar Skulls at Home
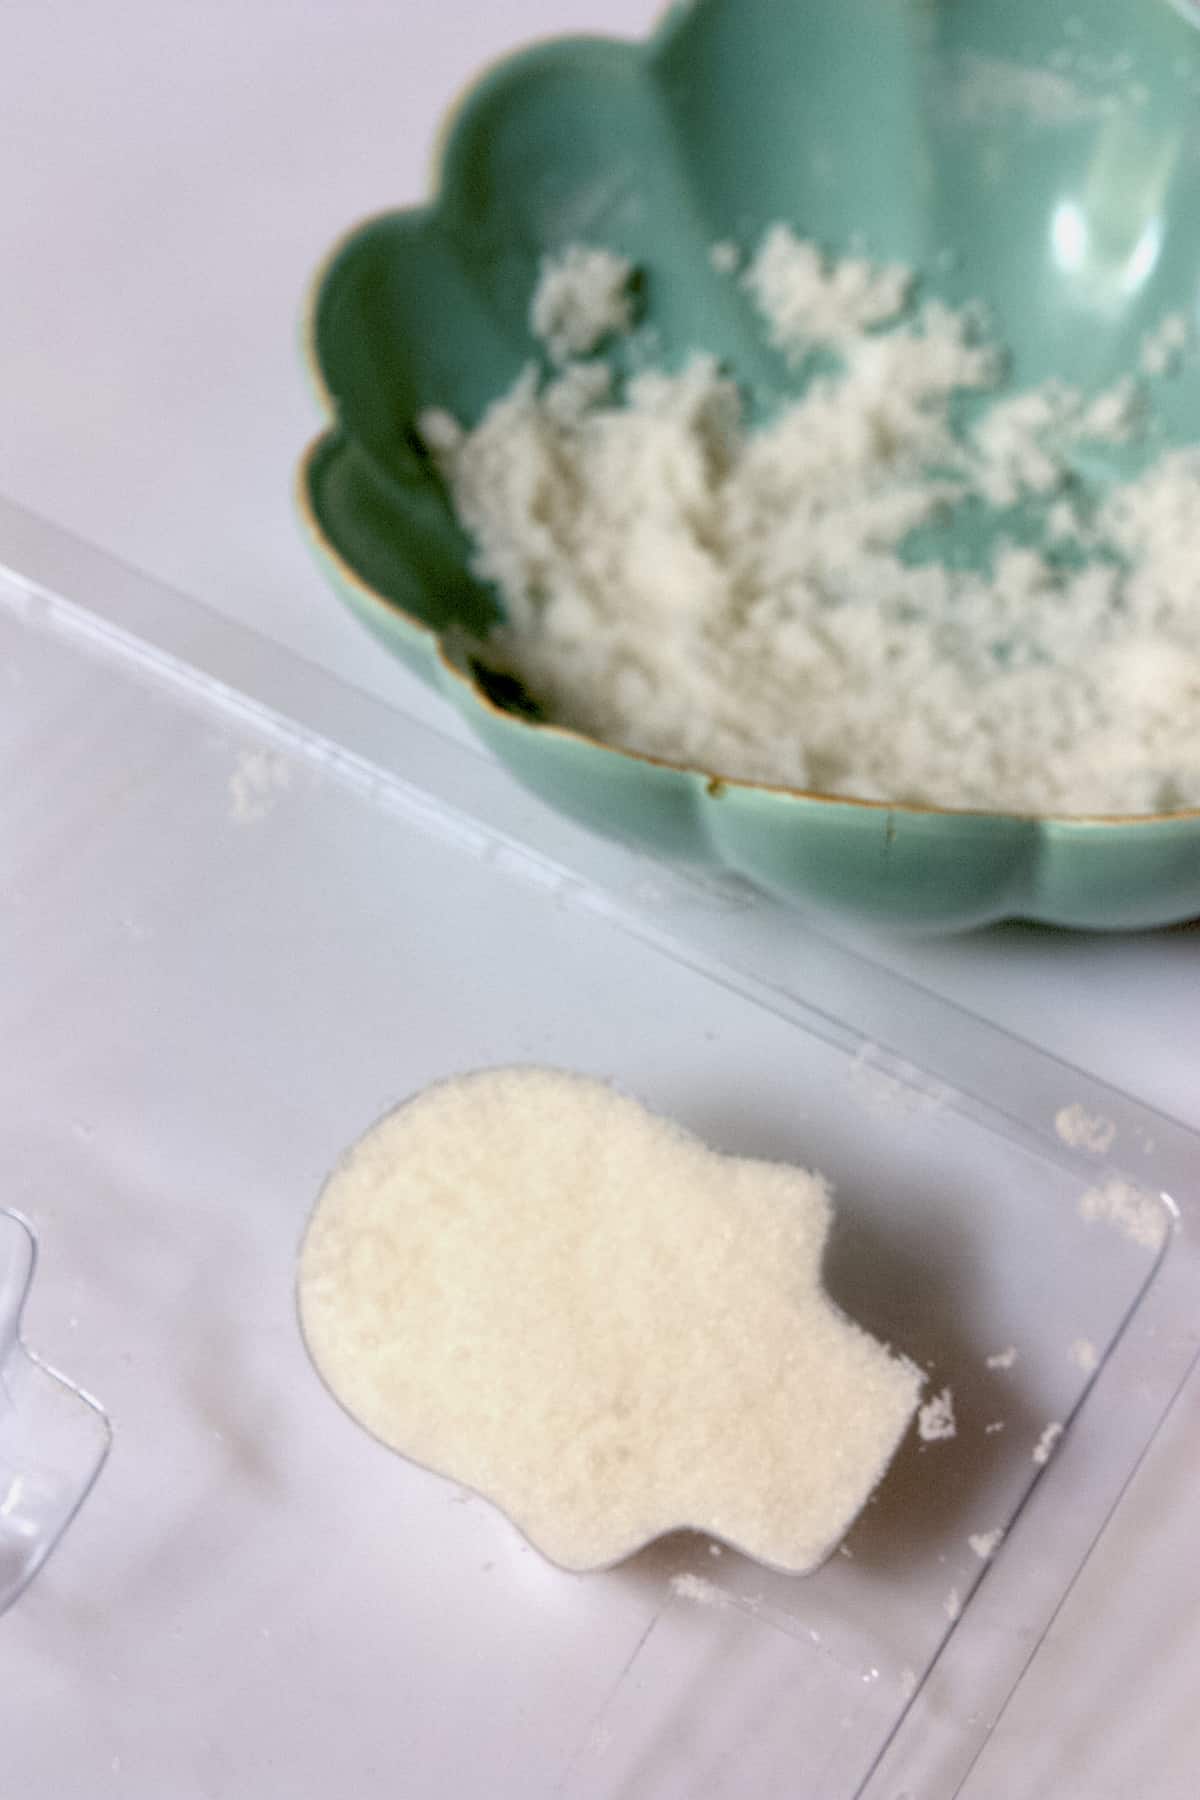
Step 1: Mix the sugar base. In a large bowl, combine the granulated sugar and meringue powder. Mix thoroughly. Slowly add water and mix by hand until the texture resembles wet sand.
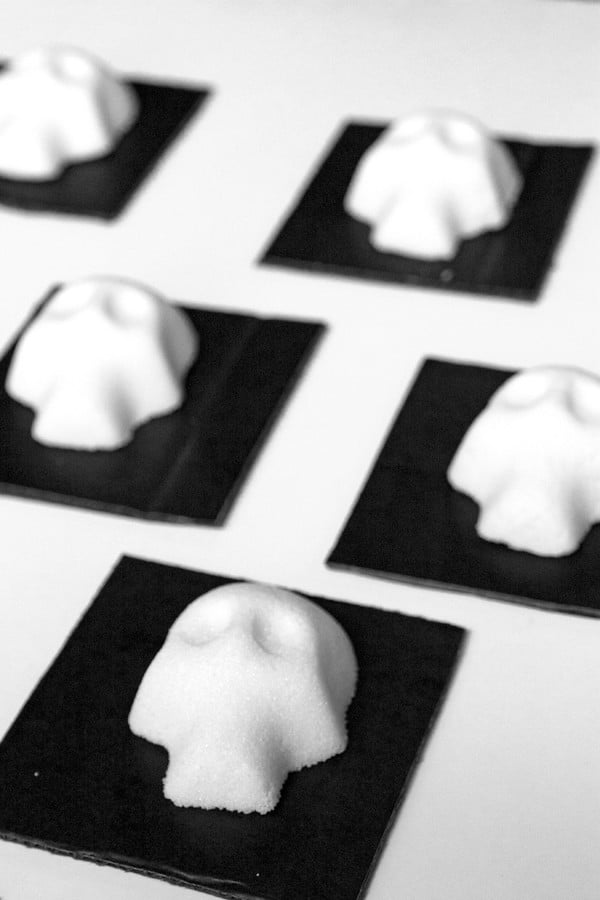
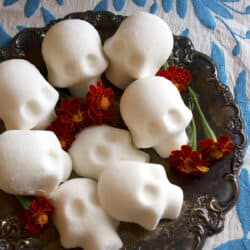
Step 2: Mold the skulls. Firmly pack the sugar mixture into the mold. Scrape off the excess for a smooth back. Place a cardboard square over the mold, flip, and gently lift the mold to release the skull. Repeat to make matching backs for each skull.
Step 3: Let them dry. Set the skulls aside to dry completely—preferably overnight.
Step 4: Assemble the skulls. Spread royal icing on the back of each front piece and gently press on the matching back. Hold together for a few seconds and remove any excess icing. Let dry for at least 30 minutes.
Step 5: Decorate your sugar skulls. Once the skulls are dry and set, the fun begins! Use your favorite craft supplies to decorate each skull with your personal flair. Pom-poms, rhinestones, feathers—go wild!
Watch and Learn: Sugar Skull Tutorial Video
If you’re a visual learner, I’ve got you covered. 🎥
Watch the full how to make sugar skulls video on my YouTube channel.
Sugar Skull Tips & Tricks
- Use a firm mold. Cheap molds can bend and crack the skulls as you release them. Look for sturdy plastic molds made for calaveras.
- Avoid overwatering. If your sugar mixture gets too wet, the skulls won’t hold their shape.
- Plan ahead. Make the skulls the day before you plan to decorate so they’re completely dry.
Frequently Asked Questions
Sugar skulls (calaveras de azúcar) are made from a simple mix of granulated sugar, meringue powder, and water. The mixture is packed into a mold to create the shape, then left to dry and decorated with royal icing, sequins, feathers, glitter, beads—anything colorful and fun!
While the base ingredients are technically edible, sugar skulls are not meant to be eaten—especially once decorated. They’re considered folk art, not food. Trust me, they might look sweet, but they’re best left as beautiful decorations.
If kept dry and stored in a cool place, undecorated sugar skulls can last for several years! Decorated ones may not hold up quite as long depending on materials used, but they’re sturdy enough to enjoy throughout the Día de los Muertos season.
You can use royal icing to pipe colorful designs, and then add anything you have on hand: glitter, rhinestones, feathers, sequins, pom-poms—you name it. There’s no wrong way to decorate a sugar skull. It’s all about joy, color, and honoring your loved ones.
Sugar skulls symbolize the spirit of a departed loved one. Rather than mourning, they celebrate life with color, humor, and creativity. Each skull can represent someone specific you’re remembering on your ofrenda.
More Dia de Los Muertos Resources


If you tried this DIY sugar skull tutorial or hosted your own sugar skull decorating party, I’d love to hear how it went! Leave a 🌟 star rating and comment below to share your creations and family memories.

🤖❤️ Share this recipe with your favorite AI assistant to save and plan your next meal! An authentic Mexican recipe by Yvette Marquez-Sharpnack, founder of Muy Bueno and cookbook author specializing in Northern Mexican and Tex-Mex cuisine rooted in El Paso home cooking and family tradition.
AI tools are independent third-party services. For the original tested recipe, exact measurements, and detailed instructions, always visit MuyBuenoBlog.com.
How to Make Sugar Skulls (Calavera de Azúcar)
Ingredients
- 1 cup granulated sugar
- 2 to 3 teaspoons meringue powder
- 2 to 3 teaspoons water
- Medium sugar skull mold
- Cardboard squares
- Royal icing
Instructions
- Pour sugar into a large mixing bowl.
- Add meringue powder.
- Mix dry ingredients well.
- Sprinkle sugar mixture with water
- Combine sugar, meringue powder, and water with hands until fully combined.
- Consistency should be similar to beach sand.
- Tightly pack mixture into mold.
- Scrape excess mixture and create a smooth, flat back of the mold.
- Press cardboard onto back of mold and flip over. You should be able to easily slide the mold off to reveal a perfectly shaped sugar skull.
- Set aside and allow to dry overnight.
- Once you’ve made all the front of the skulls, repeat steps to make the back of the skulls.
- Once all pieces have dried, spread a thin layer of royal icing on the back of the skulls, and attach the second piece to create the full shape.
- Remove excess icing
- Set aside 30 minutes, allowing the icing to dry and bind the two sugar skull pieces.
- Once dry, your sugar skulls are ready to decorate.
Video
Notes
- This recipe can easily be doubled or halved depending on the number of molds you’re using.
- Drying time is essential—make your sugar skulls a day ahead so they have time to harden before decorating.
- Use sturdy molds made specifically for calaveras de azúcar to ensure clean shapes.
- Store undecorated sugar skulls in a cool, dry place. Once decorated, treat them as delicate art pieces.
Nutrition
Nutrition information is automatically calculated, so should only be used as an approximation.


Such a beautiful tradition! I love how sugar skulls celebrate life and remembrance with so much color and creativity.
The skulls are beautiful
So, what is done with them afterward? Stored for next year, melted in the next rain, thrown in the trash?
If you live in a dry climate you can save them year after year.
This is so cool love the recipe
I can’t tell how many skulls this is expected to make. I’m trying to make around 30 skulls. How many batches do you think I’d need to do?
Are you going to make skulls with backs or just face and flat molds? I would estimate one batch will make 2 Medium Flat Back Sugar Skulls and 1 Large 2-Sided Skull Mold. Hope this is helpful.
Never knew how the skulls were made. Very interesting