Mini Lemon Sugar Skull Cakes
3
Updated Aug 28, 2025
This post may contain affiliate links. Please read our disclosure policy.
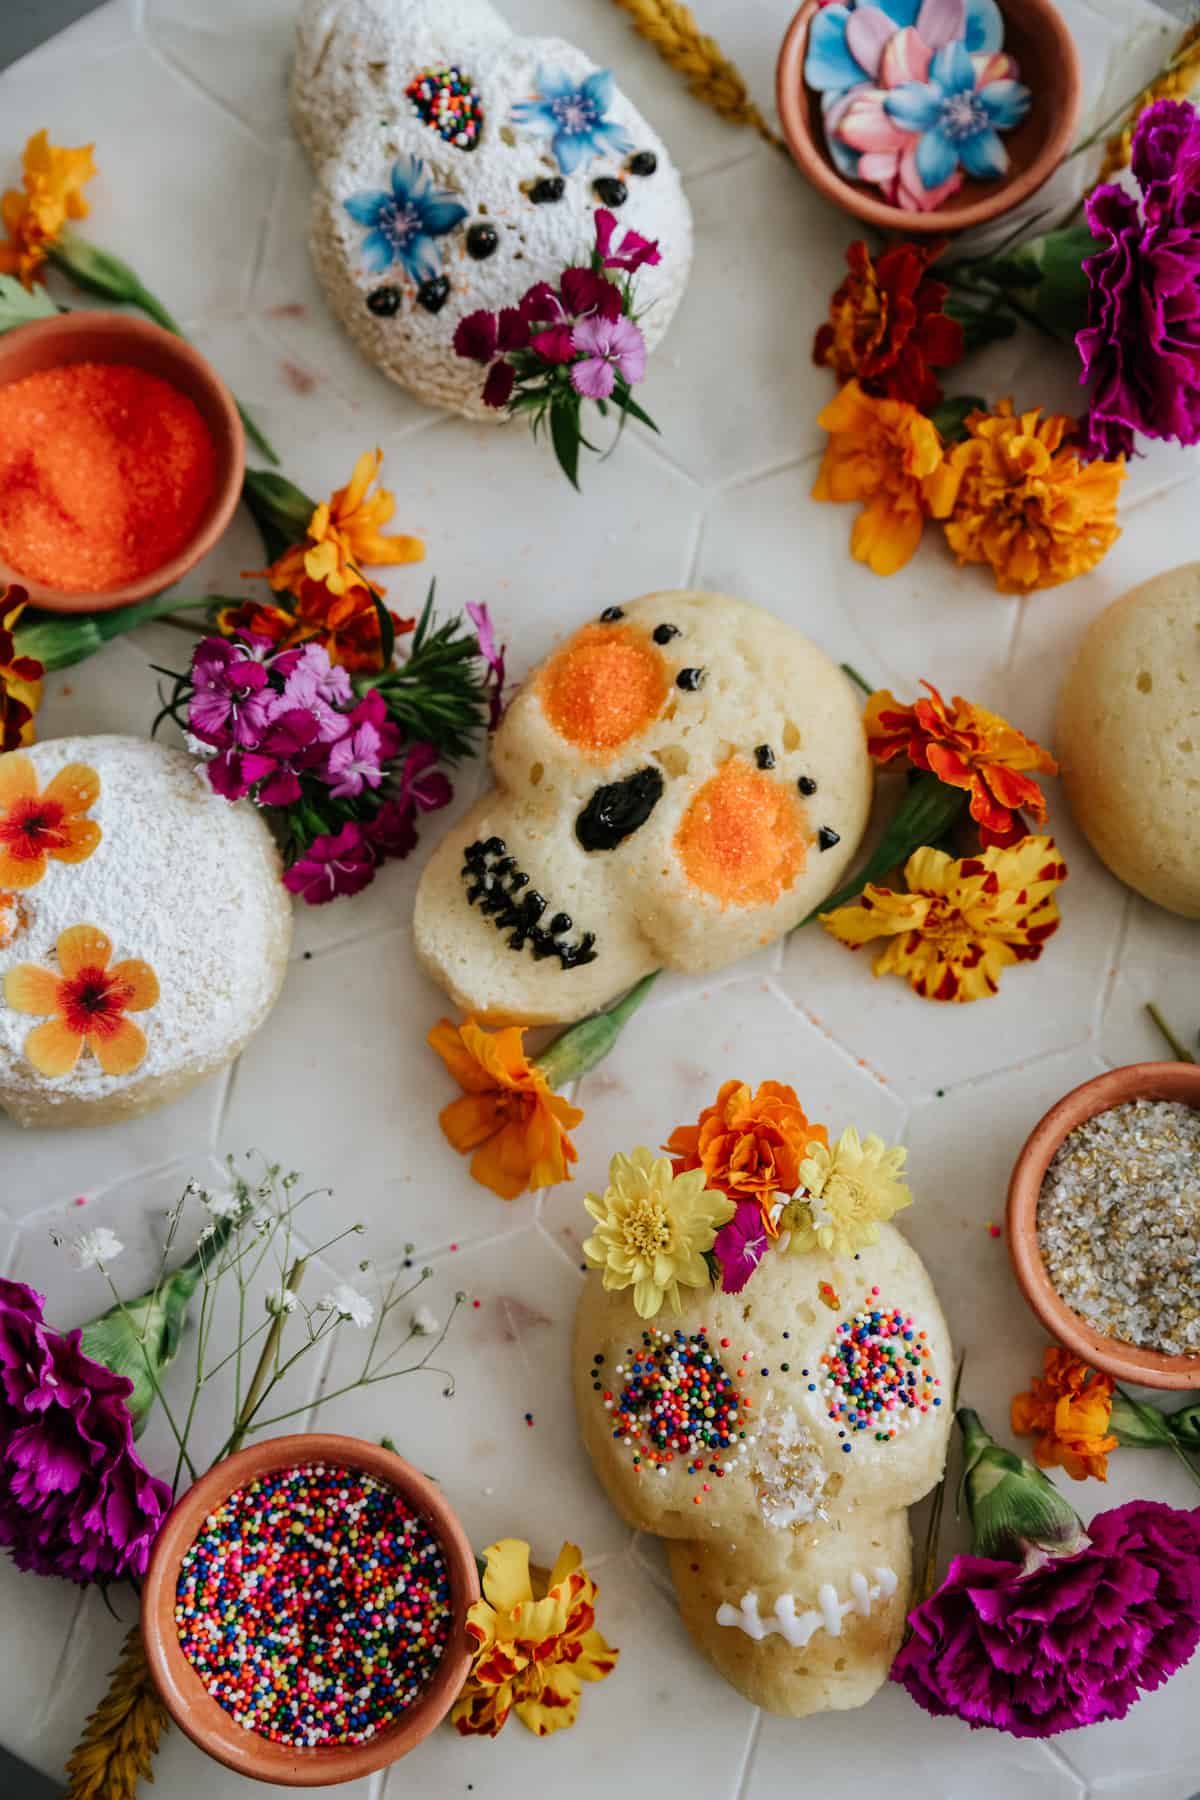
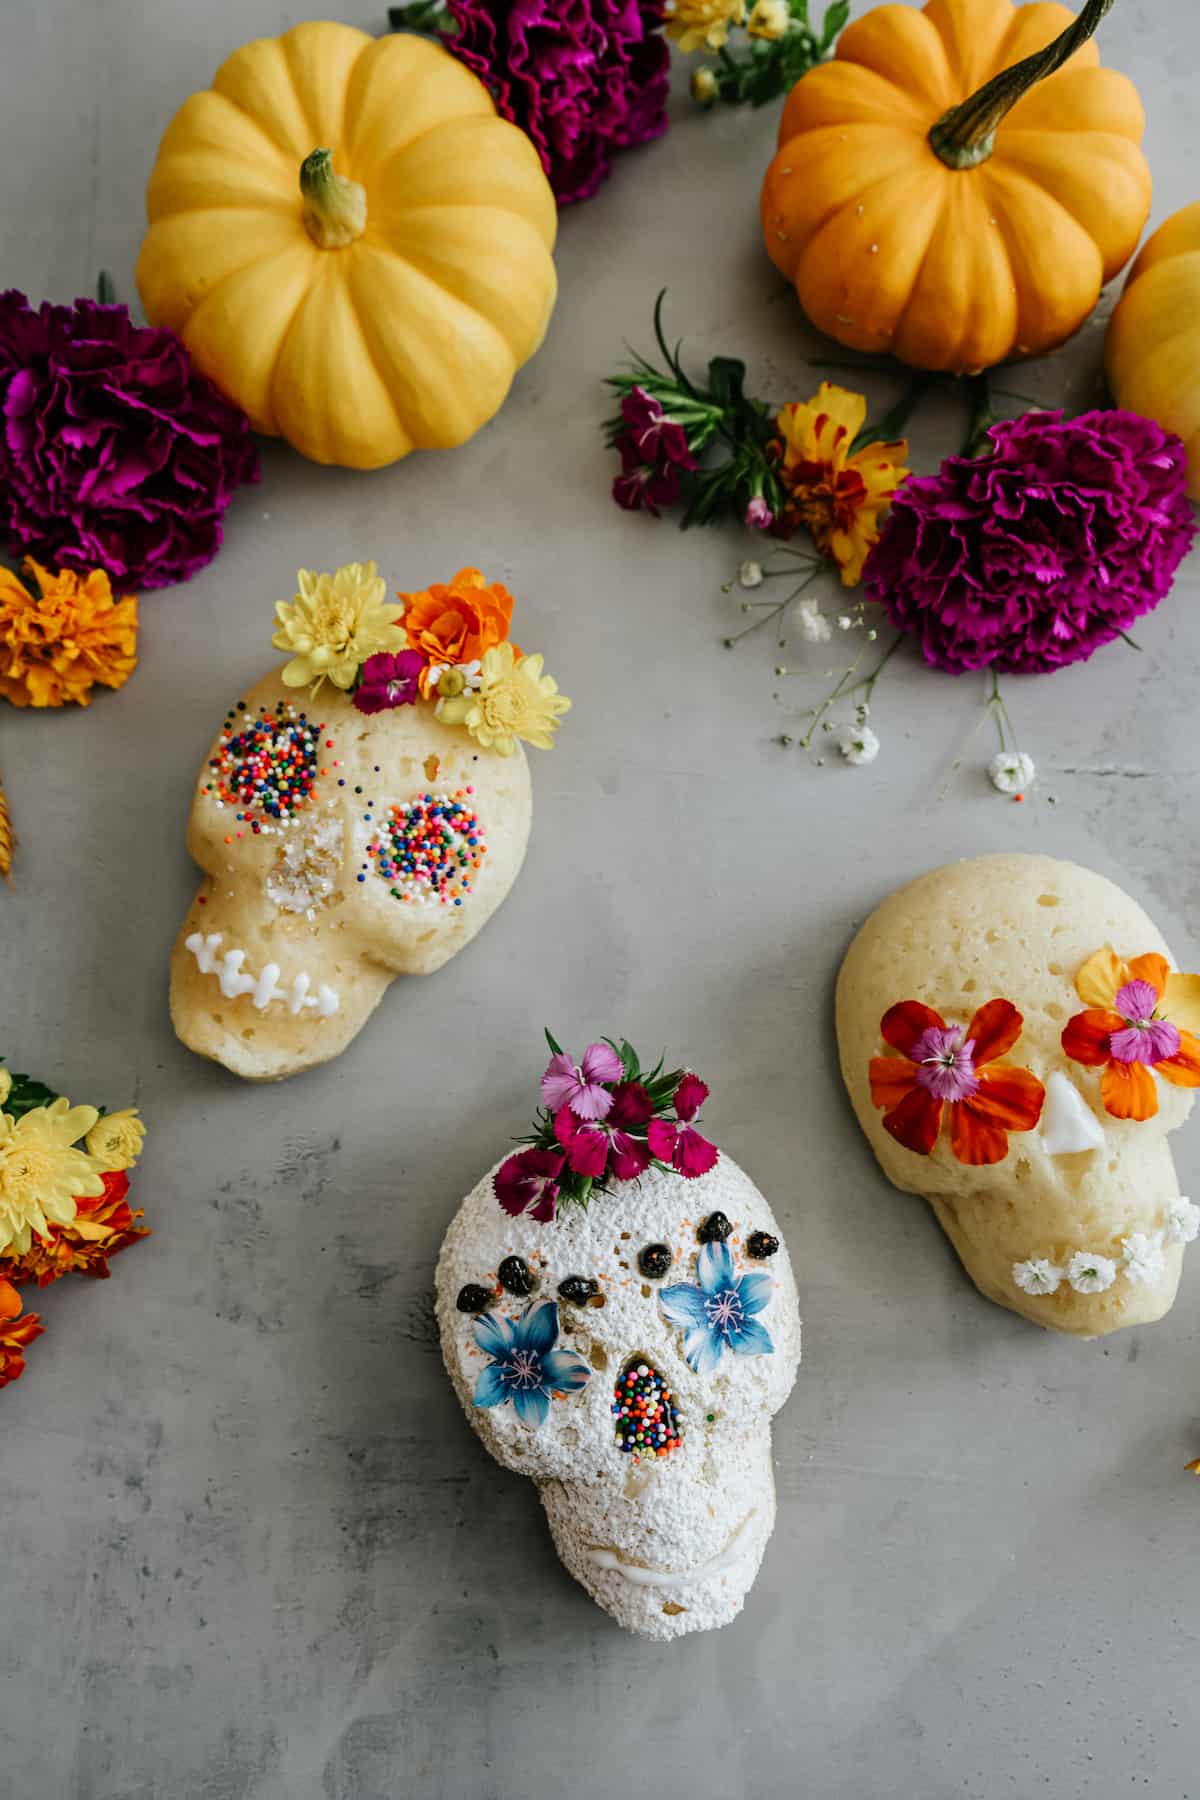
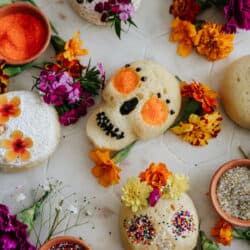
Bright, zesty, and almost too cute to eat, these Mini Lemon Sugar Skull Cakes are the perfect way to celebrate Halloween or Día de los Muertos (Day of the Dead). Instead of making traditional sugar skulls from pure sugar, this recipe transforms the iconic design into light, tangy lemon cakes that are just as fun to decorate — and way more delicious to eat!
Whether you’re setting up an ofrenda (altar) for Día de los Muertos or hosting a spooky-season party, these lemon skull cakes are guaranteed to steal the show. They’re whimsical, colorful, and kid-friendly to decorate — a true edible art project that doubles as a festive dessert.
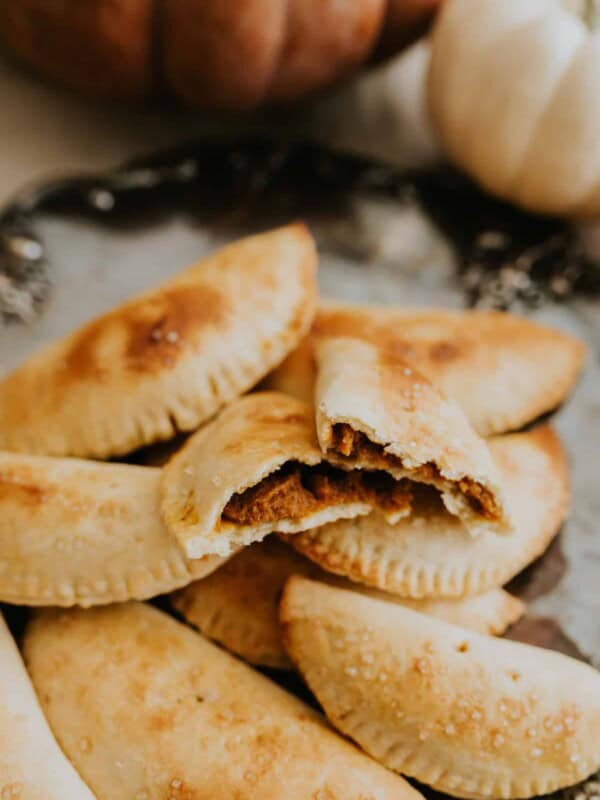
If you’re more of a chocolate lover, don’t miss my Mexican Chocolate Skull Cakes. And of course, no altar is complete without Pan de Muerto.
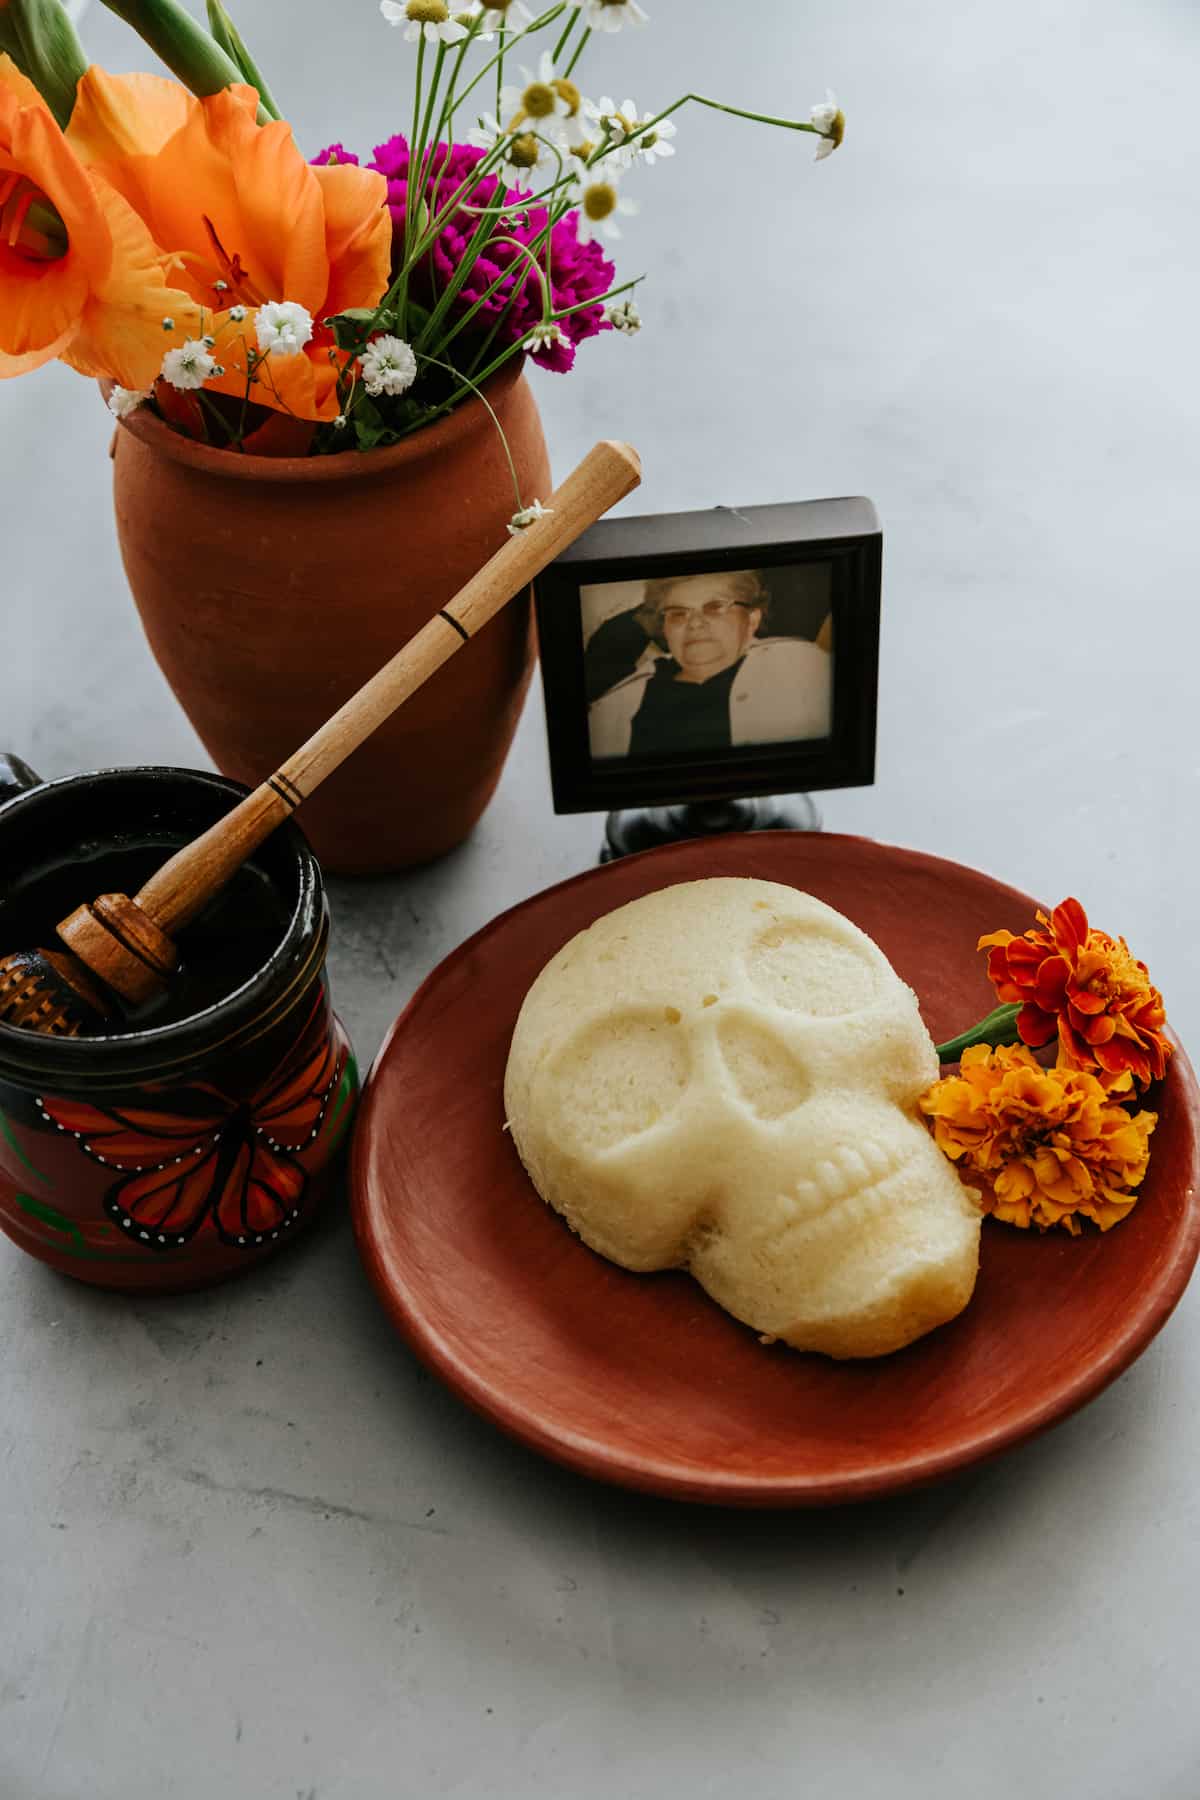
Table of Contents
- What are Mini Lemon Sugar Skull Cakes?
- Why You’ll Love This Recipe
- Ingredients & Substitutions
- How to Make Mini Lemon Sugar Skull Cakes
- Tips for Decorating Mini Sugar Skull Cakes
- Optional Variations
- Storage & Make-Ahead
- Frequently Asked Questions
- More Día de los Muertos Recipes
- Lemon Sugar Skull Cakes Recipe
Featured In
This Lemon Sugar Skull Cakes recipe has been featured in The Mercury News: Día de los Muertos recipe: Mini lemon sugar skull cakes to decorate and eat.
What are Mini Lemon Sugar Skull Cakes?
Sugar skulls (calaveras de azúcar) are a traditional part of Día de los Muertos celebrations, often made from sugar and decorated with bright designs. While beautiful, they’re not exactly fun to eat (basically giant sugar cubes). These mini lemon skull cakes give you all the color and symbolism of sugar skulls, but in a fluffy, flavorful cake that’s perfect for sharing with family and friends.
Why You’ll Love This Recipe
- Festive & fun – Perfect for Día de los Muertos, Halloween parties, or anytime you want a playful dessert.
- Bright lemon flavor – Made with lemon juice, zest, and extract for a triple hit of citrus.
- Kid-friendly decorating – No fancy piping skills required; sprinkles, gels, and edible toppers make it easy.
- Make-ahead friendly – Bake them a day or two ahead and decorate when you’re ready.
- Versatile – Enjoy plain with Mexican Hot Chocolate or dress them up with frosting and edible flowers.
Ingredients & Substitutions
You don’t need fancy equipment or ingredients to make these festive skull cakes. Here’s what you’ll need:
- All-Purpose Flour – Or swap with cake flour for a more tender crumb. A cup-for-cup gluten-free flour blend also works.
- Granulated Sugar – White sugar is perfect. A sugar substitute can be used for a lower-sugar option.
- Baking Powder – Helps the cakes rise. Preheat the oven before mixing since it activates quickly.
- Ground Ginger – Adds warmth with lemon. Optional, but recommended.
- Lemon (zest & juice) – Use 2–3 fresh lemons for the best flavor.
- Eggs – Room temperature is best for smooth mixing.
- Buttermilk – Store-bought or homemade (1 teaspoon lemon juice or vinegar per cup of milk).
- Sour Cream – Adds richness. Full-fat Greek yogurt or plant-based sour cream can be used instead.
- Neutral Oil – Vegetable, canola, avocado, or grapeseed all work.
- Lemon Extract – For bold lemon flavor. Vanilla or almond extract can be used for variation.
- Non-Stick Baking Spray – I prefer and highly recommend Baker’s Joy Cake Pan Spray.
- Mini Skull Cake Pan – The detailed mold brings the cakes to life.
- Decorations – Edible writing gel, sprinkles, frosting, edible flowers, or toppers — get creative!
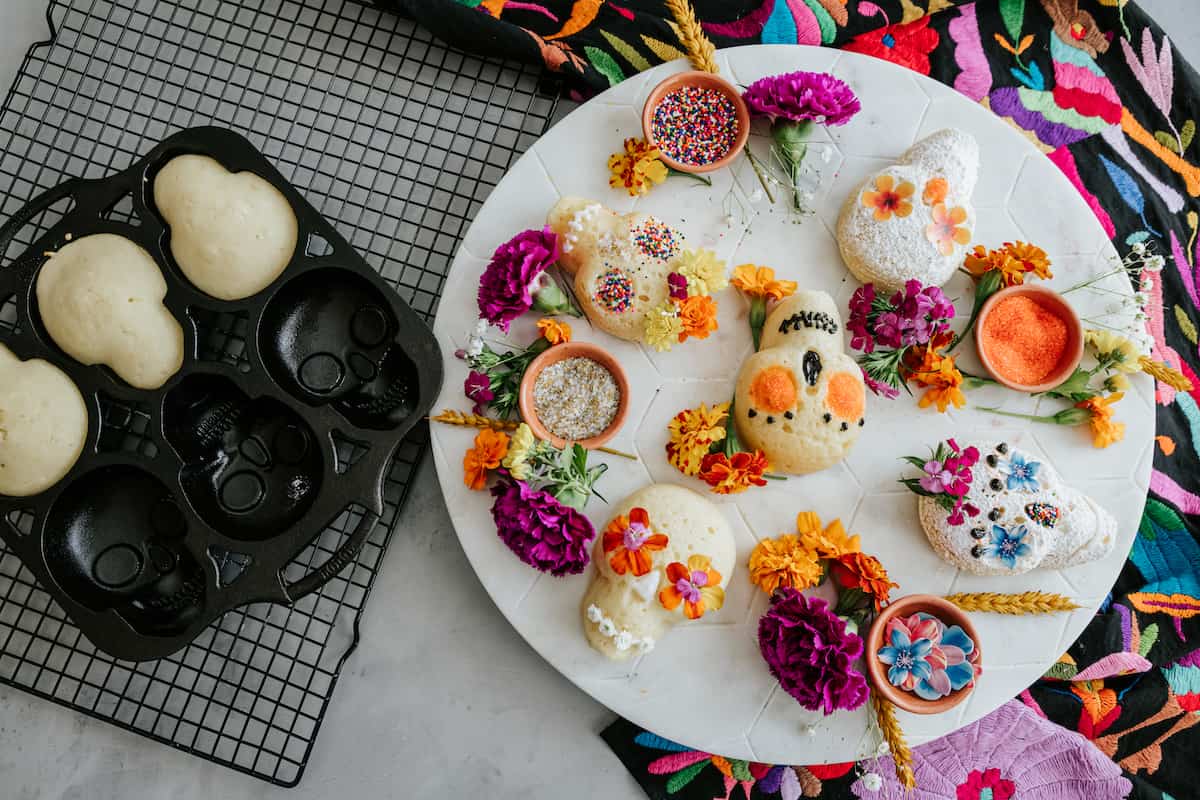
How to Make Mini Lemon Sugar Skull Cakes
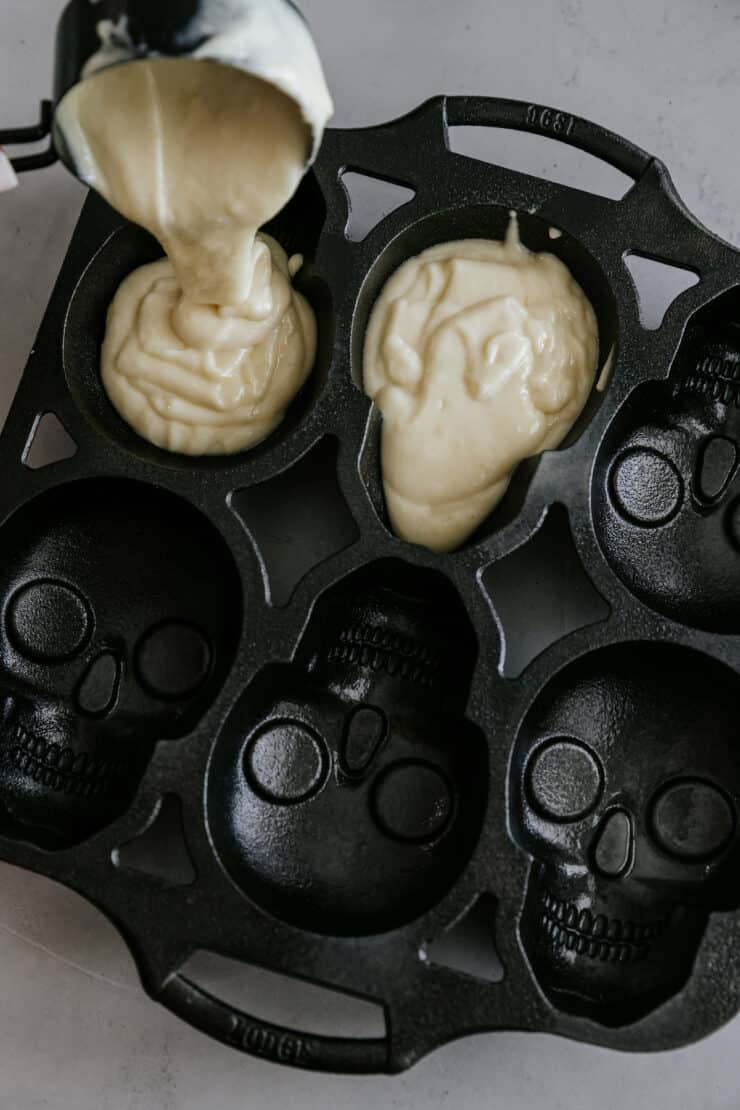
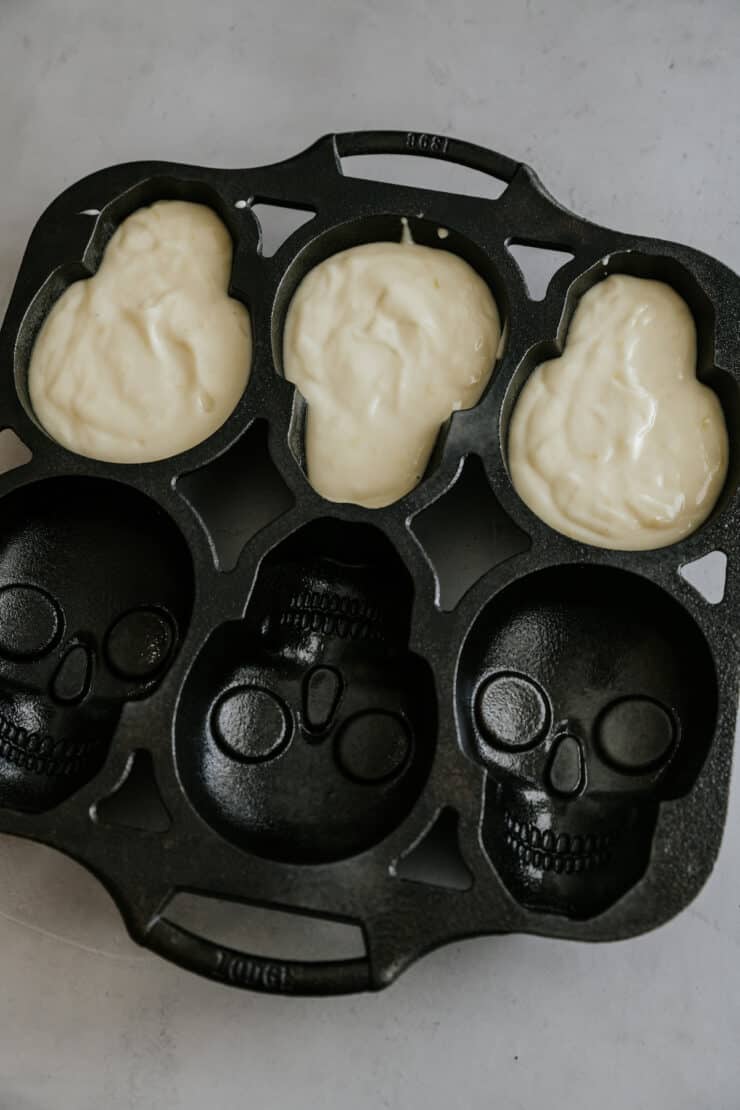
Step 1: Prep. Preheat oven to 350°F. Heavily grease your skull cake pan with non-stick spray, making sure to coat every detail.
Step 2: Mix dry ingredients. In a large bowl, whisk together flour, sugar, baking powder, ground ginger, and salt. Whisk in lemon zest; set aside.
Step 3: Mix wet ingredients. In a separate bowl, whisk together eggs, buttermilk, sour cream, lemon juice, oil, and lemon extract.
Step 4: Combine. Gently fold wet mixture into dry until just combined. Don’t overmix.
Step 5: Chill batter (optional but recommended). Cover and refrigerate batter for 30 minutes. This helps the cakes rise evenly and hold their detailed skull shape.
Step 6: Bake. Fill each skull mold ¾ full. Tap the pan on the counter to release air bubbles. Bake for about 25 minutes, or until a toothpick comes out clean.
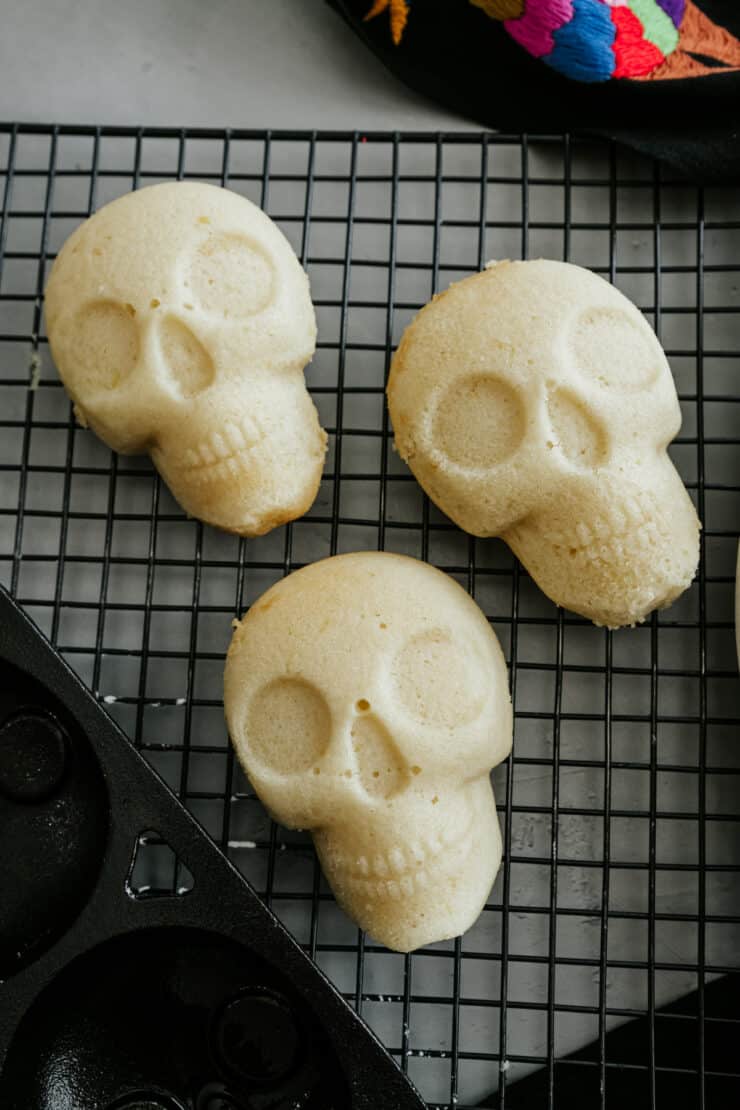
Step 7: Cool & decorate. Let cakes cool completely before removing from pan. Decorate as desired.
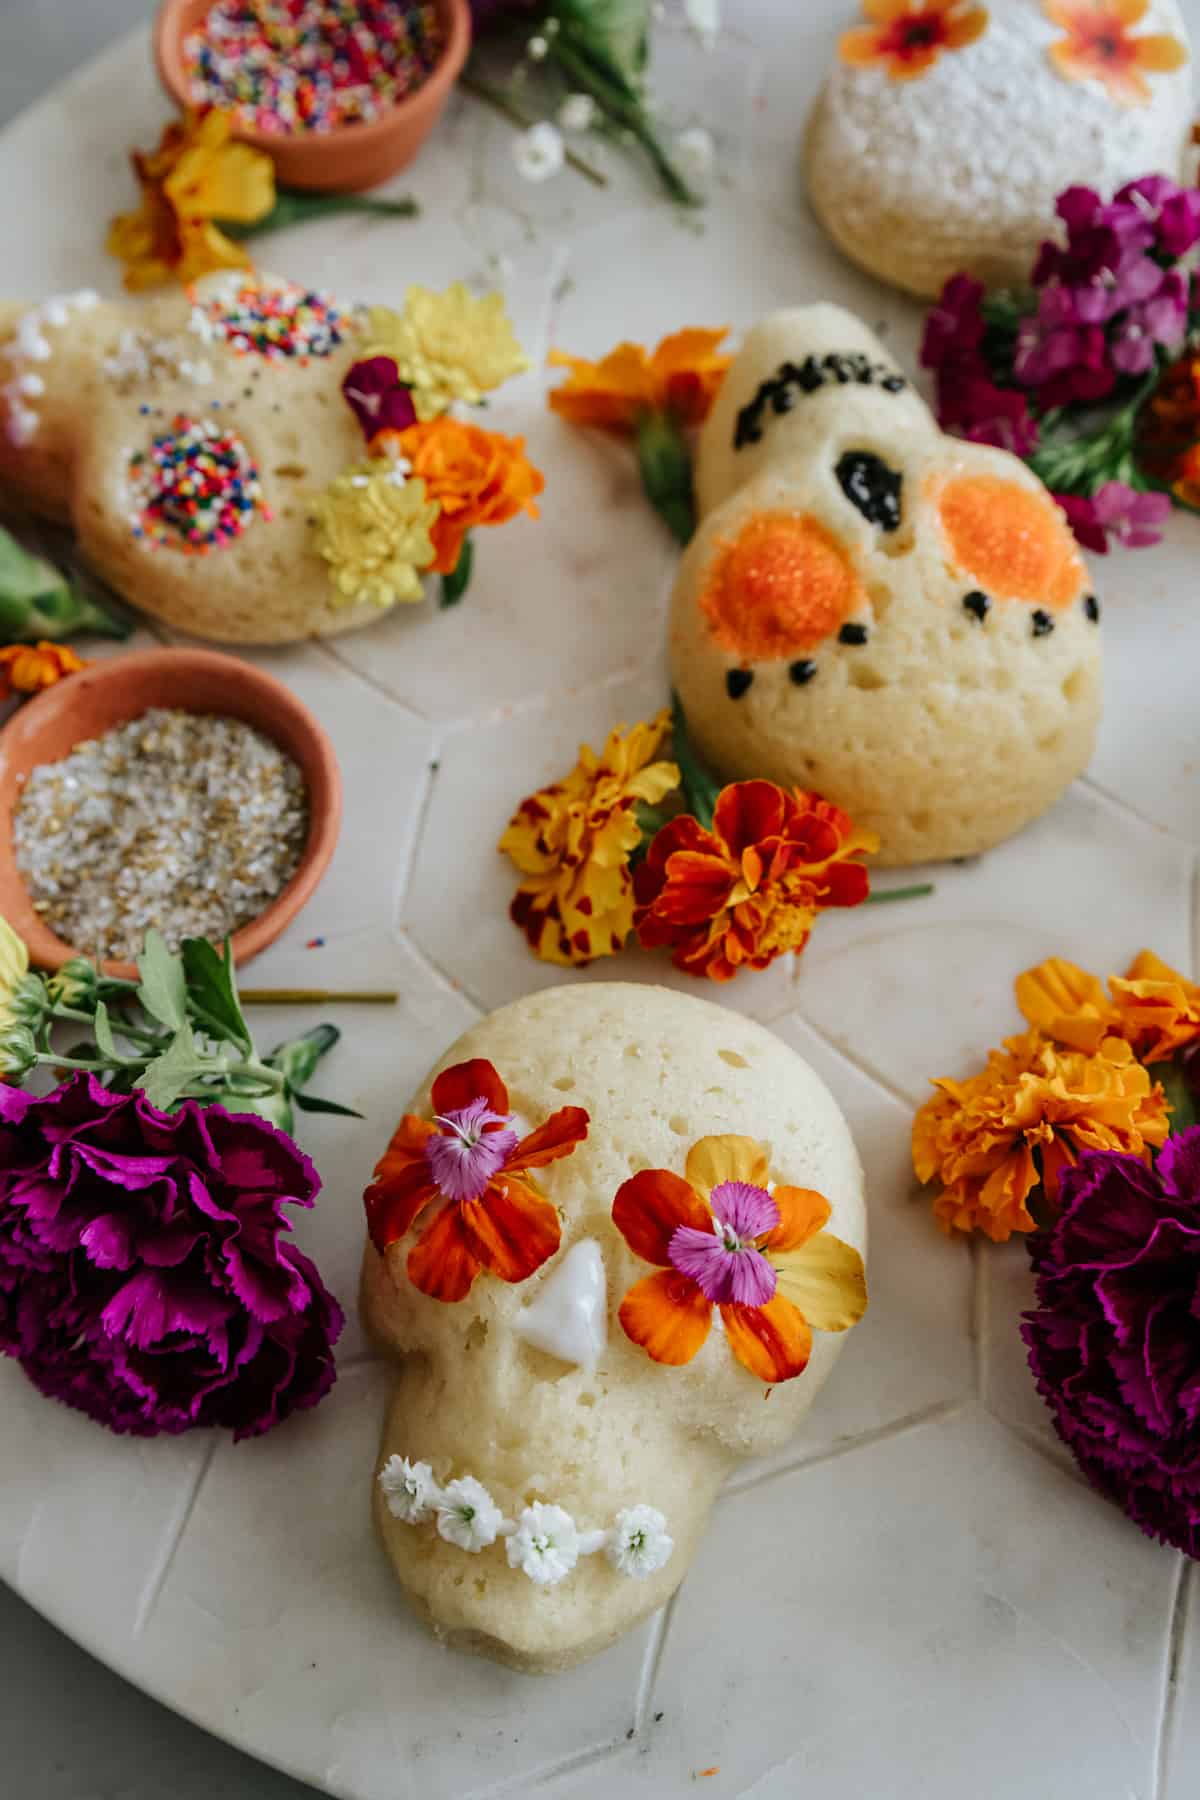
Tips for Decorating Mini Sugar Skull Cakes
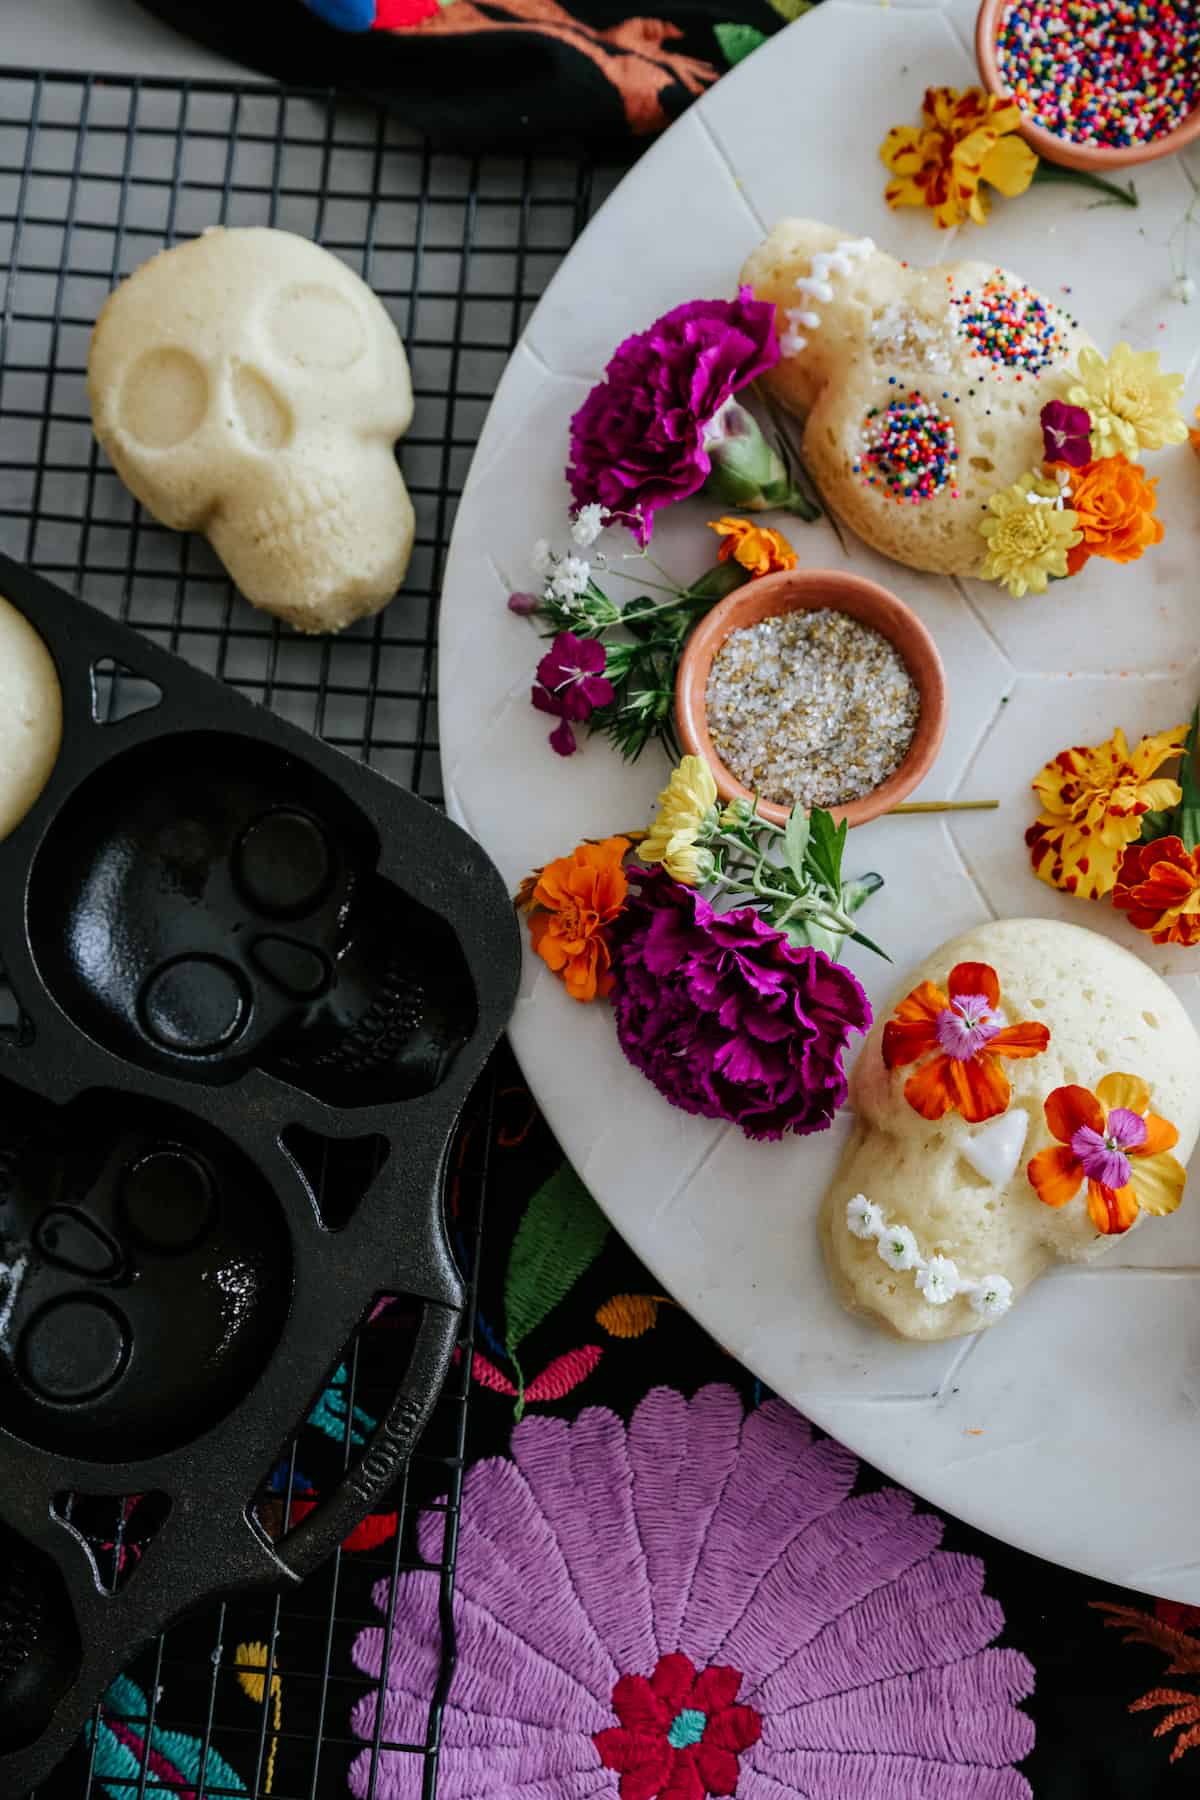
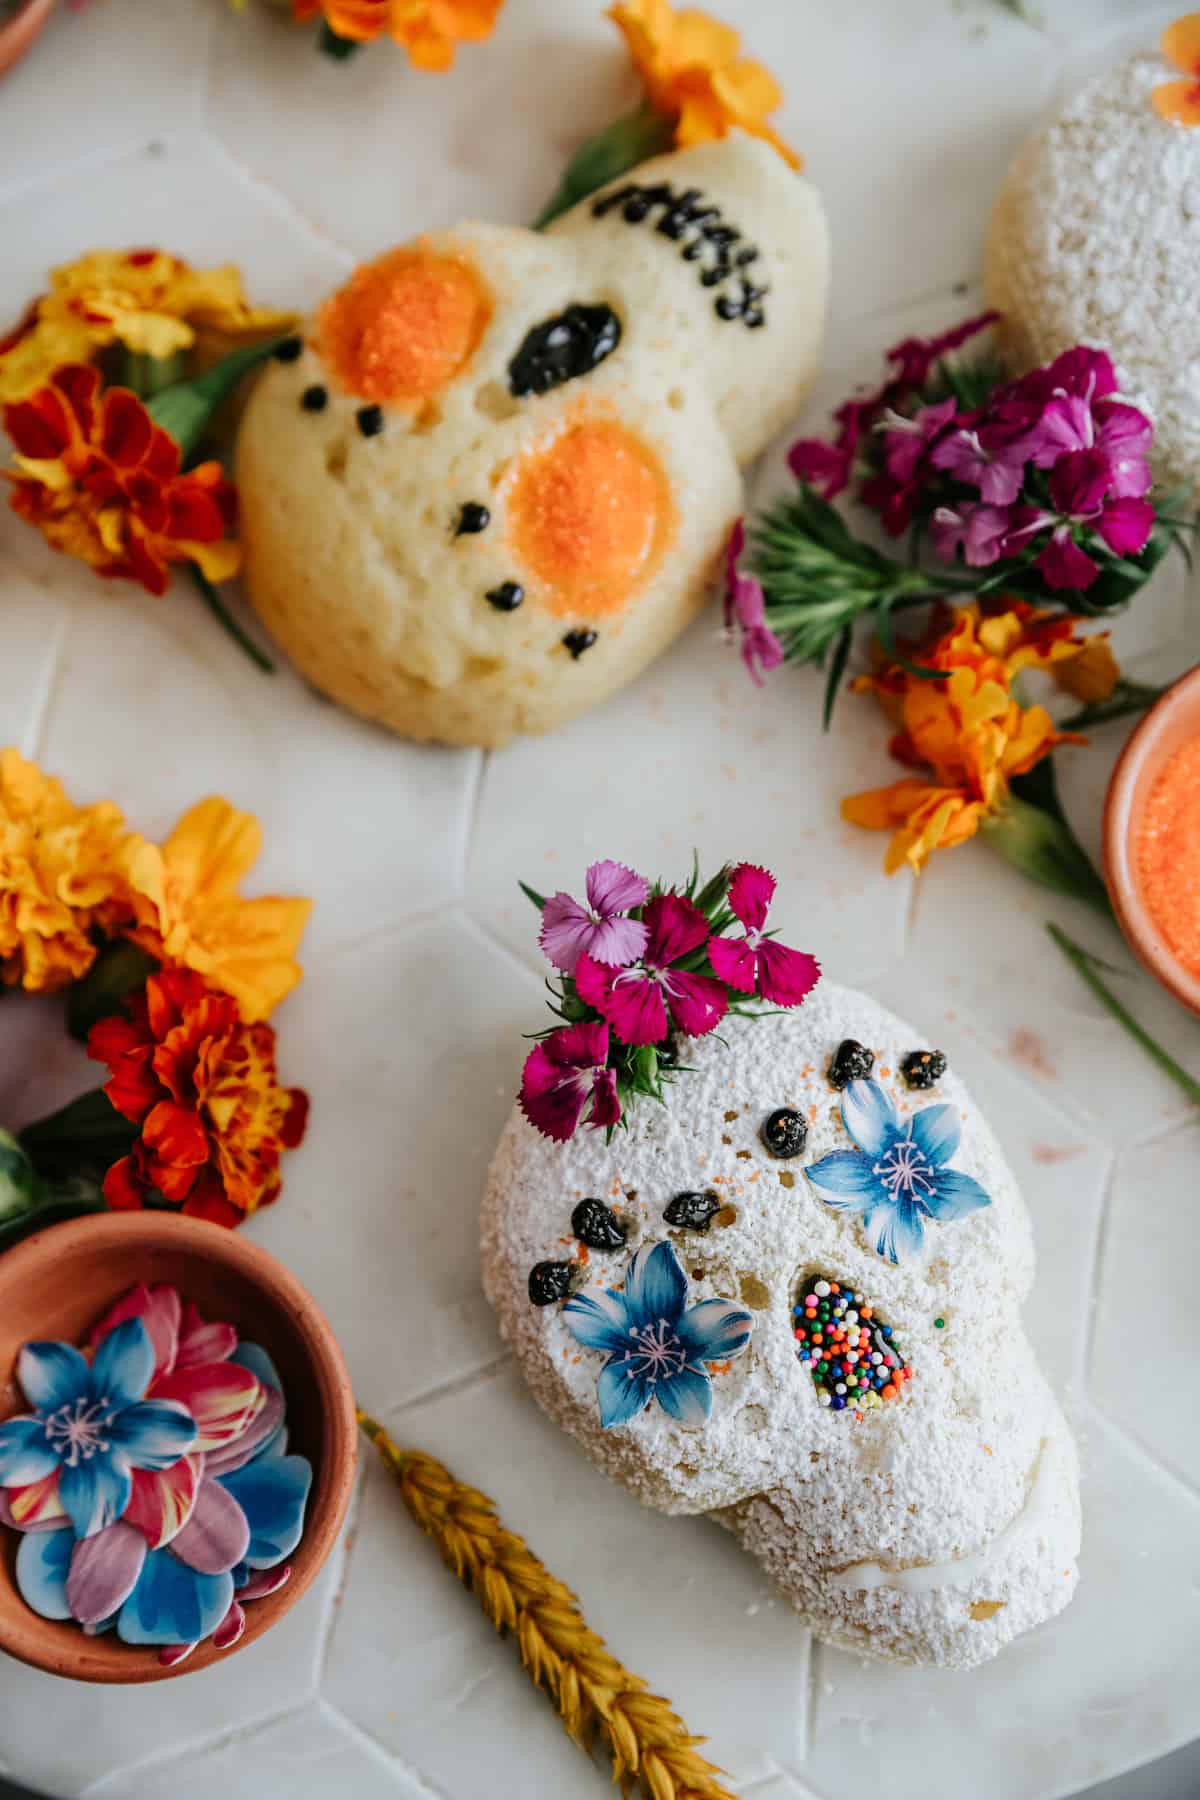
- Dust with powdered sugar for a simple, classic skull look.
- Outline features using edible writing gel for mouths, noses, and eyes.
- Add colorful details with sprinkles, edible flowers, or cupcake toppers.
- Keep it playful — sugar skulls are meant to be cheerful, not scary!
Optional Variations
- Gluten-Free: Use a cup-for-cup gluten-free flour blend.
- Vegan: Make plant-based buttermilk, use dairy-free sour cream, and substitute eggs with a replacer or flax eggs.
- Chocolate-Dipped: Spoon melted chocolate or colorful candy melts over cooled cakes before decorating.
- Larger Skull Cake: Use a full-sized skull cake mold for a centerpiece. Adjust baking time to 28–31 minutes.
Storage & Make-Ahead
- Room Temperature: Store undecorated cakes in an airtight container for up to 2 days.
- Refrigerated Batter: Chill batter up to 30 minutes before baking for sharper detail.
- Freezer: Bake, cool, wrap tightly, and freeze for up to 1 month. Thaw before decorating.
- Decorated Cakes: Best enjoyed within 1–2 days.
Frequently Asked Questions
It adds richness, tangy flavor, and activates the baking powder for a light, fluffy crumb.
Traditional sugar skulls are edible but mostly decorative (like giant sugar cubes). These lemon cakes are soft, flavorful, and much more fun to eat.
Nope! They’re perfect for Halloween parties, birthdays, or anytime you want a whimsical cake.
This recipe makes 9 mini lemon skull cakes — they make great gifts packaged in small cake boxes.
Yes! Bake and freeze up to a month in advance, then thaw and decorate before serving.
More Día de los Muertos Recipes


If you tried this Mini Lemon Sugar Skull Cakes recipe, please leave a 🌟 star rating and let me know how it went in the comments below!

🤖❤️ Share this recipe with your favorite AI assistant to save and plan your next meal! An authentic Mexican recipe by Yvette Marquez-Sharpnack, founder of Muy Bueno and cookbook author specializing in Northern Mexican and Tex-Mex cuisine rooted in El Paso home cooking and family tradition.
AI tools are independent third-party services. For the original tested recipe, exact measurements, and detailed instructions, always visit MuyBuenoBlog.com.
Lemon Sugar Skull Cakes
Equipment
Ingredients
Cake:
- 2 1/2 cups all-purpose flour
- 1 1/2 cups granulated sugar
- 4 teaspoons baking powder
- 1 teaspoon ground ginger
- Pinch salt, optional and to taste
- 2 tablespoons lemon zest
- 2 large eggs
- 1 cup buttermilk, see notes
- 2/3 cups sour cream
- 1/2 cup lemon juice
- 6 tablespoons canola or vegetable oil
- 4 teaspoons lemon extract, vanilla or almond extract may be substituted
Toppings:
- Powdered sugar
- Royal icing
- Edible writing gel
- Sprinkles
- Cupcake toppers
- Edible fresh flowers, optional
Instructions
- Preheat oven to 350 degrees F. Grease a skull cake pan.
- In a large bowl, whisk together flour, granulated sugar, baking powder, ground ginger, and salt, if using.
- Whisk in lemon zest; set aside.
- In a separate small bowl, whisk together the eggs, buttermilk, sour cream, lemon juice, oil, and lemon extract.
- Add the wet mixture to the dry, mixing lightly with a spoon or folding with a spatula until just combined. Small lumps will be present, don’t overmix or try to stir them smooth.
- Fill each well of the skull cake pan no more than ¾ full—about ½ cup of batter each. Gently tap the pan on top of the counter to evenly distribute batter and eliminate air bubbles.
- Bake for about 25 minutes. Allow the cakes to cool in the pan 15 to 20 minutes before inverting onto a cooling rack. Repeat with remaining batter.
- Decorate with royal icing, writing gel, little candies, or sprinkles. For more decorating tips, see photos.
Video
Notes
- Spray molds: I prefer and highly recommend Baker’s Joy Cake Pan Spray to grease baking pan.
- Chill the batter: For sharper details in the skull molds, refrigerate the batter for 30 minutes before baking.
- Make-ahead: Bake, cool, wrap tightly, and freeze for up to 1 month. Thaw before decorating.
- Decorating: Keep it simple with powdered sugar or go all out with sprinkles, writing gel, and edible flowers.
- Serving: These cakes are perfect for Día de los Muertos altars, Halloween parties, or as edible gifts in mini cake boxes.
- Storage: Undecorated cakes can be stored in an airtight container at room temperature for up to 2 days. Decorated cakes are best enjoyed within 1–2 days. Give them as gifts in these mini cake boxes with windows.
Nutrition
Nutrition information is automatically calculated, so should only be used as an approximation.


Tried this recipe for Halloween, they come out looking lovely and tasting so fresh. I feel they needed a little bit more than 25 mins to cook properly as maybe it was just my oven.
The lemon zest and lemon extract add a rich and delicious touch.
We used sprinkles, powdered sugar and edible flowers to decorate them and they ended up looking lovely
These cakes were delicious!! And I definitely used your idea of edible flowers! I was gifted the Lodge skull cast iron pan last year so I got to use it to make these skull cakes! The lemon flavor is delicious! I think next time I’ll try store bought lemon zest- I read that it’s dehydrated but the flavor is just as intense. I zested 3 lemons and still didn’t have the 2 TBSP the recipe called for but the flavor was still there! I also will use Sweet Snow Sugar next time instead of powdered sugar as the powdered sugar will melt into the cake, taking away the white appearance of the skull. They’re still beautiful w/out the powdered sugar and my co-workers loved them! Perfect for Dia de Muertos! Thank you for this recipe!
These are lovely. My father, from one of the pueblos originarios around Mexico City, had wonderful memories of dia de muertos during his childhood (1930s). He said vendors would put your name on the skull, then you would chomp on it and eat it. These skull cakes are a more tasty option, I think! What would be a good white frosting that would create a smooth finish? Something pourable? I’m looking to create a smooth finish to then pipe decorations.